
Attributes, by Finsweet, offers a free series of Solutions that provide essential features to improve your Webflow websites.
How to set the <script> tag
In Attributes Solutions, specific attributes can be directly assigned within the <script> tag. This is not a requirement but an option that offers several benefits.
The Attributes script
To make a Solution functional, the initial step is to include the Attributes script on your page. The script granularly imports the Attributes library's modules and allows you to specify the specific solutions you want to use.
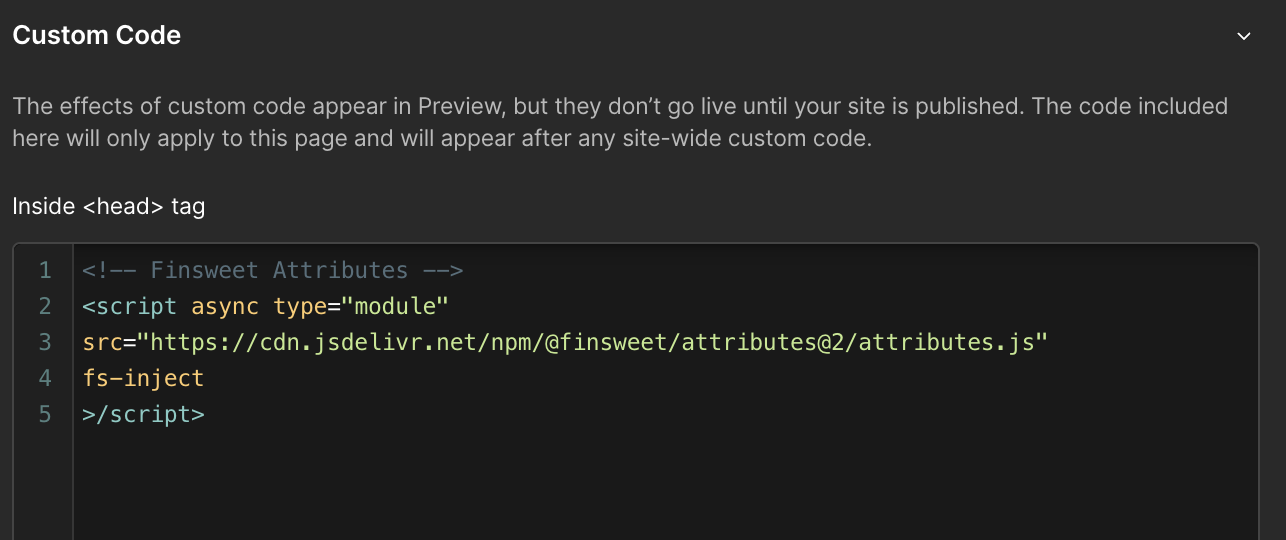
How to add the <script> tag to your page
At the top of every Solution's documentation page, there's a script block that you need to copy. Click on the Copy Script button.

In Webflow, open your page's Settings panel, and paste the copied code into the <head> tag field.
The classic way to use Attributes
It’s the way the documentation is describing: add the script as described above, and add custom attributes to necessary elements in Webflow’s Settings panel.


The advanced way to use the <script> tag
Introduced with Attributes v2, the <script> tag sports two new features: a single universal JavaScript Library, and the ability to define Settings attributes within the <script> tag itself.
The Solution in use is added as an attribute within the <script> tag
We define the current Solution by adding its key name to the <script> tag itself.
<script async type="module" src="https://cdn.jsdelivr.net/npm/@finsweet/attributes@2/attributes.js"
fs-inject
></script>
All the settings attributes can be added inside of the <script> tag
Instead of being added to elements in the page. They’re gathered into once place: it’s easier to inspect and maintain, it’s also easier to re-use on another page.
Defined on the <script> tag, settings attributes affect all relevant elements in the page. It’s still possible to define them again on the relevant elements themselves to override the ones set in the <script> tag.
<script async type="module" src="https://cdn.jsdelivr.net/npm/@finsweet/attributes@2/attributes.js"
fs-list
fs-list-cache="false"
></script>
Here's various ways to set the <script> tag:
<script> tag with the Powerful Rich Text Solution defined
<script async type="module" src="https://cdn.jsdelivr.net/npm/@finsweet/attributes@2/attributes.js"
fs-inject
></script>
<script> tag set up for the Powerful Rich Text Solution
<script async type="module" src="https://cdn.jsdelivr.net/npm/@finsweet/attributes@2/attributes.js"
fs-inject
fs-inject-instance="my-component"
fs-inject-resetix="true"
fs-inject-sanitize="true"
></script>
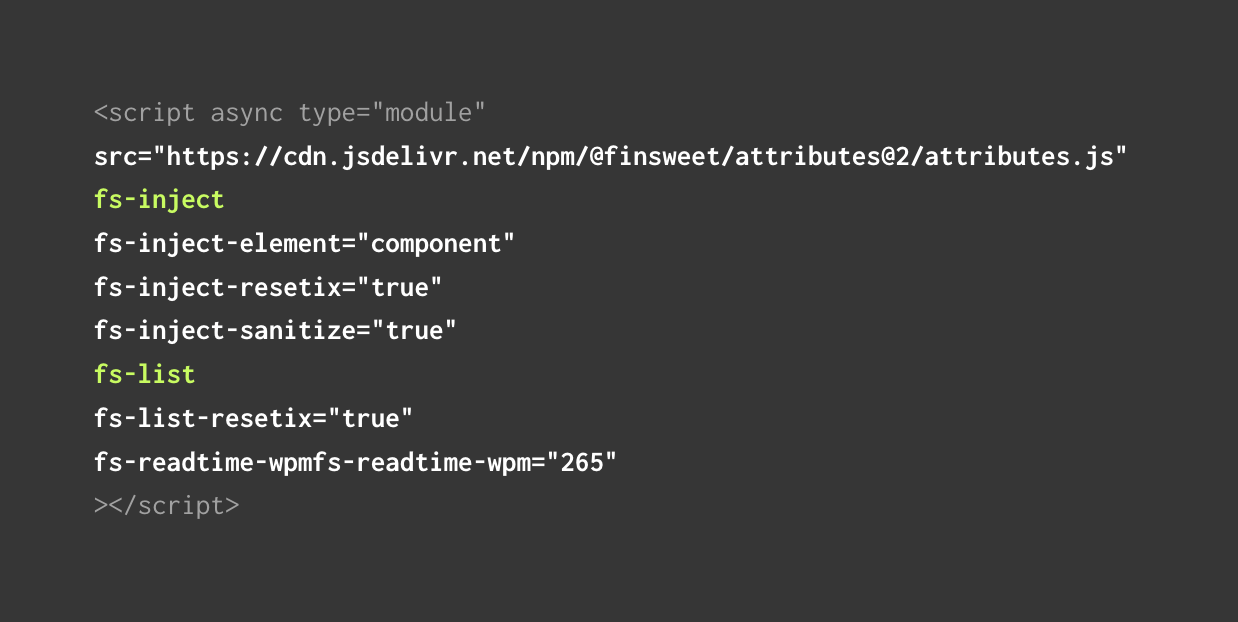
<script> tag set up for the Powerful Rich Text and CMS Slider Solutions
<script async type="module" src="https://cdn.jsdelivr.net/npm/@finsweet/attributes@2/attributes.js"
fs-inject
fs-inject-instance="my-component"
fs-inject-resetix="true"
fs-inject-sanitize="true"
fs-list
fs-list-resetix="true"
fs-readtime-wpmfs="265"
></script>
Finsweet Attributes inheritance and override
Targeted elements inherit attributes set on parent elements or within the <script> tag
Defined within the <script> tag, the settings attributes — the ones with -element attributes on — are applied globally across a page, ensuring that these settings impact all targeted elements marked with the element attributes.
Settings attributes can actually be defined on any element of the page. Their values will be inherited by all their appropriate children.
The three methods showcased below are producing the same result:
Settings attributes are set on each of the targeted elements
<body>
<div class="section">
<div class="container">
<div class="collection-list" fs-list-element="list" fs-list-duration="250">...</div>
<div class="collection-list" fs-list-element="list" fs-list-duration="250">...</div>
</div>
</div>
</body>
A setting attribute is set on a common parent of the targeted elements, affecting all targeted children
<body>
<div class="section">
<div class="container" fs-list-duration="250">
<div class="collection-list" fs-list-element="list">...</div>
<div class="collection-list" fs-list-element="list">...</div>
</div>
</div>
</body>
A setting attribute is set within the script tag, affecting all targeted elements on the page
<head>
<!-- Finsweet Attributes -->
<script async type="module"
src="https://cdn.jsdelivr.net/npm/@finsweet/attributes@2/attributes.js"
fs-list
fs-list-duration="250"
></script>
</head>
<body>
<div class="section">
<div class="container">
<div class="collection-list" fs-list-element="list">...</div>
<div class="collection-list" fs-list-element="list">...</div>
</div>
</div>
</body>
Attributes are overriding other attributes set above in the DOM
It's possible to override global settings by defining attributes again on any individual element within the page.
Overriding is particularly useful if you’re using multiple instances of the same Solution, with different settings, on one page.
The three examples below are showcasing different override methods, and produce the exact same results:
The two first lists are set with a fade duration of 250ms, and the third one with a fade of 500ms
<body>
<div class="section">
<div class="container">
<div class="collection-list" fs-list-element="list" fs-list-duration="250">...</div>
<div class="collection-list" fs-list-element="list" fs-list-duration="250">...</div>
<div class="collection-list" fs-list-element="list" fs-list-duration="500">...</div>
</div>
</div>
</body>
The attribute sets on the Container affects the two first lists. The attribute set on the third list overrides the one set on the Container.
<body>
<div class="section">
<div class="container" fs-list-duration="250">
<div class="collection-list" fs-list-element="list">...</div>
<div class="collection-list" fs-list-element="list">...</div>
<div class="collection-list" fs-list-element="list" fs-list-duration="500">...</div>
</div>
</div>
</body>
The attribute set within the <script> tag affects all list on the page, except for the third one, on which an overriding attribute has been set
<head>
<!-- Finsweet Attributes -->
<script async type="module"
src="https://cdn.jsdelivr.net/npm/@finsweet/attributes@2/attributes.js"
fs-list
fs-list-duration="250"
></script>
</head>
<body>
<div class="section">
<div class="container">
<div class="collection-list" fs-list-element="list">...</div>
<div class="collection-list" fs-list-element="list">...</div>
<div class="collection-list" fs-list-element="list" fs-list-duration="500">...</div>
</div>
</div>
</body>
Benefits of adding the Settings attributes within the <script> tag
Adding the Settings attributes within the script tag rather than on the targeted elements or any of their parents in the DOM is optional. The Solution will absolutely work the same, whatever the method you chose to employ.
But Settings attributes within the <script> tag comes with several benefits:
- Settings are grouped into one location
No need to inspect several elements and the Settings panel to get an overview of the current Solution's configuration or to edit it: they're all conveniently grouped within the <script> tag. - All related elements inherit them
If you're using multiple instances of the same Solution in one page, the Settings attributes defined within the <script> tag will affect them all. And you can still re-define some of them on any element in the page: they will override the settings for all of their children. - It's easier to re-employ a Solution
You can copy the entire <script> tag on another page using the same Solution(s) , or archive it for later use. You'll only need to define the Elements attributes again on the new pages, saving a lot of time.