
Attributes, by Finsweet, offers a free series of Solutions that provide essential features to improve your Webflow websites.
List Nest
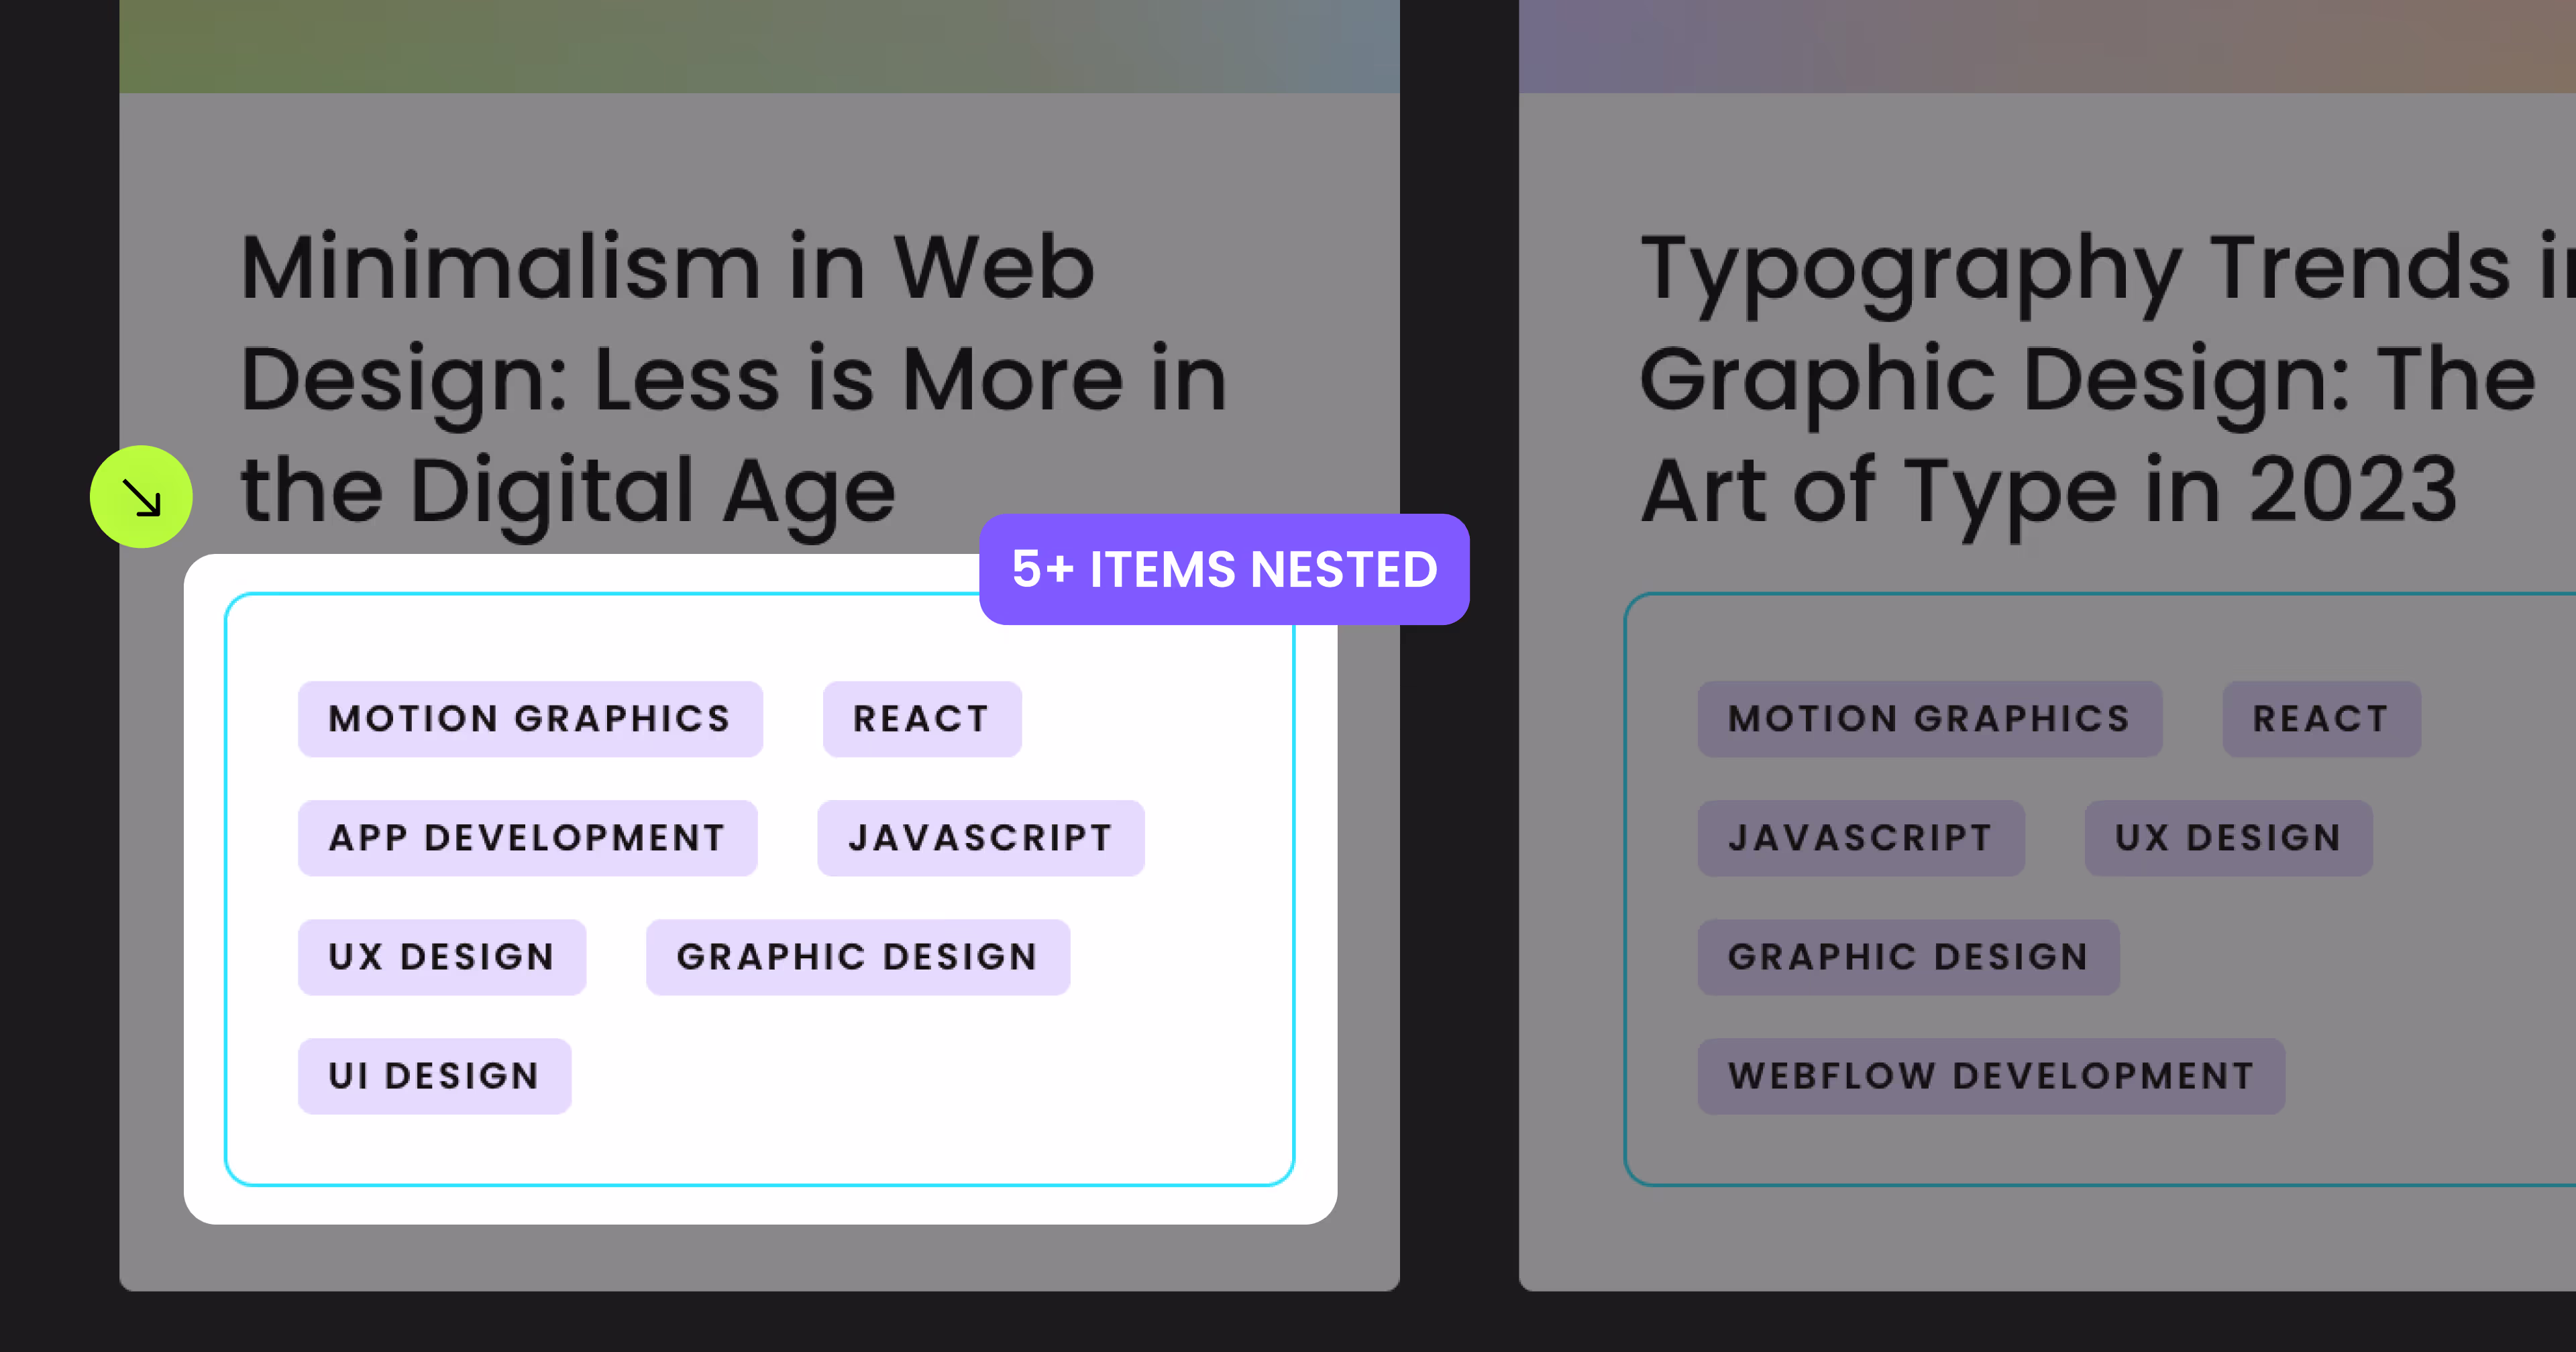
Nest more than 10 items, and nest unlimited collections on a page in Webflow
For advanced users familiar with this solution. Includes all attributes from this page. Click on attributes and values to copy them.
Required attributes on the Target List page
Target List
Add to Collection List on the Collection List element
Target Div
Add to Div
Item Link
Add to a Link element
Important: set this link to the CMS Current page in the Link Settings panel.
CMS Field Slug (Plain text method)
Add to Div Block
CMS Collection Source (Plain text method)
Add to Collection List
Required attributes and settings on the Collection Template page
Nested List (Wrapper)
Add to the Collection List Wrapper element (NOT to the Collection List element)
Collection settings
Required: Bind this List to a Multi-reference field of the Target List Collection, NOT to a Collection.
Collection Item link
Required: Set the Collection Item link link to the CMS Current page in the Link Settings panel.
Collection Item link
Required: Set the Collection Item link link to the CMS Current page in the Link Settings panel.
Optional attributes
Disable caching (Optional)
Add to Collection List
Add this <script> inside the <head> tag of your page or project
This script is the universal Attribute script: you only need to include it once, even if you have multiple Attribute solutions on the page. Learn more .
Choose which nesting method your Collection List needs
Default method - Add these required attributes and settings
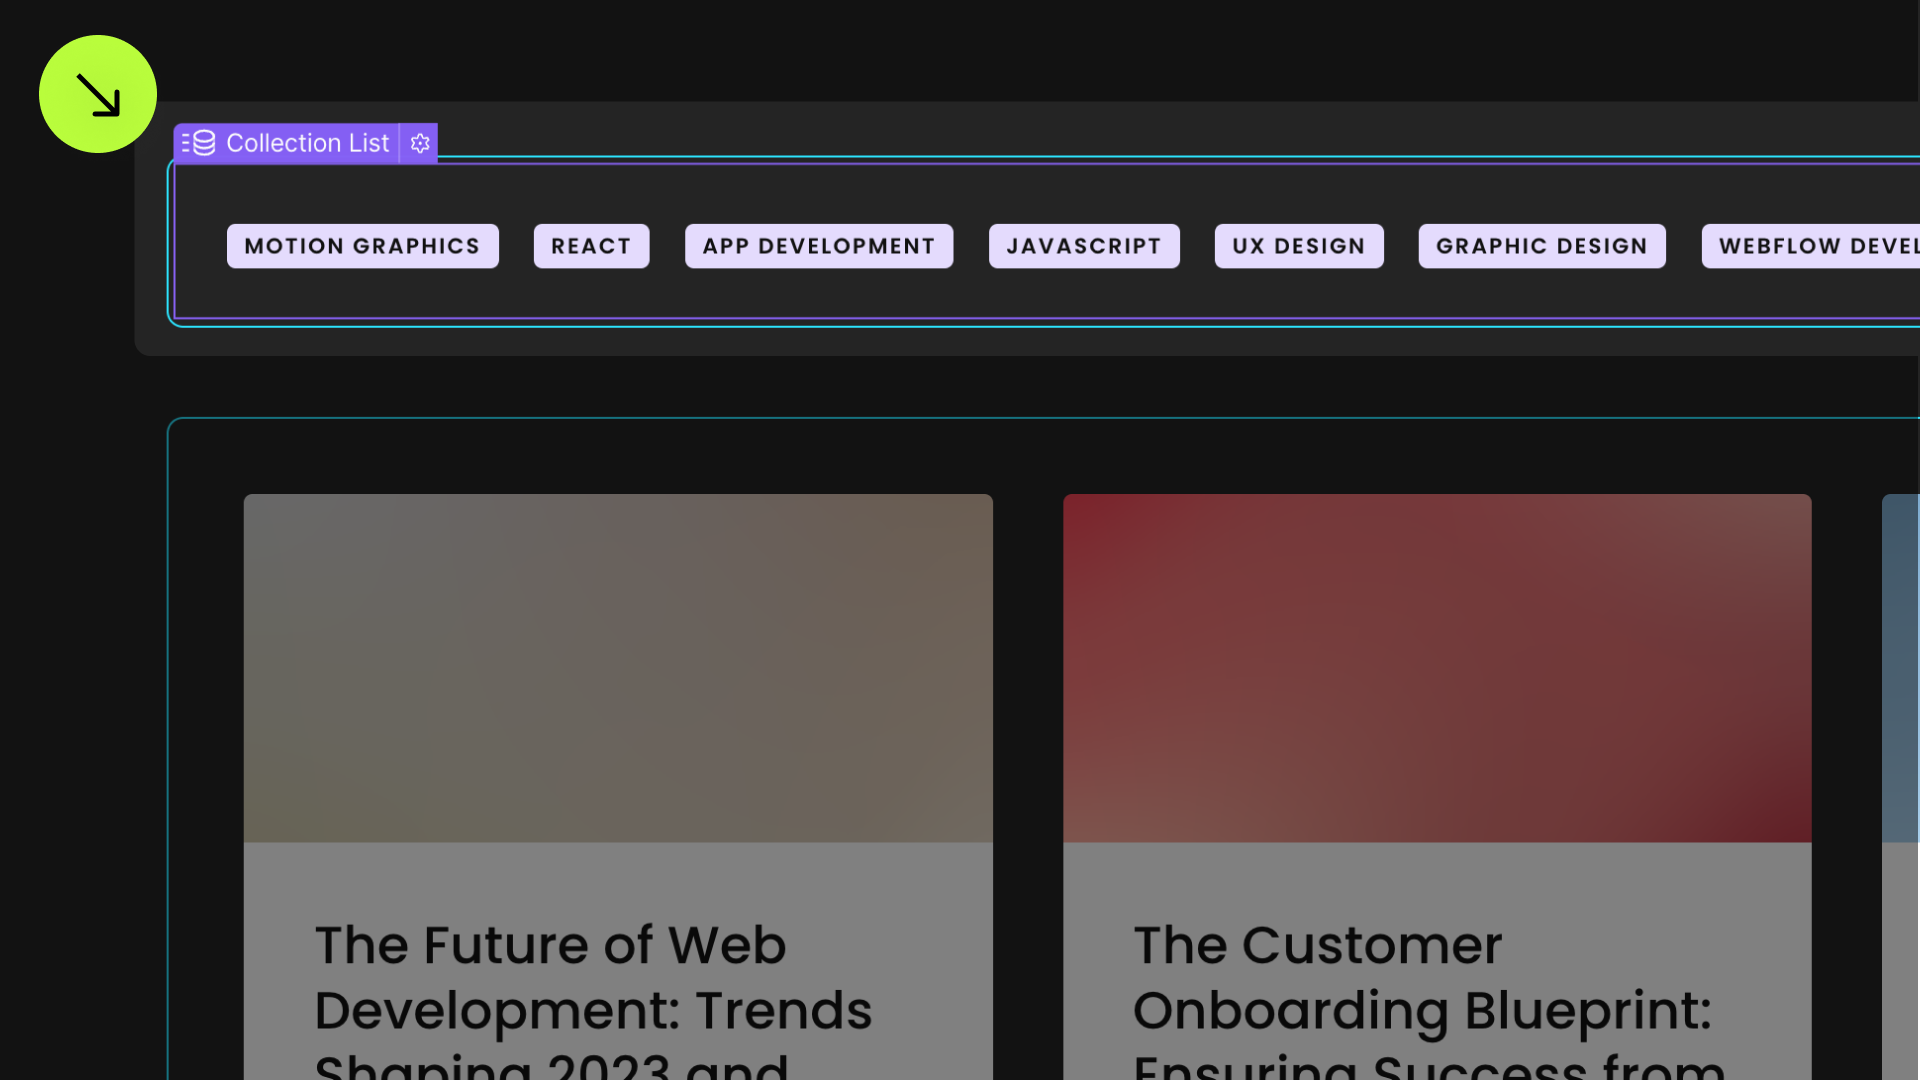
Target List
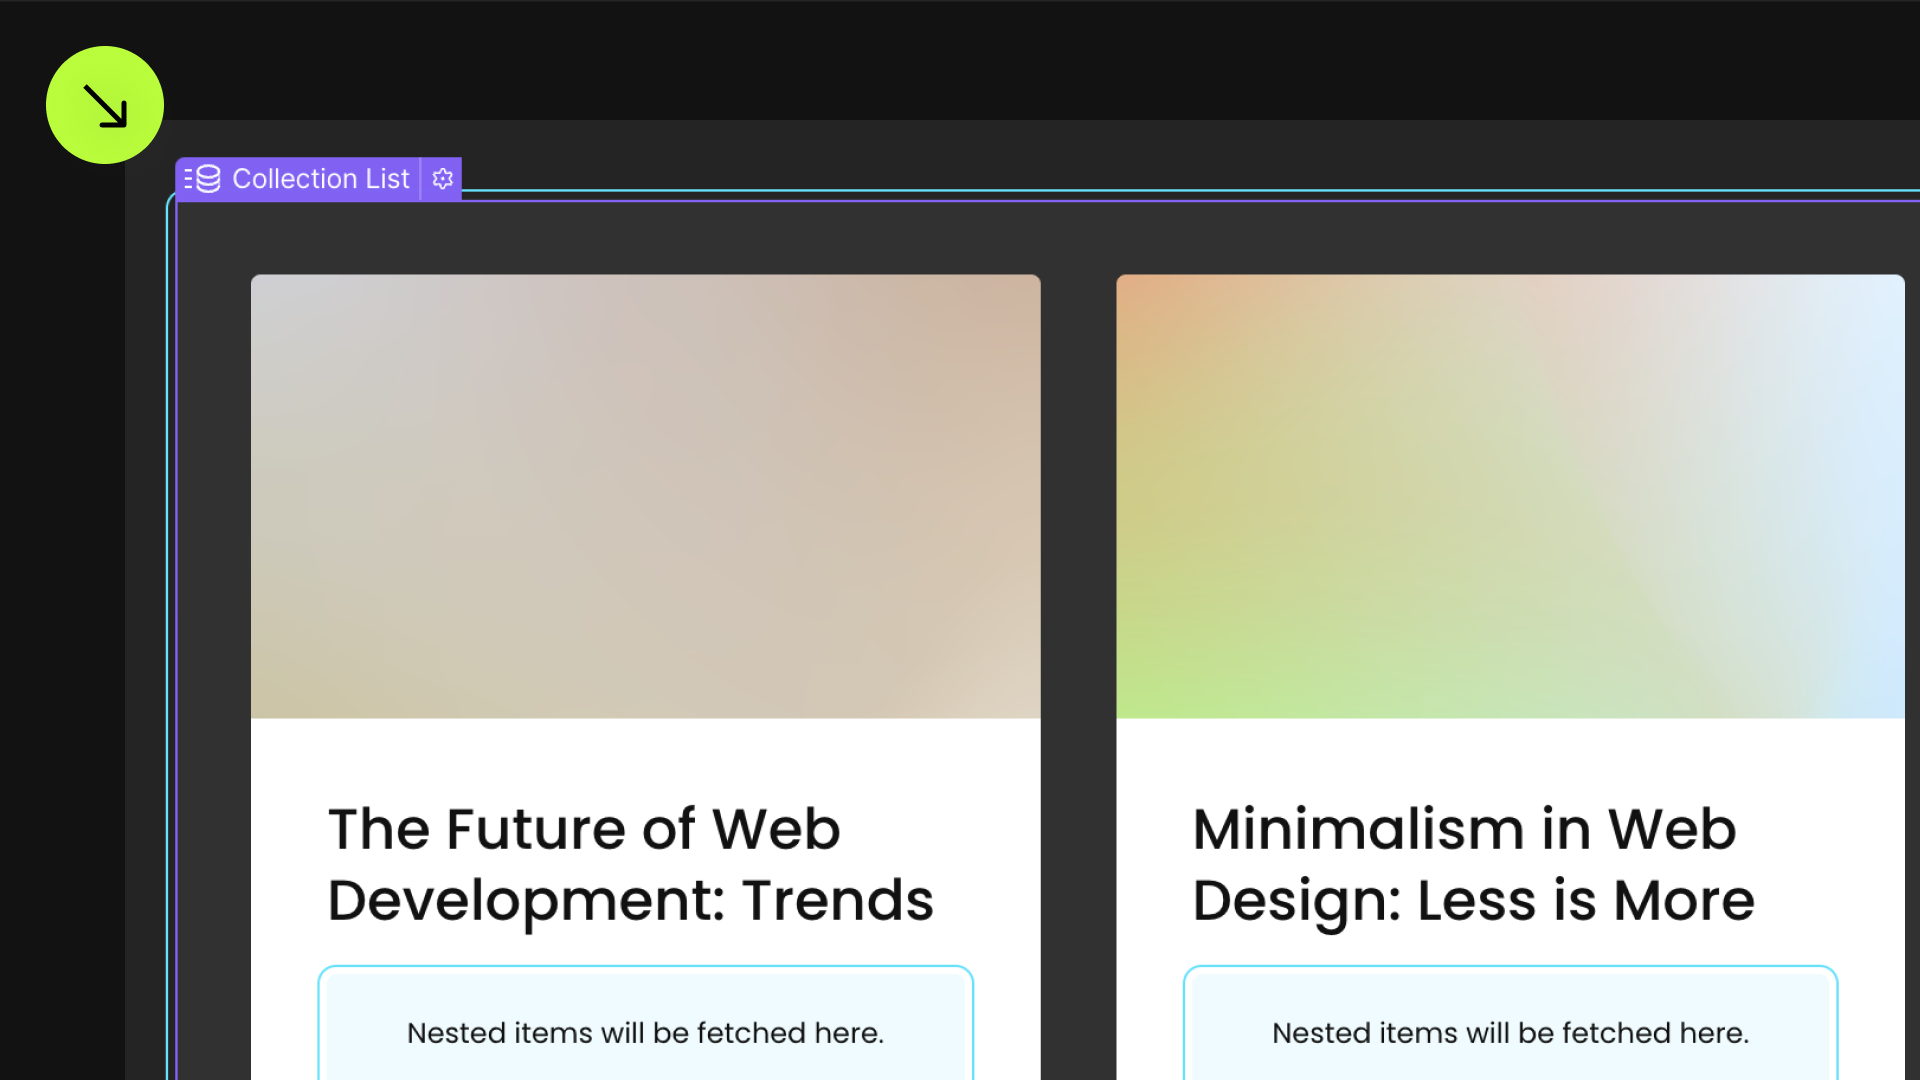
To define the Target List — the Collection List in which you want to nest another List — select the Collection List element and add this attribute.

Target Div
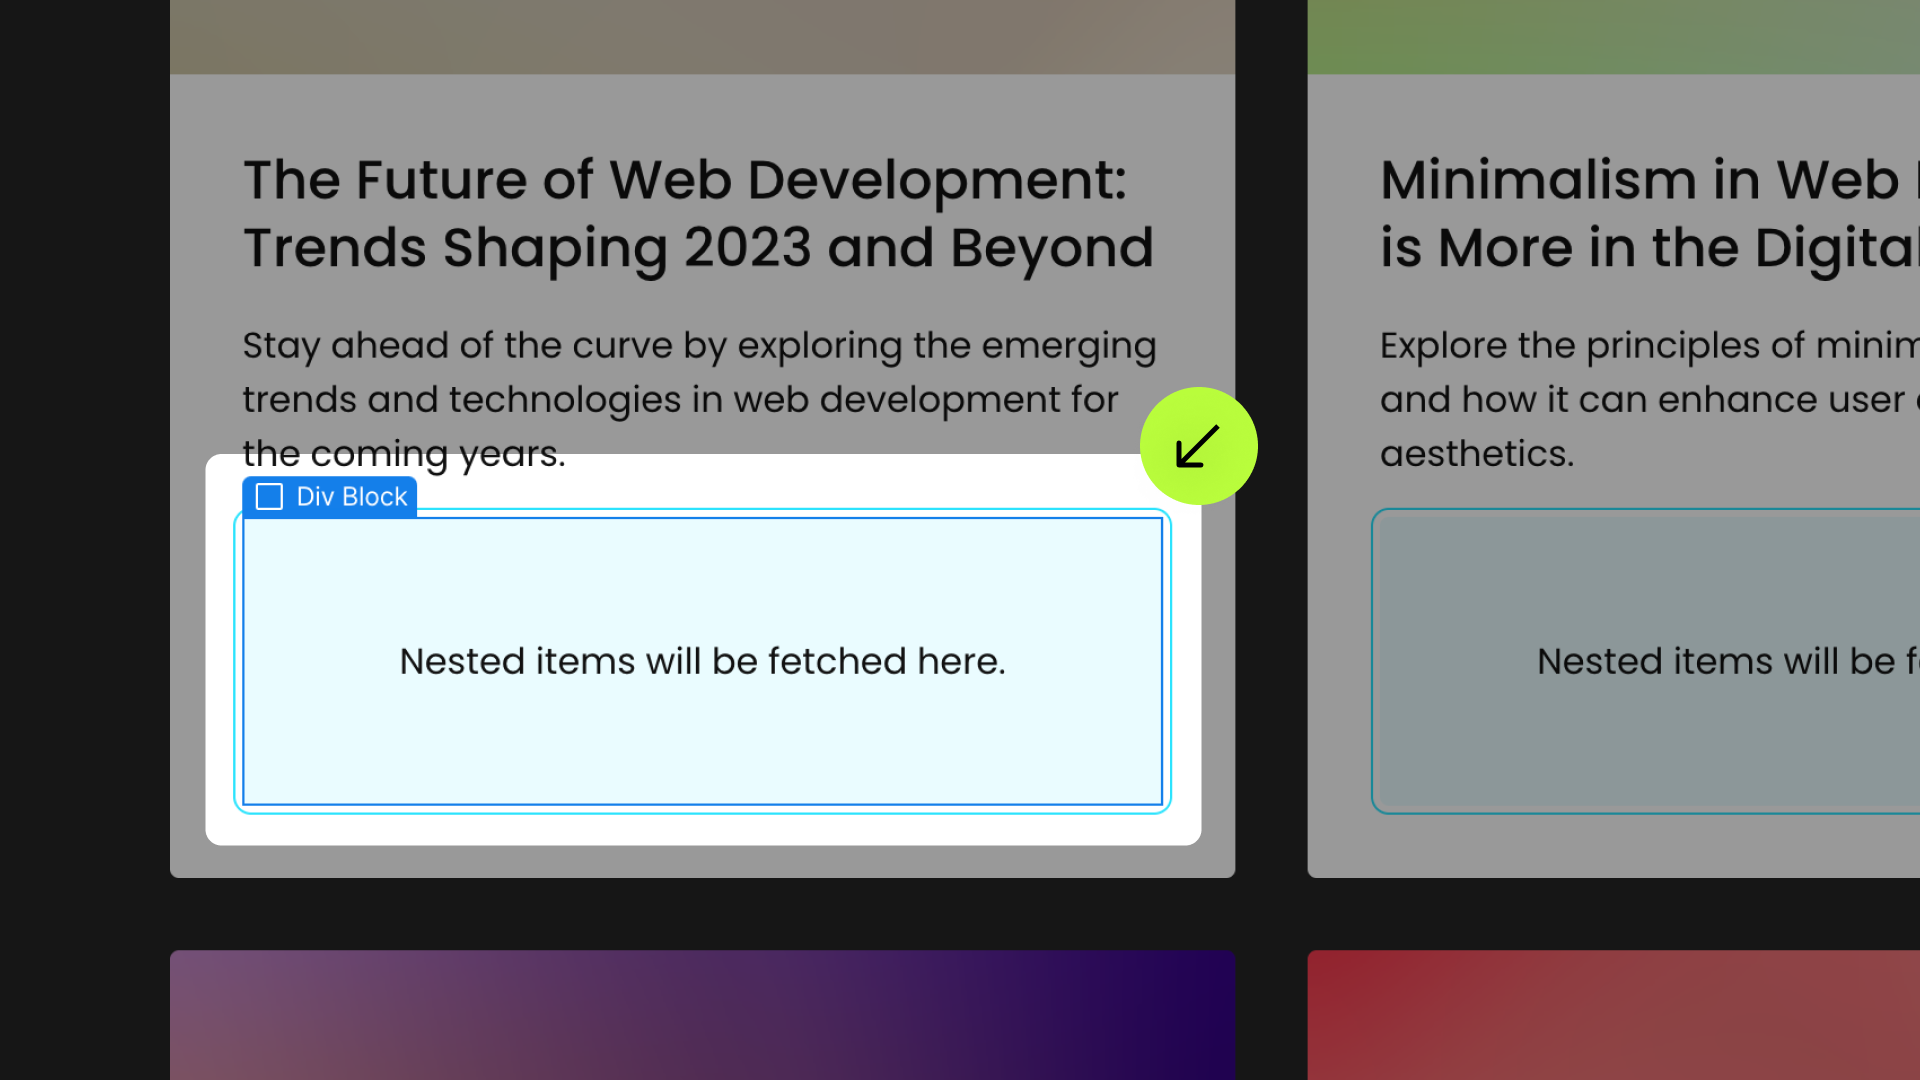
To define where the Nested List will be positioned, select a Div Block element inside the Collection Item element and add these attributes to it. This Div Block will act as the wrapper for the Nested List
Choose an IDENTIFIER value that represents the content of your Nested List, e.g., categories. You will use the same IDENTIFIER in a later step to create a connection between the Target Div and the Nested List.

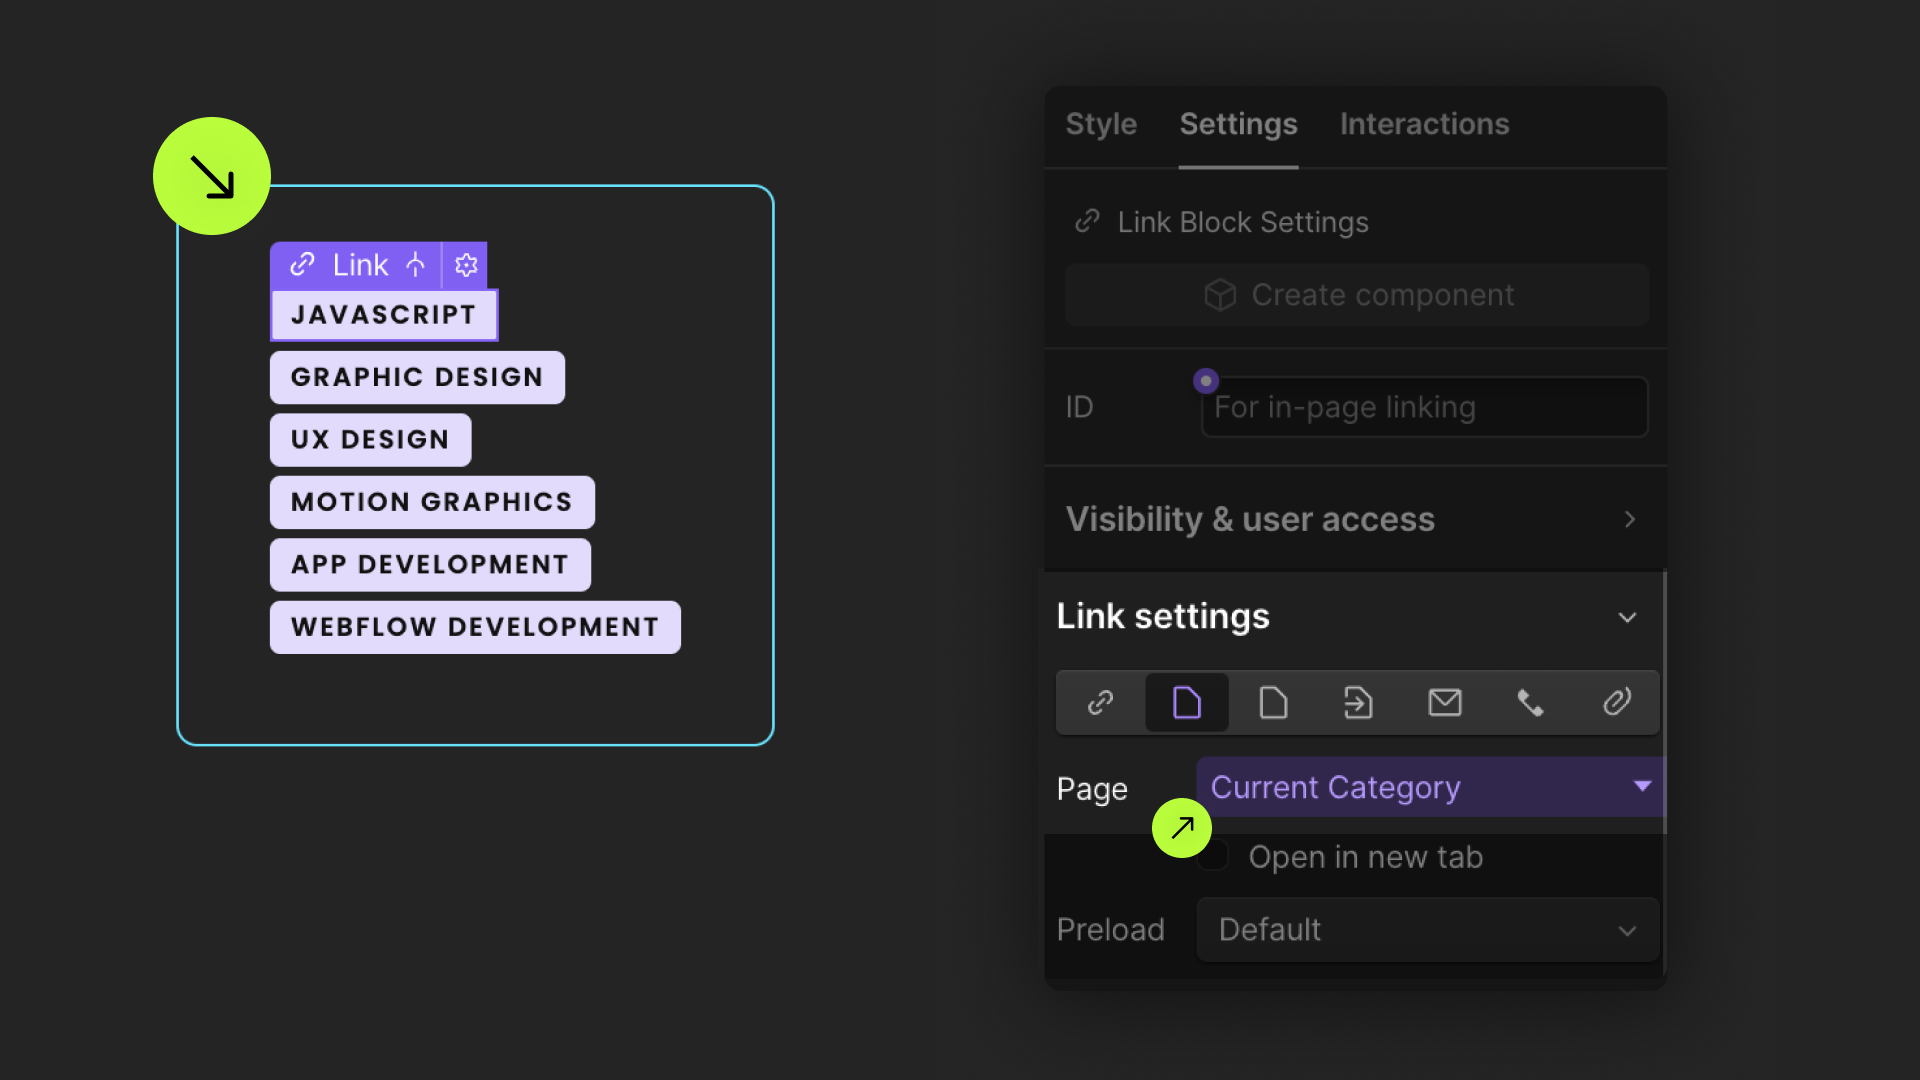
Item Link
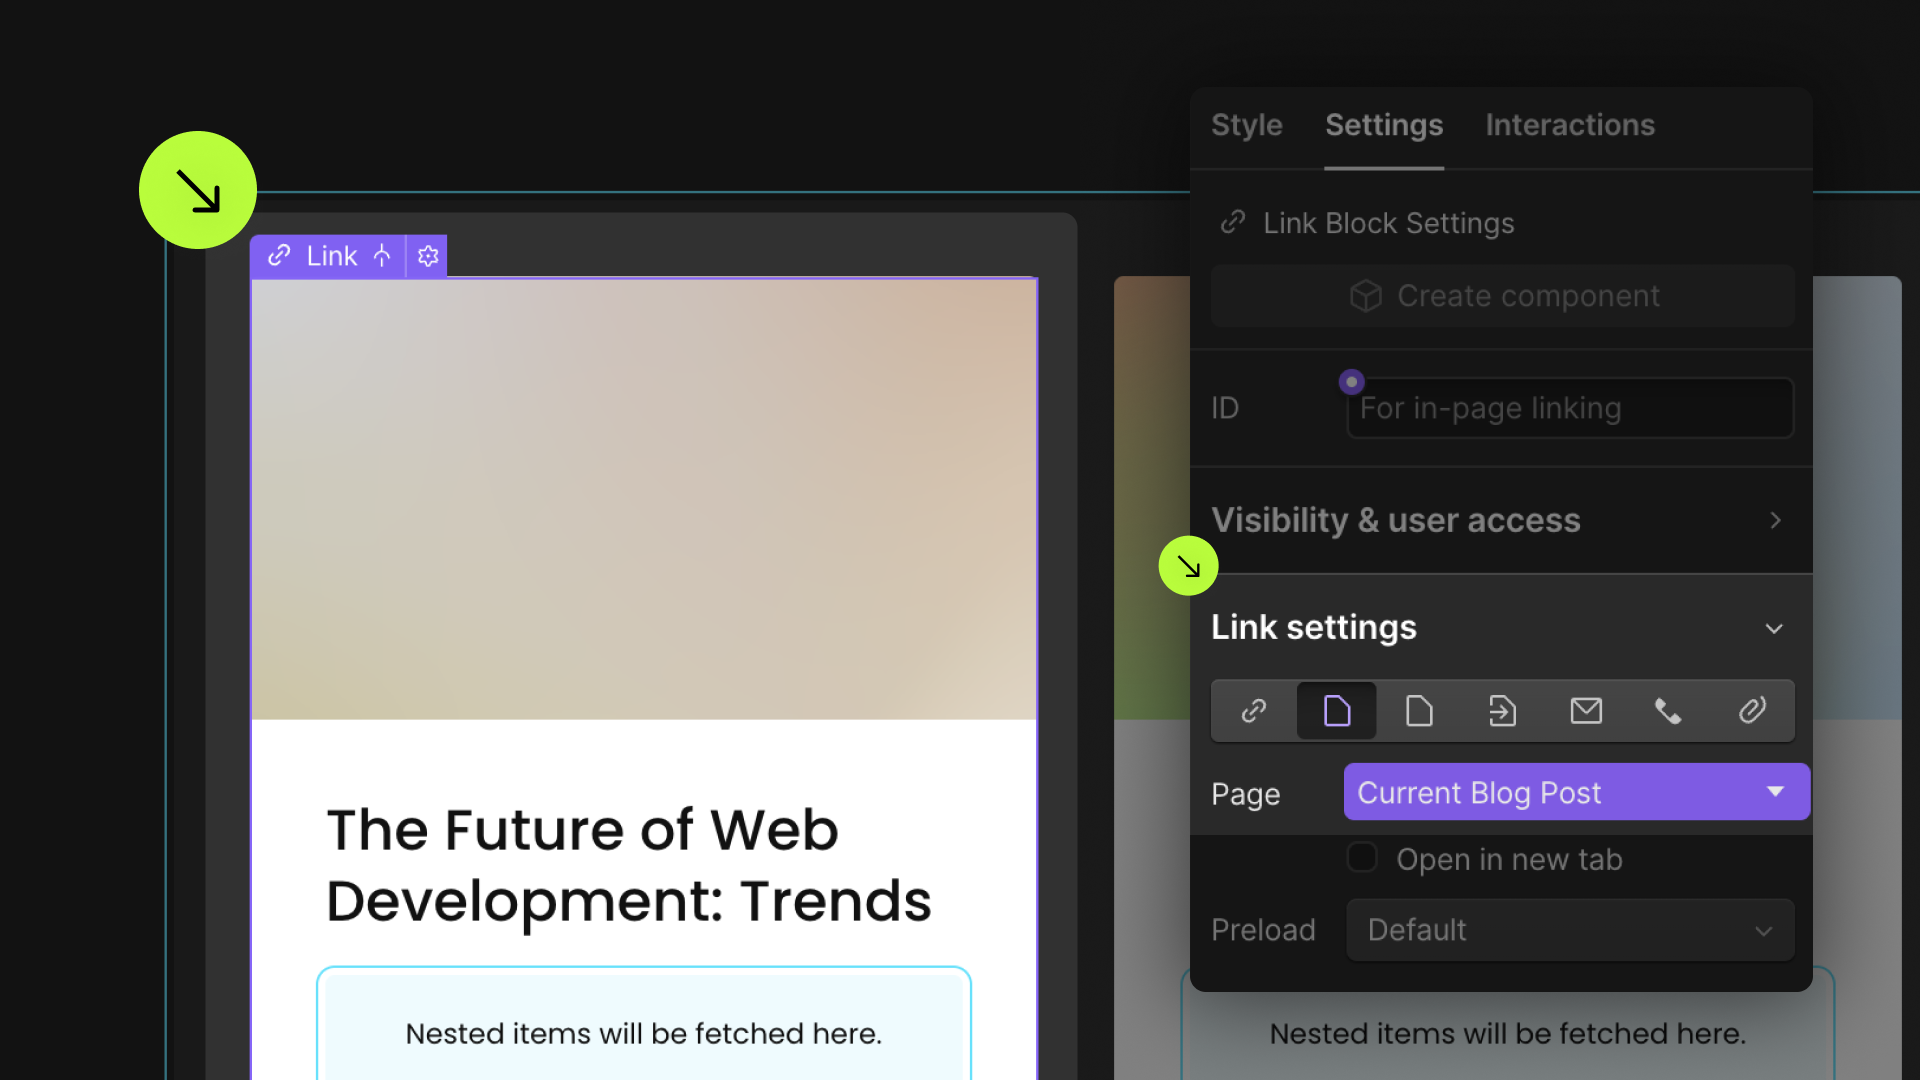
This step ensures a connection between the Target List and the Collection Template page.
- Select a Link element inside the Collection Item — if there's none, create one — and add this attribute.
- Set this link to the CMS Current link in the Link Settings panel — it's the link to the Collection Item page.


Nested Items

This step needs to be performed on another page, specifically the Collection Template page of the Target List, the one you set with fs-list-element="list" in the first step. WARNING: not on the Template page of the Collection you want to nest.
- On the Collection Template page, create a Collection List and bind it to a Multi-reference field of the Target List Collection.
- Select the Collection List Wrapper element and apply these attributes. Ensure the
IDENTIFIERvalue matches the one defined for thefs-list-nest="IDENTIFIER"attributes from the previous steps. - Add your content in the Collection Item element. This List displays exactly what will appear on each Collection Item of the Target List. The way you add and style its content here on the Collection Template page is how it will be shown, nested in the Target List, on the published site.
Set the link to the current CMS page
Remaining on the Collection Template page, create a Link Block element anywhere inside of the Collection Item element, select it and set it as the 'Current' in the Link Settings panel.
This step establishes a relationship between this list and your Target List. It's requested for the List Nest Solution to work.
Add these required attributes to the elements
Target List
To define the Target List — the Collection List in which you want to nest another List — select the Collection List element and add this attribute.
Target Div
To define where the Nested List will be positioned, select a Div Block element inside the Collection Item element and add these attributes to it. This Div Block will act as the wrapper for the Nested List
Choose an IDENTIFIER value that represents the content of your Nested List, e.g., categories. You will use the same IDENTIFIER in a later step to create a connection between the Target Div and the Nested List.
CMS Field Slugs
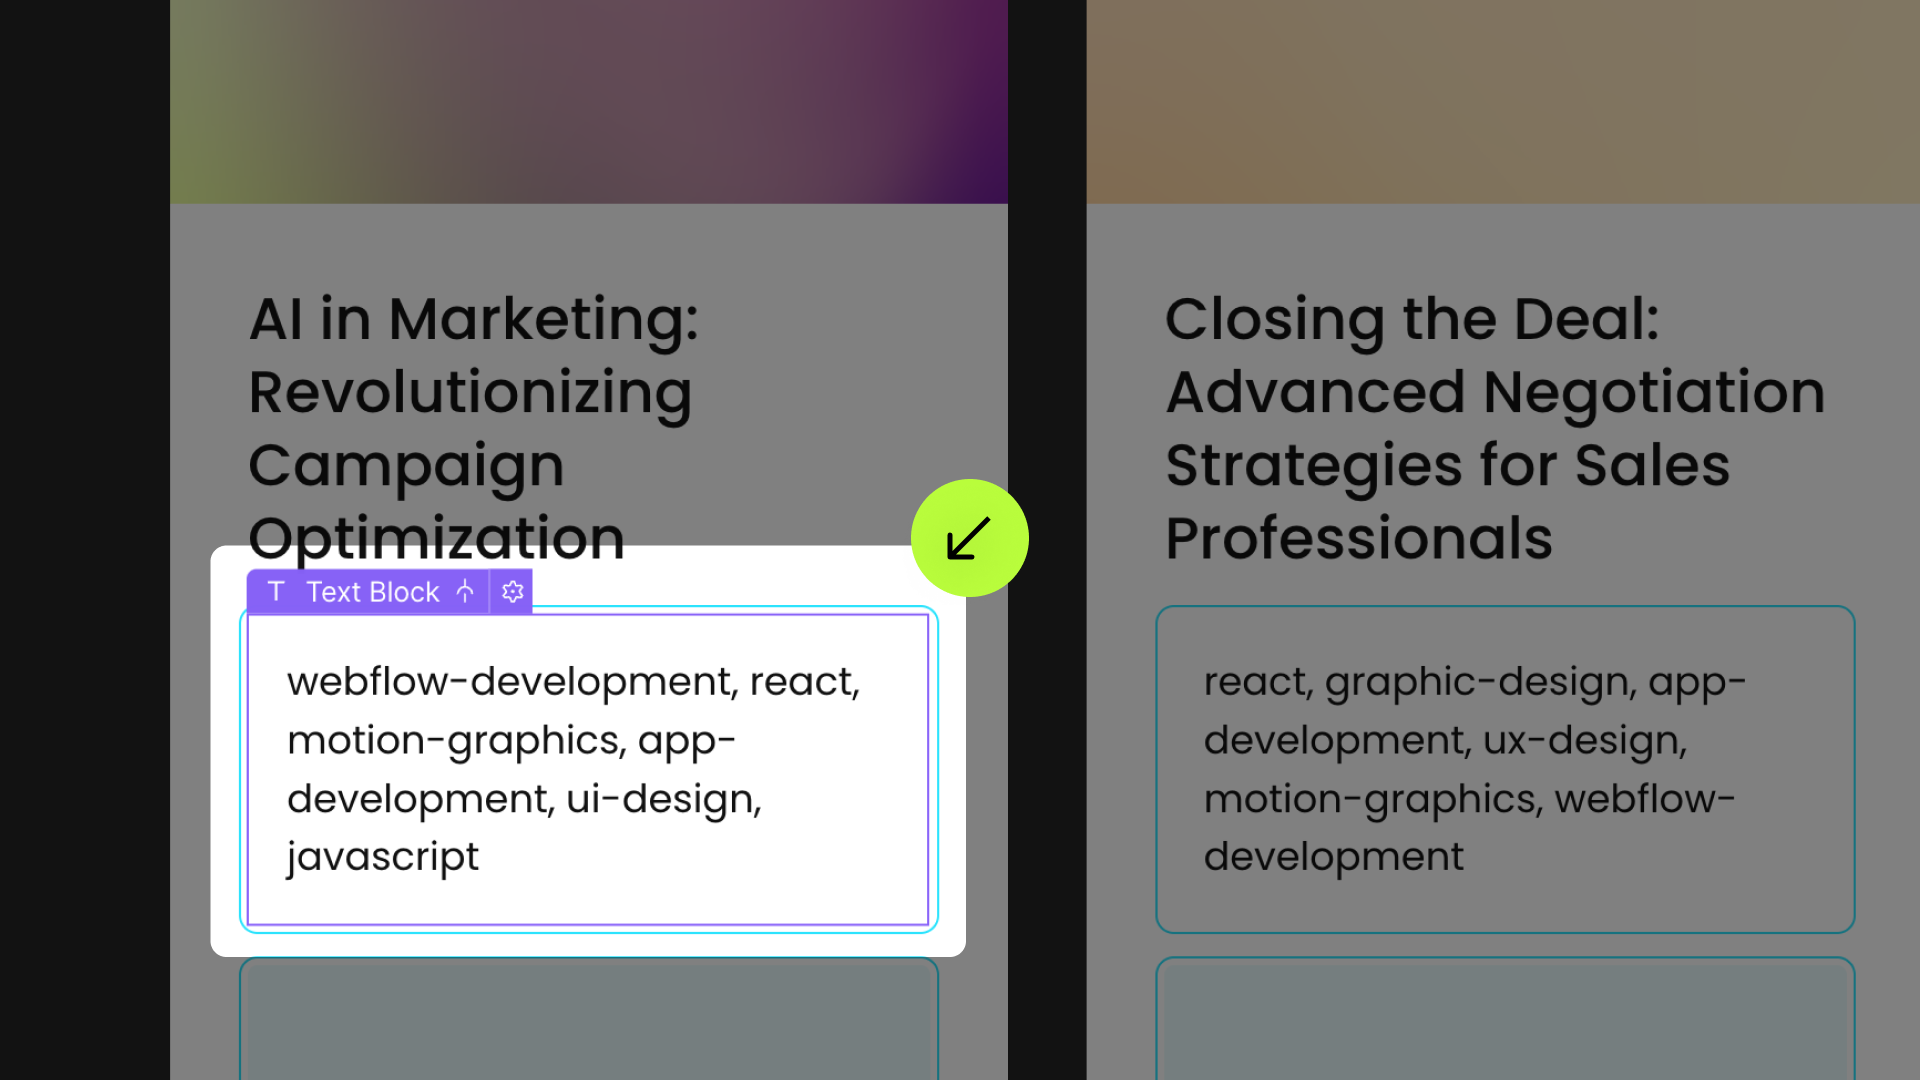
For this alternative nesting method to work, you need to add these attributes to a Text Block element bound to a Text Field that contains a text version of the Multi-reference field:
- Create a new Text field in the Target List Collection settings and place it under the Multi-reference field bound to the Collection you want to nest.
- For each Collection Item, replicate the list of referenced items from the Multi-reference field in the text field. Separate each item with a comma.


Item Link
Select the Link element inside the Collection Item and set it to the CMS Current link in the Link Settings panel — it's the link to the Collection Item page.
This step ensures a connection between the Target List and the Collection Template page.
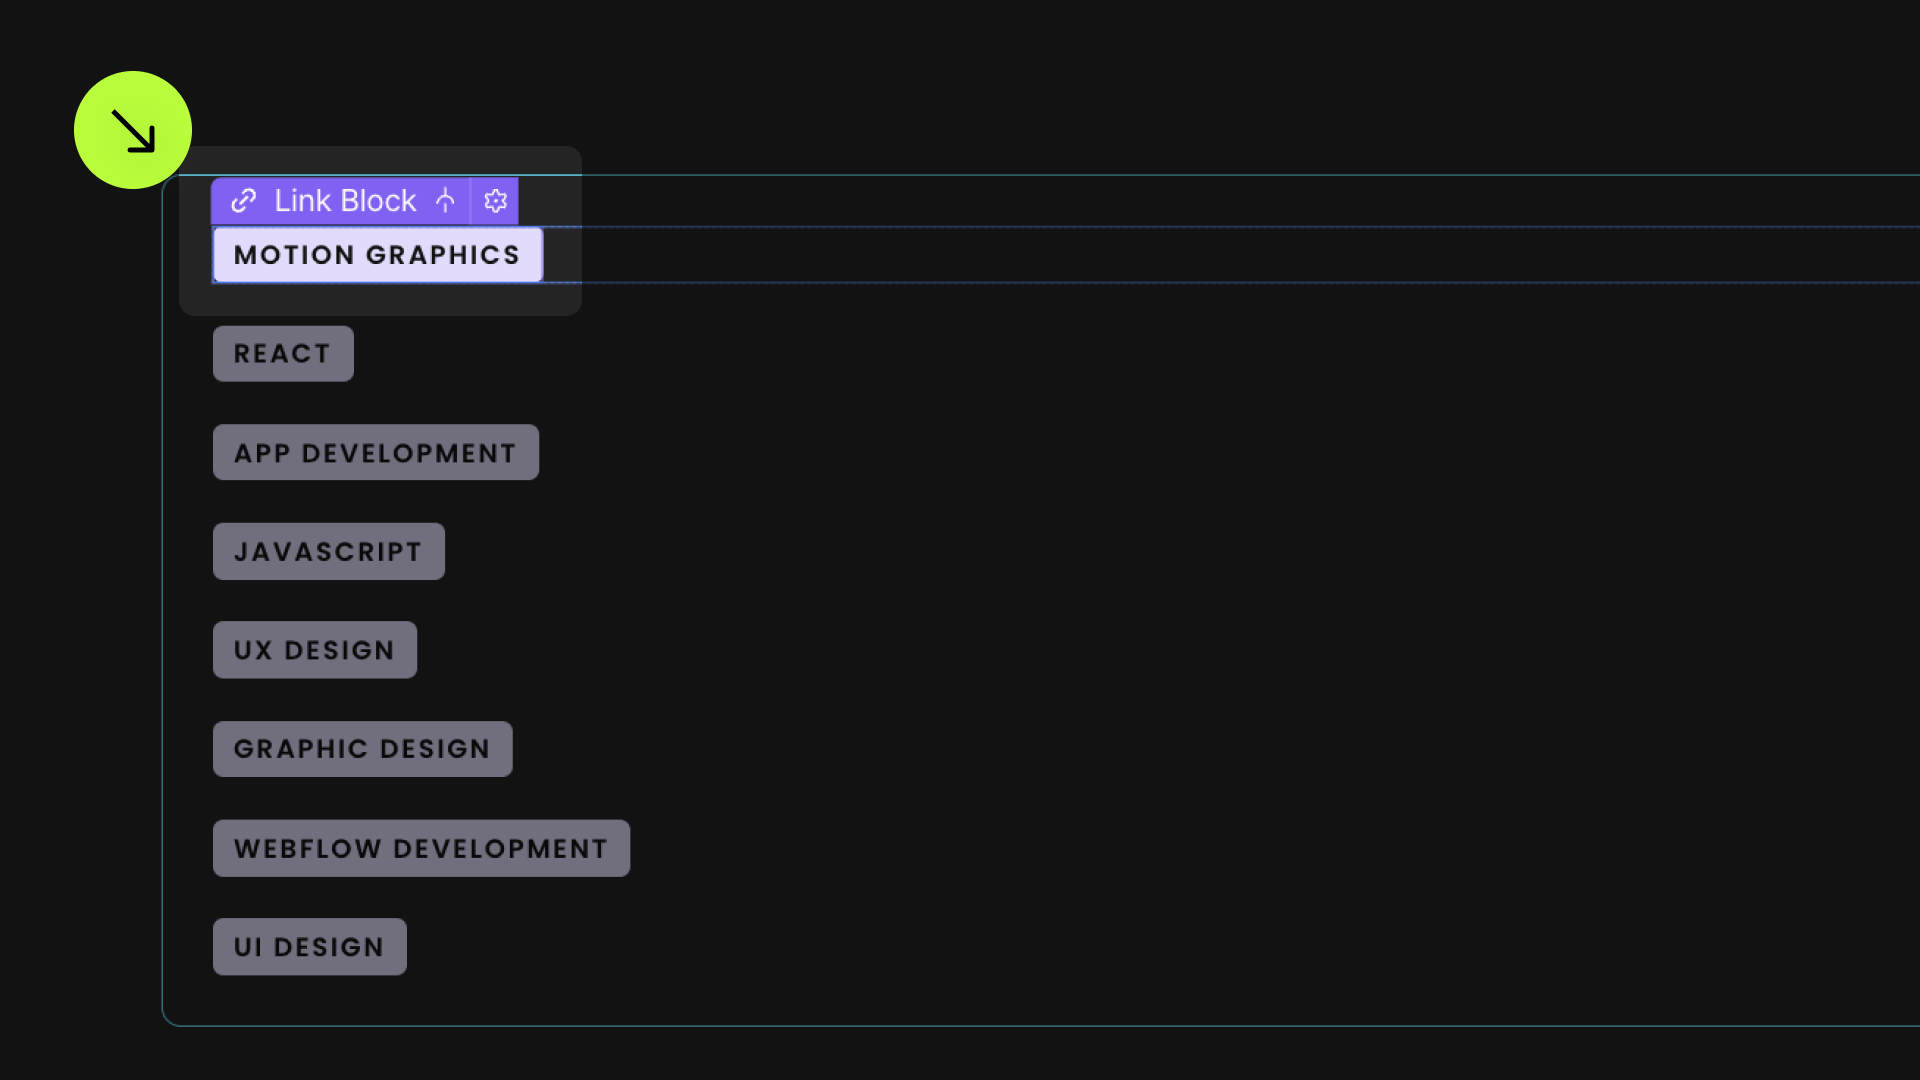
Nested List
Add these attributes to a Collection List on the page that will become the Nested List on the published site. Ensure the IDENTIFIER value matches the one defined previously.
Publish your project and check out the result on the live site.
* Attributes Solutions must be tested on the published site after each change. They do not run in Design, Edit, or Preview mode.