Static Image Alt Tags


In this post, you'll discover:
- The best practices when setting your static alt tags
- How to set alt tags from the Webflow asset panel
- How to use Webflow audit to find alt tags that haven’t been set
After you learn about static alt tag, make sure to check our guide for setting dynamic alt text.
Setting Alt Text in the Asset Panel
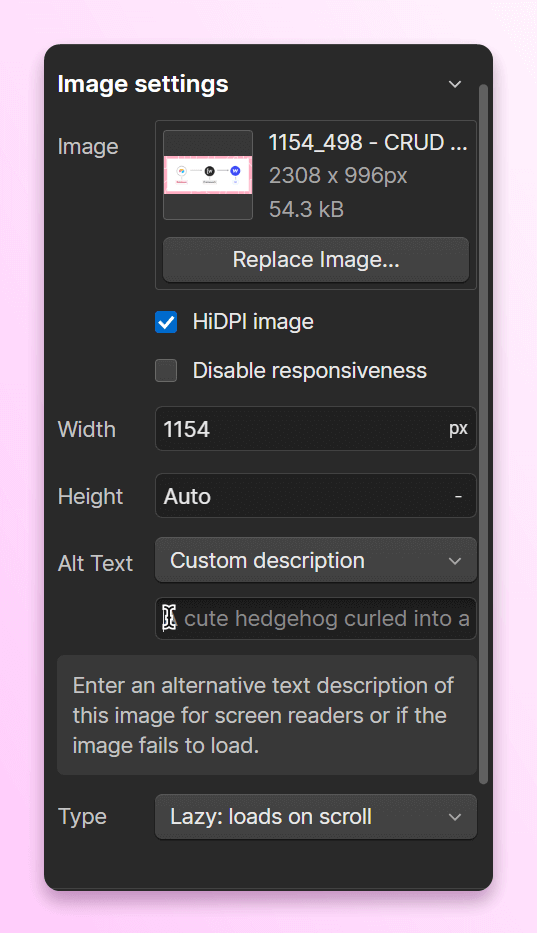
When you upload any image in any format (even Lottie animations) to the Webflow assets panel - you can click on the gear icon to set alt tag text for that image.
You will have two options when setting the alt tag:
- Descriptive
- Decorative
Let’s start with the easier one, the decorative alt tag!
Setting Decorative Alt Tags in Webflow
If you select the decorative alt text option in the image settings within the asset panel, Webflow will not allow you to set alt tag text.
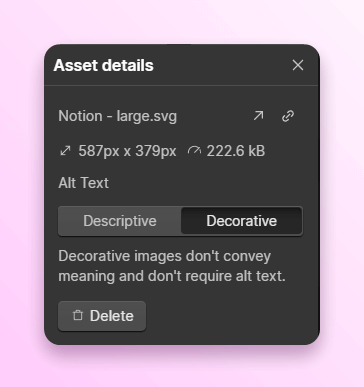
In this case, your alt tag will be set to alt=”” (also known as null or empty alt tag). The alt attribute is set, but the meaning is empty.
This way screen readers will ignore the image and will not read it out loud when reading the contents on the web page.
If you set decorative image alt tag text from the assets panel - this will be applied by default to any instance where this image has been used on your website.
When to Use Decorative Alt Tag in Webflow?
Set any image alt tag settings to decorative if that image adds no actual extra meaning to your content.
A great exercise is getting a screen reader extension and testing it on different types of pages to get a feeling for what images convey meaning and which ones don’t.
Ask yourself…
Does not seeing this image change the meaning of the contents on the page? If it doesn’t, set the alt tag to decorative.
If it’s crucial to understand this image to understand this page - set the image alt tag to descriptive.
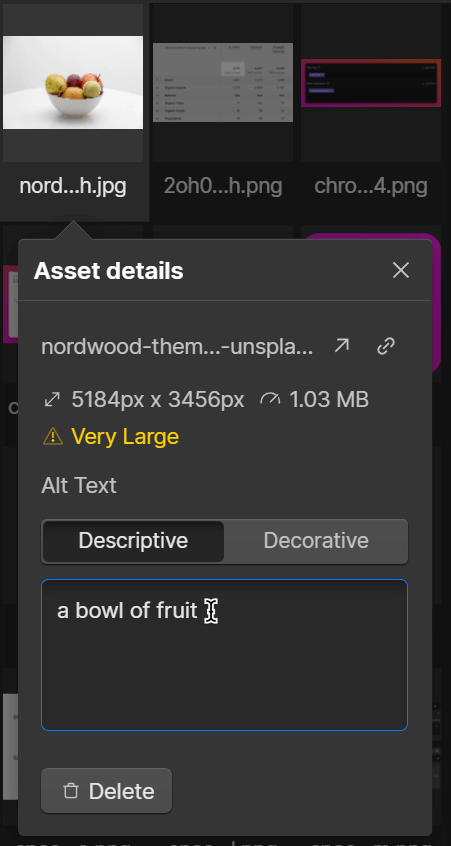
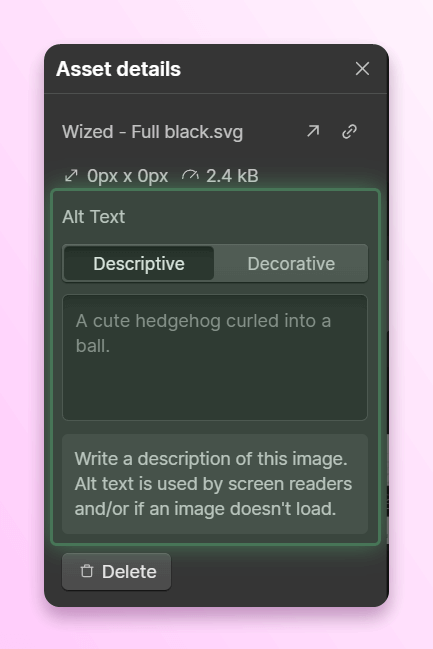
Setting Descriptive Alt Tag from the Webflow Assets Panel
Click on the settings gear icon on the asset you want to set descriptive alt text for. Make sure the descriptive alt text option is selected (it should be set to descriptive by default).
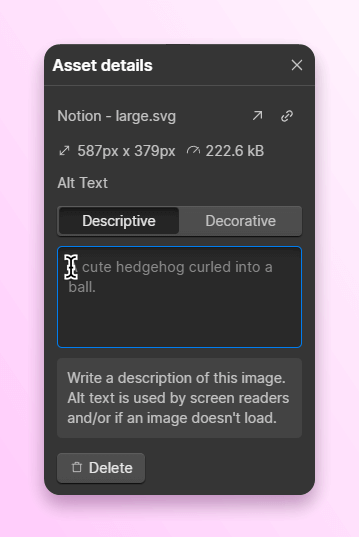
Type the image description in the field below.
That’s it, your alt tag text value is set after you publish your Webflow project!
How to Optimize Image Alt Texts for SEO in Webflow?
I don’t want to sound controversial here, but… You shouldn’t “optimize” alt text for SEO.
Hear me out, though!
Alt text is first and foremost an accessibility HTML tag. It allows screen readers to explain images to those who can’t see them.
So optimizing alt texts for SEO is just - being helpful and explaining what is inside that image. Do that and you will have optimized your image alt text for SEO.
This means…
Write what you see.
Don’t try to stuff keywords.
Don’t add meaning that is not there.
Think about how you would explain this image to someone who doesn’t see it.
And also, think about which details are important, especially given the context that image is in.
When I say context, I mean - surrounding text, paragraphs, and headings. Again, be sure you need to explain it, most of the images we use provide no actual meaning for those just listening to this page.
There’s no point in trying to “hack” your way into image search top results.
Be helpful. That’s it.
Overriding Alt Tag Settings for Single Instance
Want to set alt tag settings just within one single instance? For just one image element?
Find the element where you want to change the alt tag within the Webflow designer and go to element settings. Either click on the gear icon on your image element or locate the image set in the settings panel on your right.
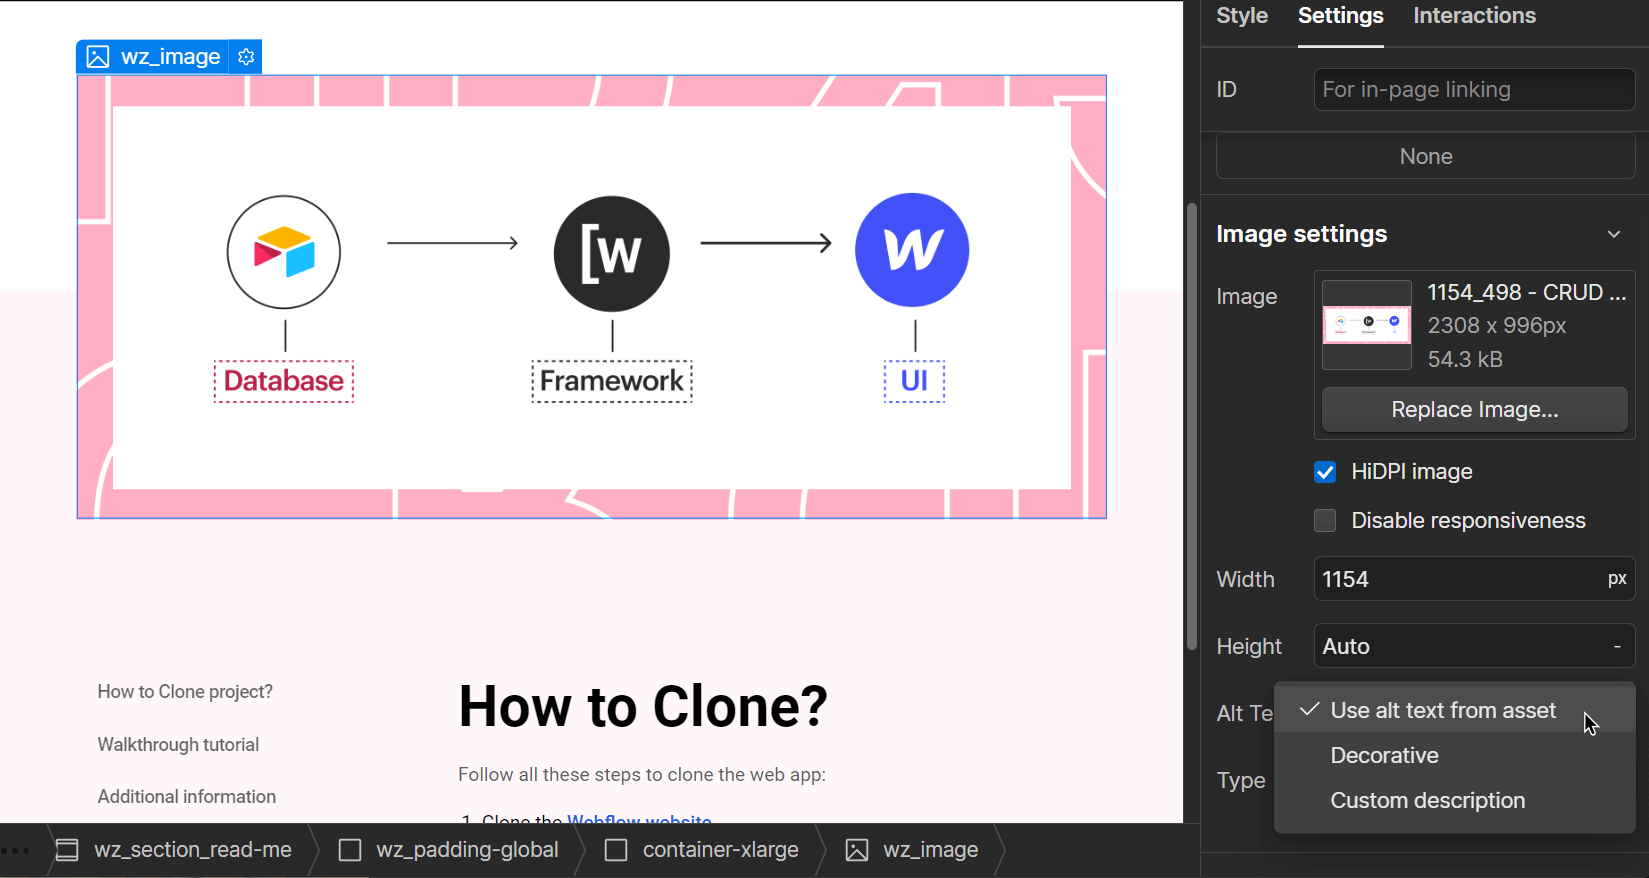
By default - all images will be set to “Use alt text from asset”. This means your image gets image alt text settings from within the assets panel. Those settings can be either descriptive or decorative.
If you want to change that, select either custom description or decorative. If you select a custom description, write your alt text in there.
Doing this will override asset alt text settings from the assets panel, but just in this single instance.
This is why it’s always better to set all alt tags for static images from within the asset panel.
Use Asset Panel First
An image rarely gets a different meaning in different scenarios on your website.
We recommend always setting alt tags only from the assets panel.
Press J. Write all image descriptions and set the option to decorative if images don’t need that description.
You are done!
Alt Text Audits in Webflow
The best way to make sure each page has all the alt texts set is to use the internal Webflow page auditing system.
Step 1: Webflow audits can be accessed by pressing U
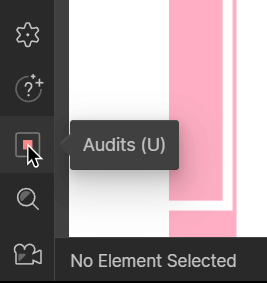
Alternatively, on the lower left side, you will see a red square if there are errors to be fixed.
Here you can see if any of the images are missing alt text.
Setting alt text will be easy!
Step 2: Click on the arrow next to the asset name
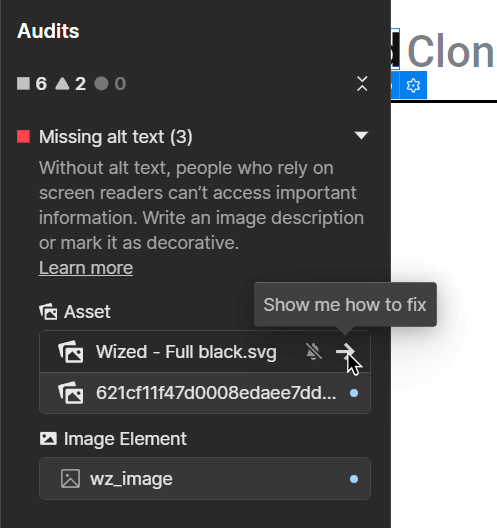
Step 3: Click on the find it for me link
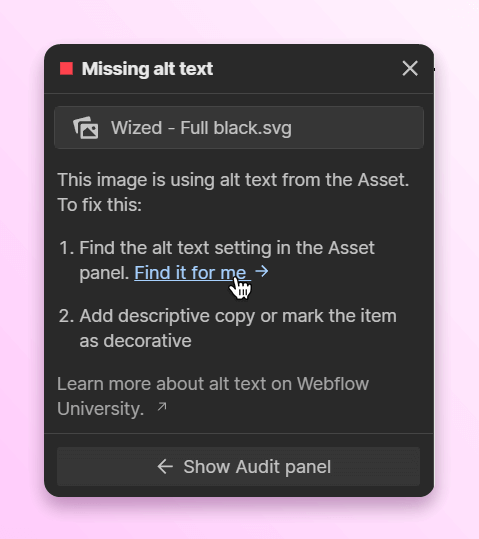
Webflow will find and highlight assets that had alt text missing.
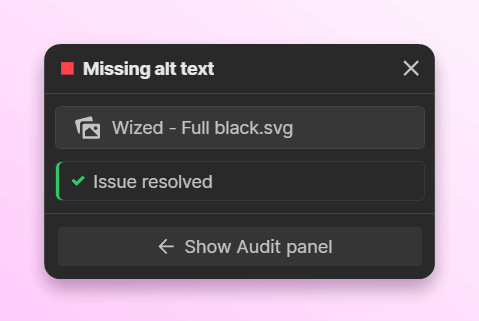
Step 4: Fill the alt text
If you type in the description or decide to pick the decorative alt text option - Webflow will mark this as solved.
Step 5: Do this for all missing alt text errors.
After you did that with all images that were missing alt texts on that page…
Your audits panel will not be showing a red square. It will be a gray check mark now.
This means that your audit panel looks like this:

What’s Next?
Congrats!
You now know the basics of static page and static image alt text settings.
Now it’s time to learn about dynamic CMS alt text.