XML Sitemap
What is a Sitemap?
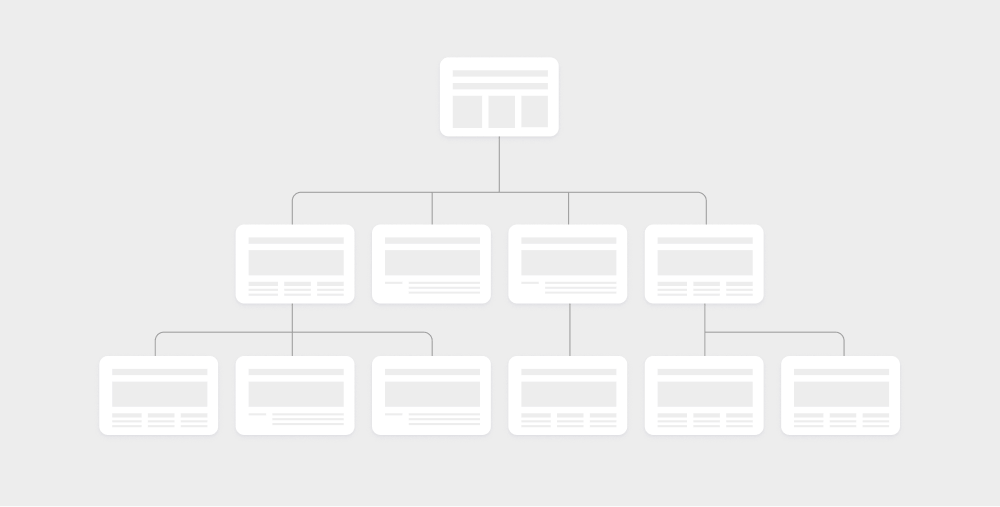
A sitemap is a file on your website that shows the structure of your website, most importantly, a sitemap shows all existing pages and content, including relationships between pages.
Search engines use sitemaps to crawl websites, mostly because sitemaps reveal all existing pages (URLs) on any given website.

XML Sitemap
When you hear the word sitemap, in 99% of the cases people will refer to an XML sitemap used by search engines.
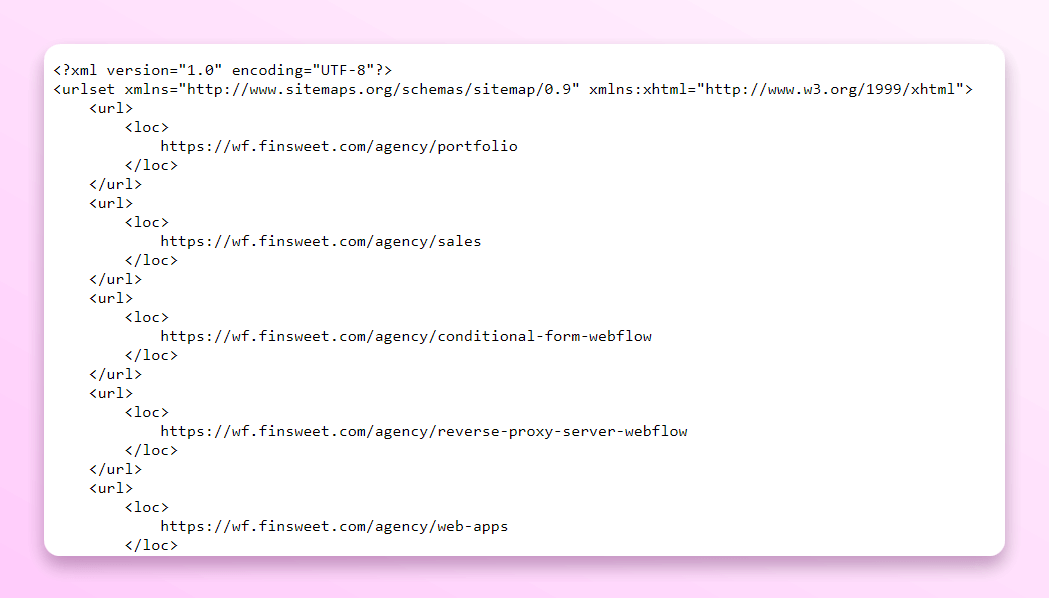
XML sitemap is an extensible markup language file that lists all URLs on the domain, including some relevant information like page relationships, update times, relevance, etc.
This is how the sitemap looks and in most cases, it can be found by adding /sitemap.xml after any domain name.

XML Sitemap Importance for SEO
Part of successful SEO steps is making sure that all the most important pages on your website are crawled by search engines.
SEOs and website owners achieve that by submitting a sitemap.xml file to search engines and keeping it up to date as new pages are created.
While you could make the argument that with perfect internal linking, advanced taxonomy, and great website structure, a sitemap.xml file is unnecessary. Because, if all three of these things are done correctly, crawlers will crawl your website fully without it.
In reality, everyone makes mistakes, therefore information within the sitemap.xml file acts as a “source of truth” and a backlog of published pages that search engines can rely on whenever they need it.
Also submitting a sitemap.xml file to webmaster tools allows search engines to “discover your website”.
Be sure to read our guide on website crawling if you want to learn more about building crawlable websites in Webflow.
XML Sitemaps in Webflow
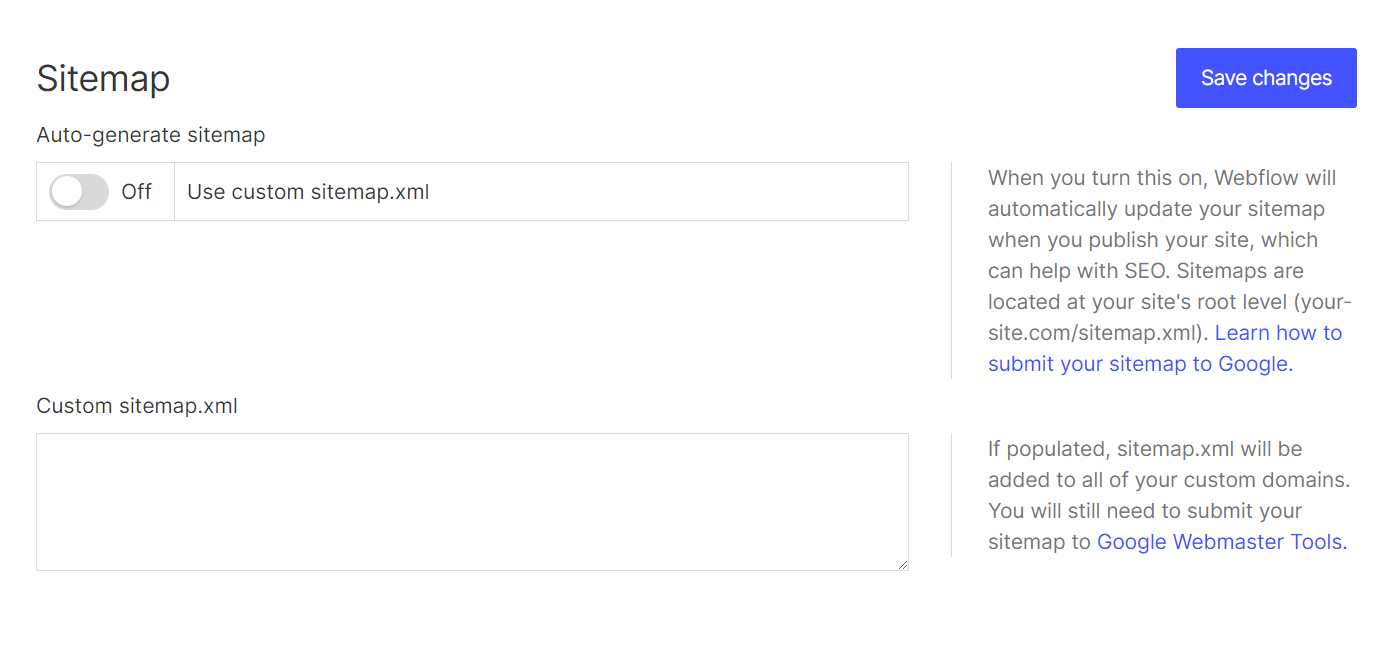
Sitemaps in Webflow can be generated automatically or updated and published manually.
Automatic Sitemap
To generate an automatic sitemap in Webflow:
- Visit website settings
- Under SEO, find the Sitemap section
- Make sure the Automatic Sitemap option is turned on
- Click on the Save Changes button
- Publish the website if you made any changes (turned on or off)

Your sitemap will now be reachable by visiting this URL:
[your-domain.com]/sitemap.xml
Manual Sitemap
There are SEO cases where you need to maintain and update your sitemap manually.
Webflow allows you to turn on or off sitemap and indexing within page settings. This will remove the URL from the sitemap and will add a noindex tag to the head code.

For even more control, Webflow allows you to manually manage your sitemap file in Website SEO settings.
It's tedious and slightly unnecessary work, but because we have little to no control in Webflow regarding which pages will be added or not added to the sitemap…
Sometimes manual sitemap.xml maintenance is mandatory.
In cases like that, you should follow previous instructions, but turn off the auto-generated sitemap option.

If you do that, you will get a text field where you can add your sitemap version.
This means that you can manually add hreflang information, lastmod attributes, or page priority properties to your sitemap.
Of course, you’ll also need to update this information when changing anything on your website.
Therefore, the custom sitemap option should not be considered by beginners as sitemap maintenance can get messy as the site becomes bigger and bigger.
Submitting Your Sitemap to Search Engines
After you release your website, it is mandatory to submit your sitemap.xml to search engines like Google.
How to Submit Your Add Your Sitemap to Search Console?
For Google to find your sitemap, you should create your GSC (Google Search Console) account.
After you approve your domain ownership inside the Search Console, you must submit your sitemap to it.
To submit your sitemap simply:
- Go to Search Console and find Sitemaps
- Add your sitemap.xml URL under “Add New Sitemap”
- Click Submit and wait for submission confirmation
Note! Below the submission field, you will find data about the submitted sitemap status, discovered pages, and other valuable information.
After submitting your sitemap, Google will be aware of your website's pages and periodically check for updates, ensuring their index remains current.
Adding Your Sitemap to Robots.txt
Robots.txt file allows crawlers (not only search engine crawlers!) to know which pages on your website should not be crawled.
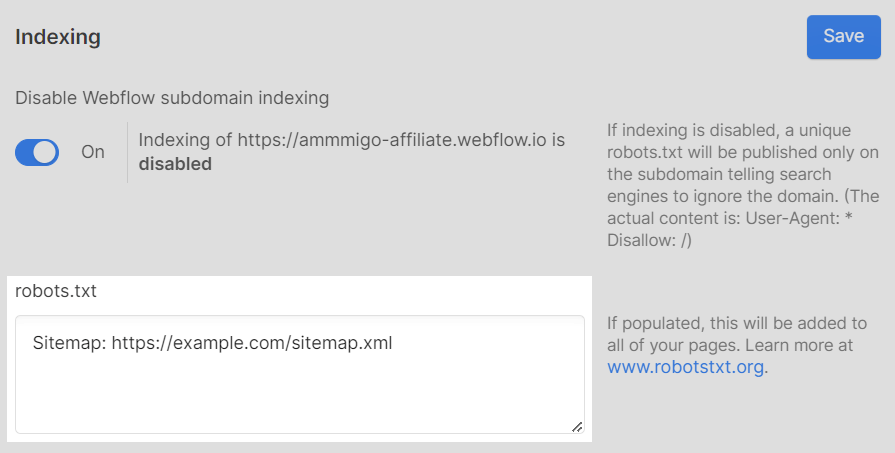
You should also add your sitemap location to robots.txt as specified by Google’s robots.txt guidelines.
To add your sitemap information to robots.txt in Webflow:
- Go to website settings and under SEO find the robots.txt section
- Add
Sitemap: https://your-domain.com/sitemap.xmlinto the text field

Sitemap Best Practices for SEO
Here are a few tips and tricks to keep in mind.
Only Public-facing pages
Include only the pages you want indexed in your sitemap.
Exclude URLs that shouldn't be picked up by Google.
While search engines may still index pages not in the sitemap, it signals that you don't consider them important.
Avoid Duplicate Content
If you have landing pages or marketing campaign pages with direct or close content duplicates, you should never add them to your sitemap.
That’s why most marketing sites having loads of similar campaigns should maintain their manual sitemap to keep it SEO-friendly.
Pro tip: if you have duplicate content like similar landing pages, you shouldn’t add them to your sitemap. In addition to that, add a no-index tag and disallow crawling within the robots.txt file (after deindexing the site).
Define Localized Pages
If you're using Webflow's Localization, or Linguana, the sitemap will be taken care of automatically. Otherwise, add your hreflang tags manually.


