How to set up Google
Tag Manager

Follow this setup if you are using Google Tag Manager to manage your third-party scripts.

Watch Tutorial

Follow this step-by-step guide to set up Google Tag Manager:

1

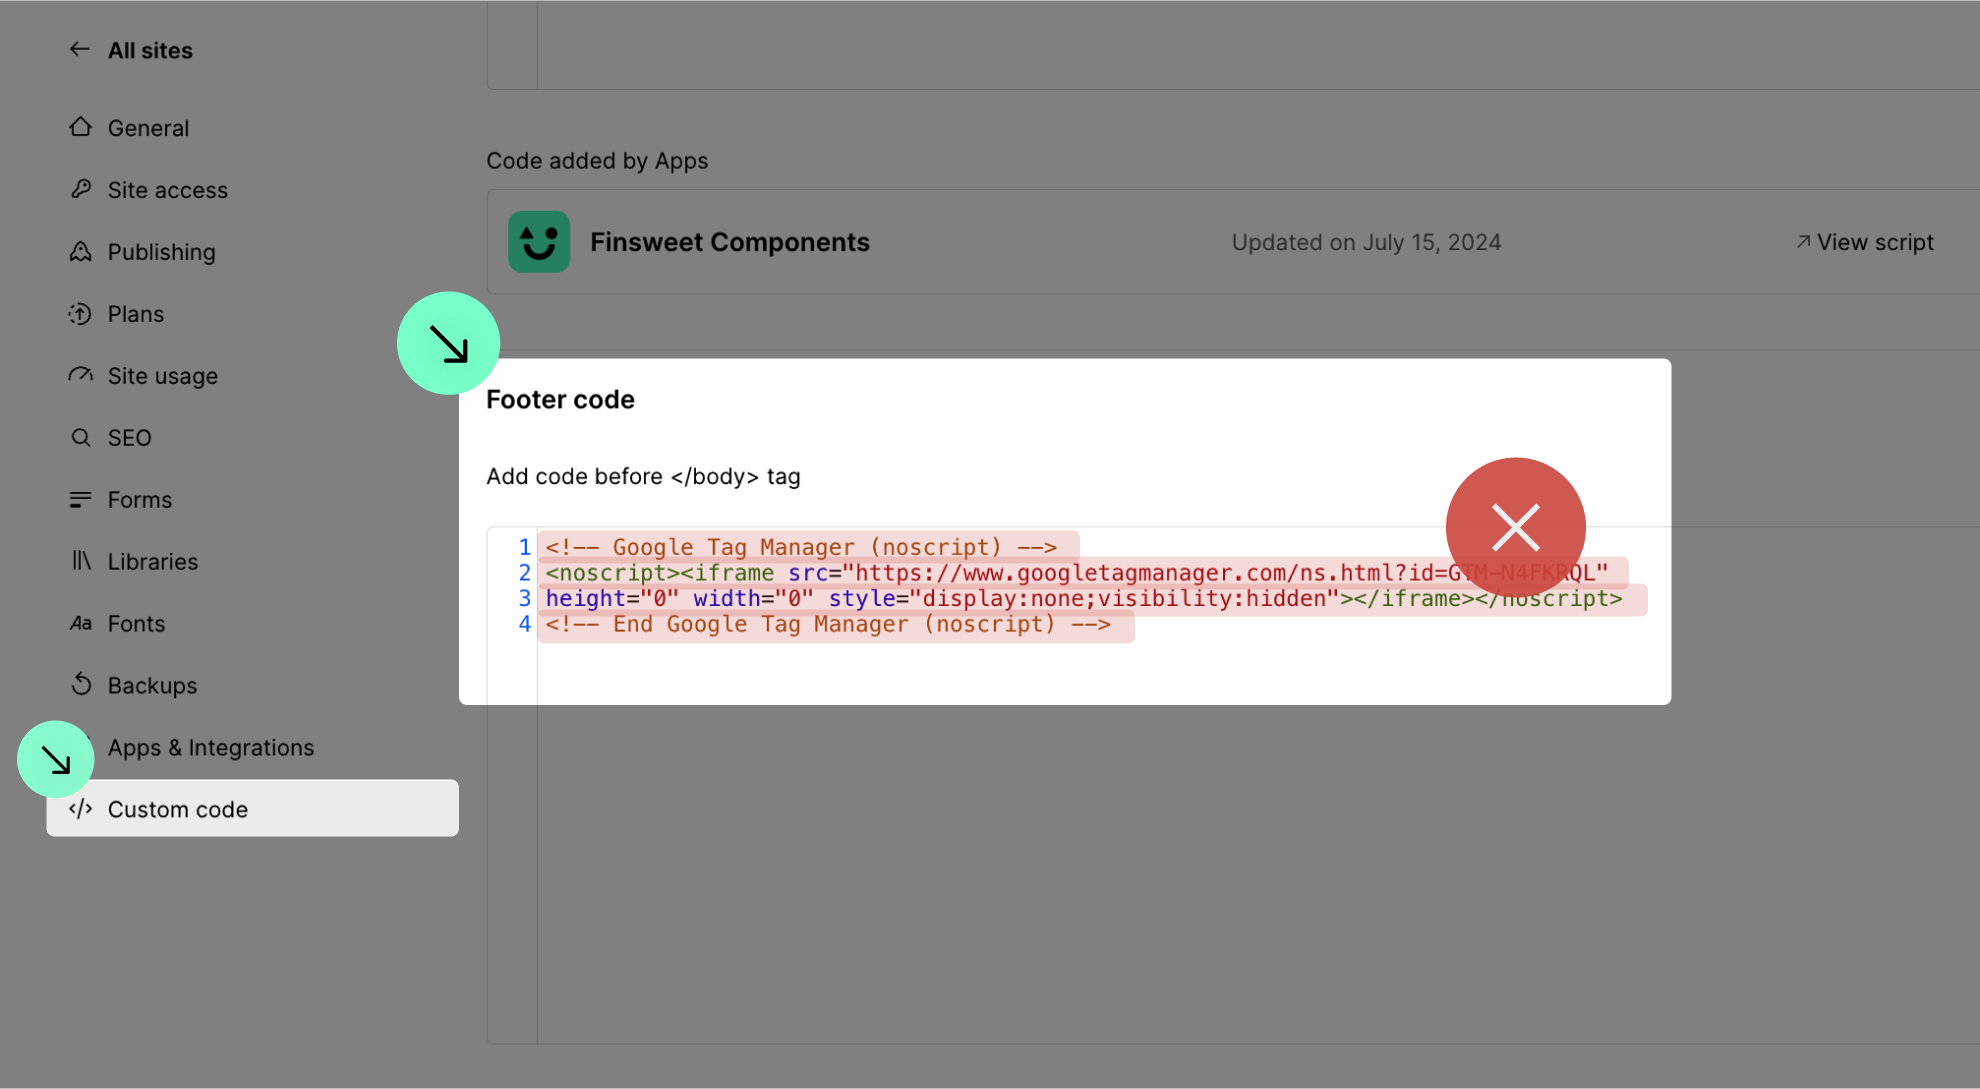
Remove the <noscript> tag from Google Tag Manager

First, go to 'Site Settings' > 'Custom Code' and remove the Google Tag Manager <noscript> tag from the footer code.

2

Download the Finsweet Google Tag Manager template for Consent Mode

Click the button below to download the template required for setting up Google Tag Manager:

Download Template
3

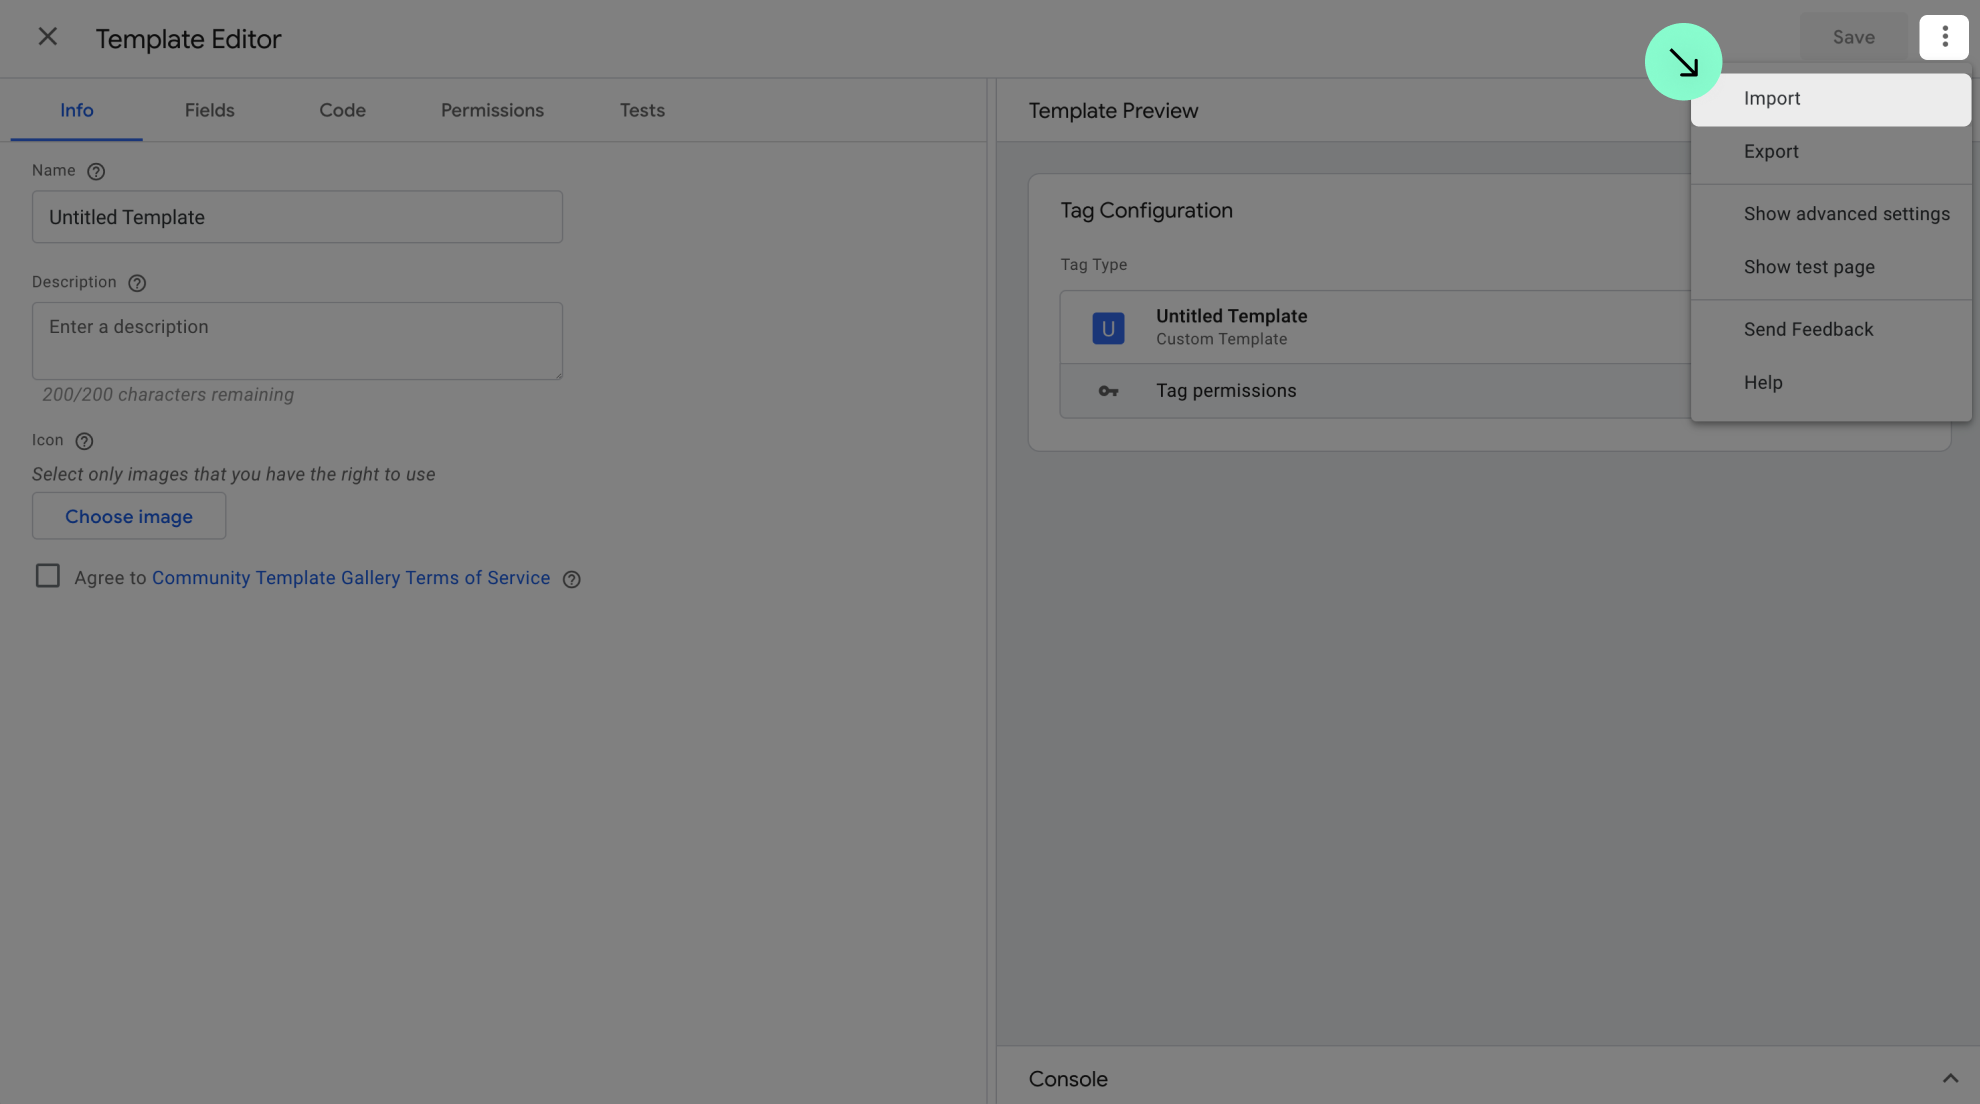
Import the Finsweet Google Tag Manager template
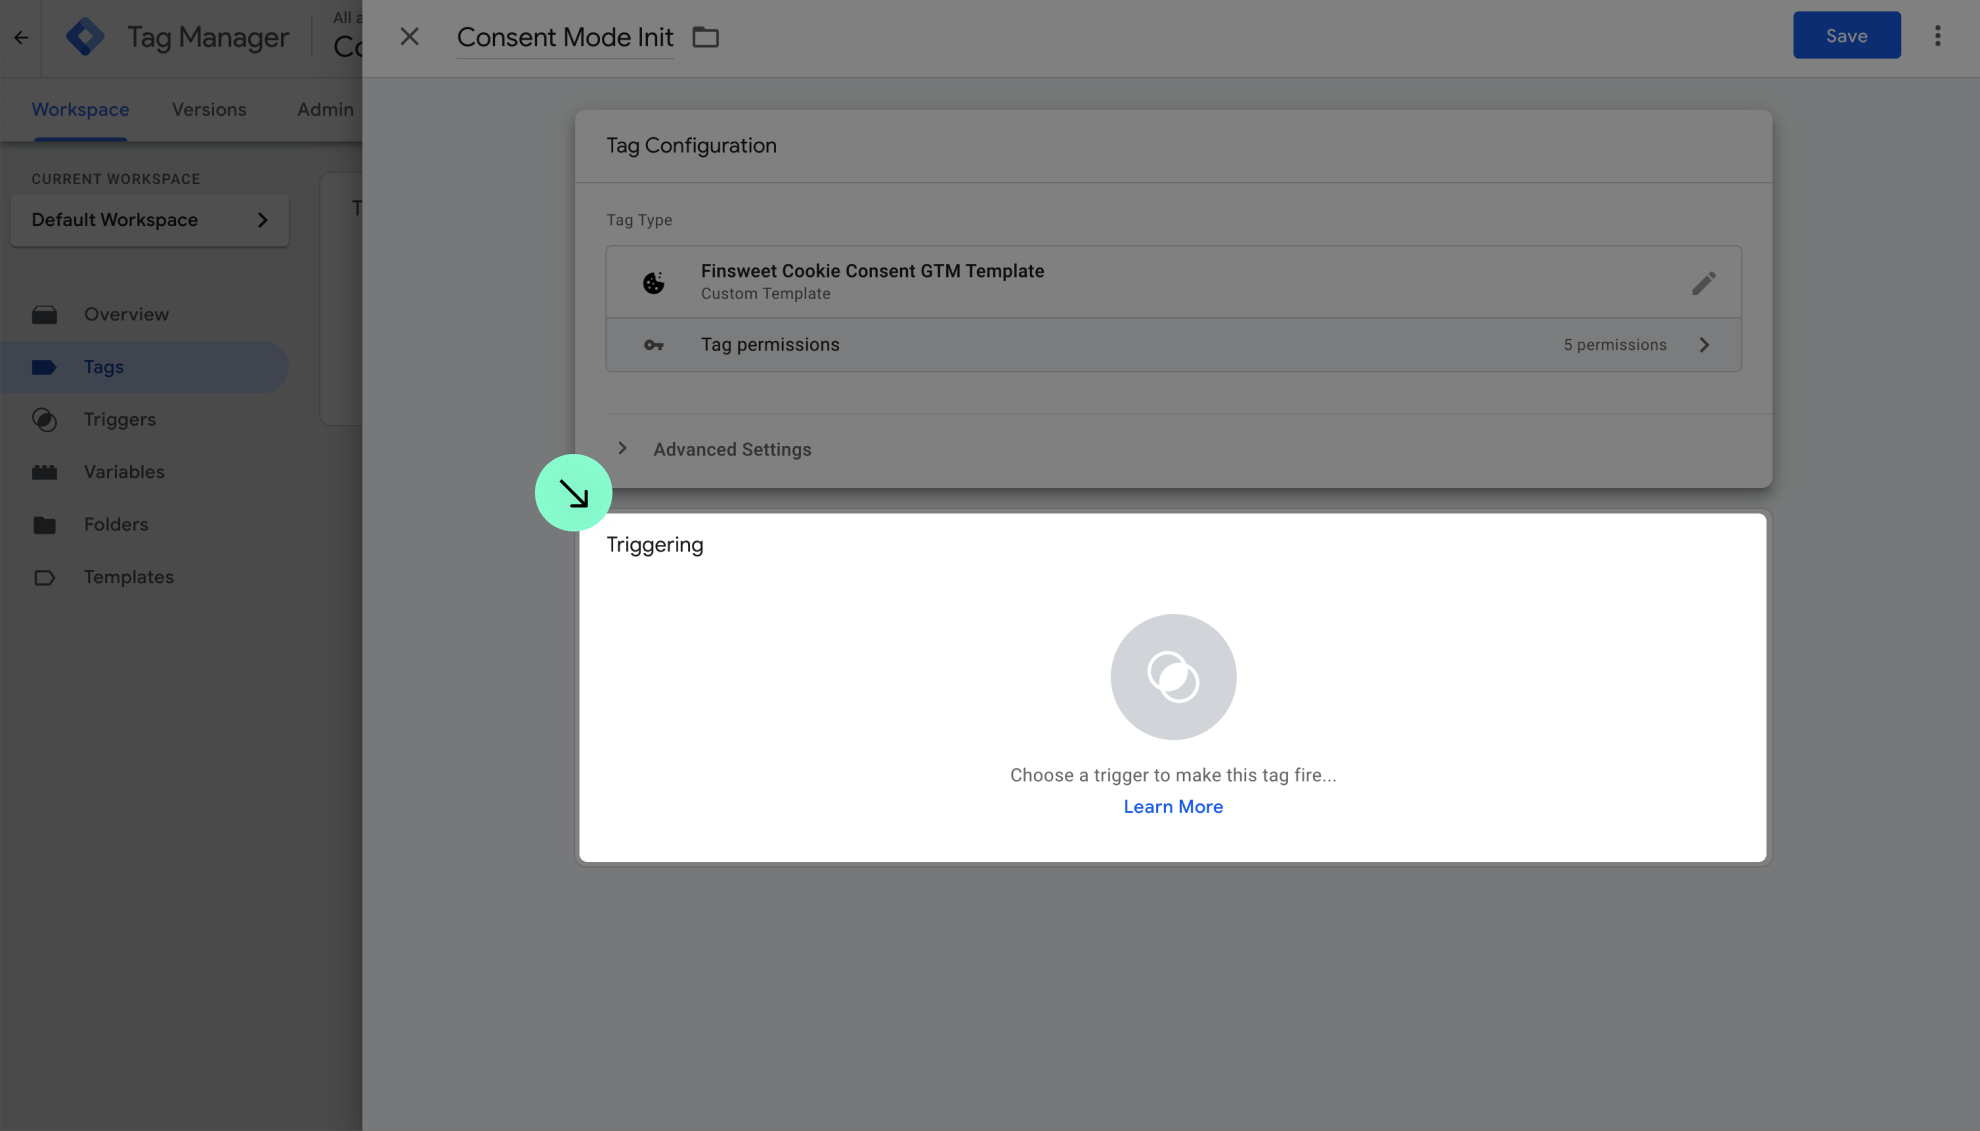
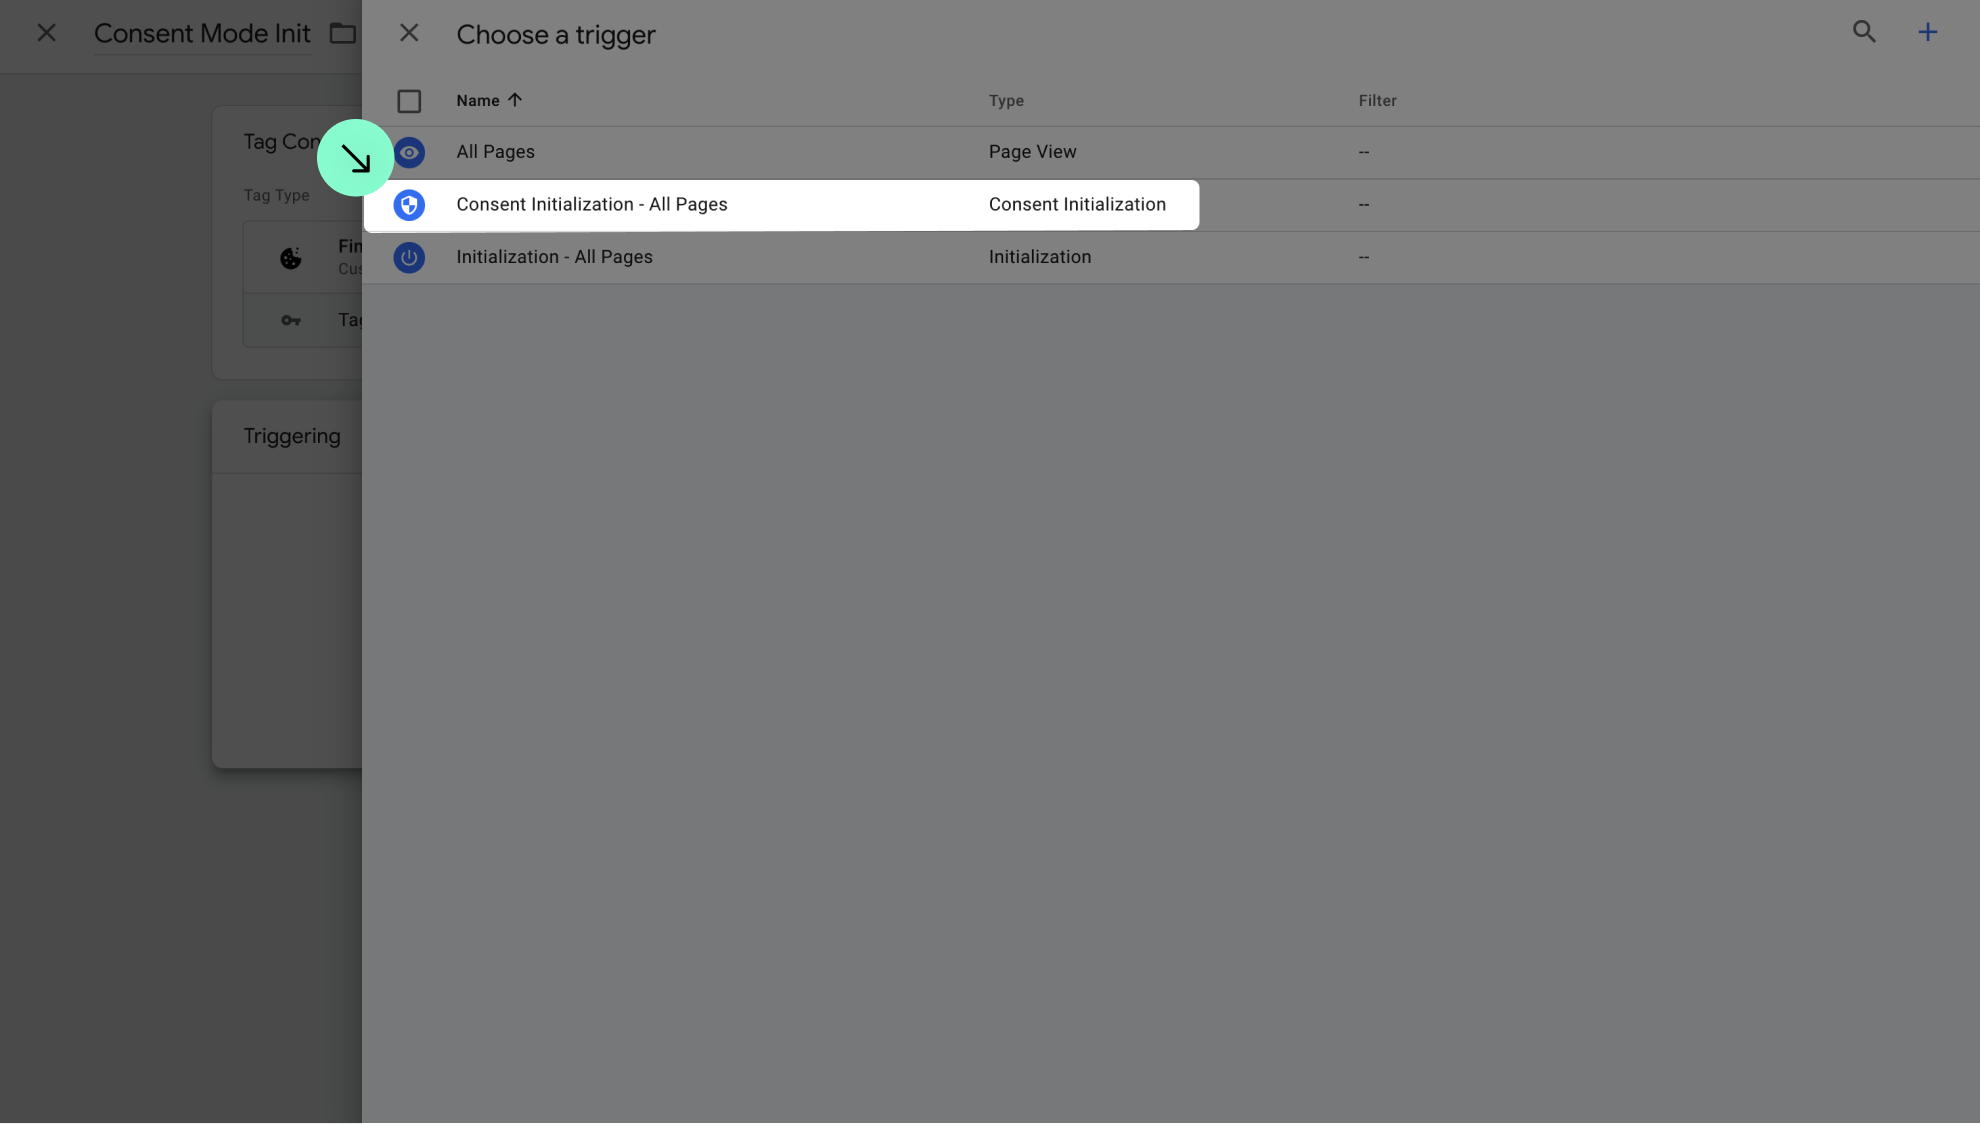
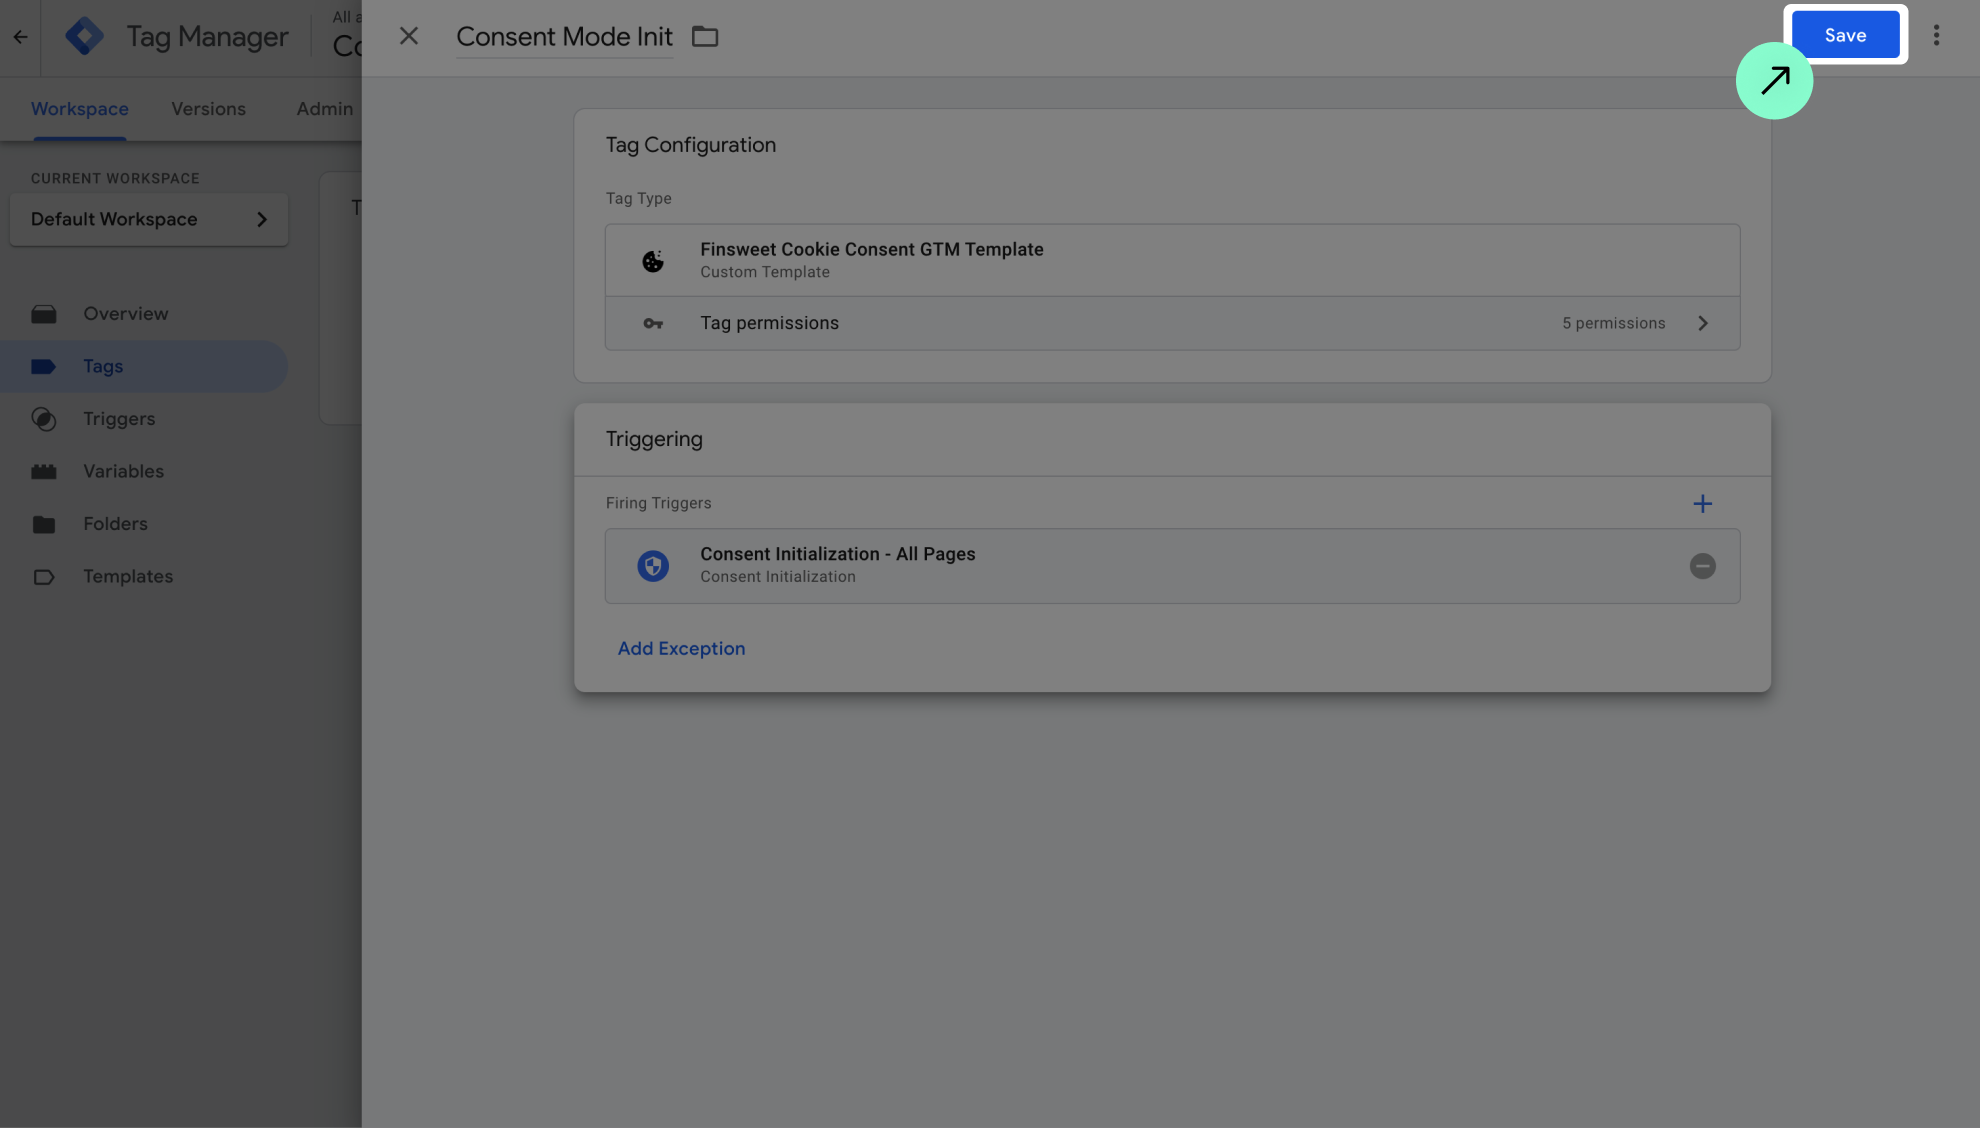
Go to your Google Tag Manager account > 'Templates' and click on 'New' in the tag templates section.

Click on the three dots in the top right corner and select 'Import'.

Select the downloaded Finsweet Cookie Consent template and click 'Open'.

Click on 'Agree to Community Template Gallery Terms of Service' and 'Save'.

4

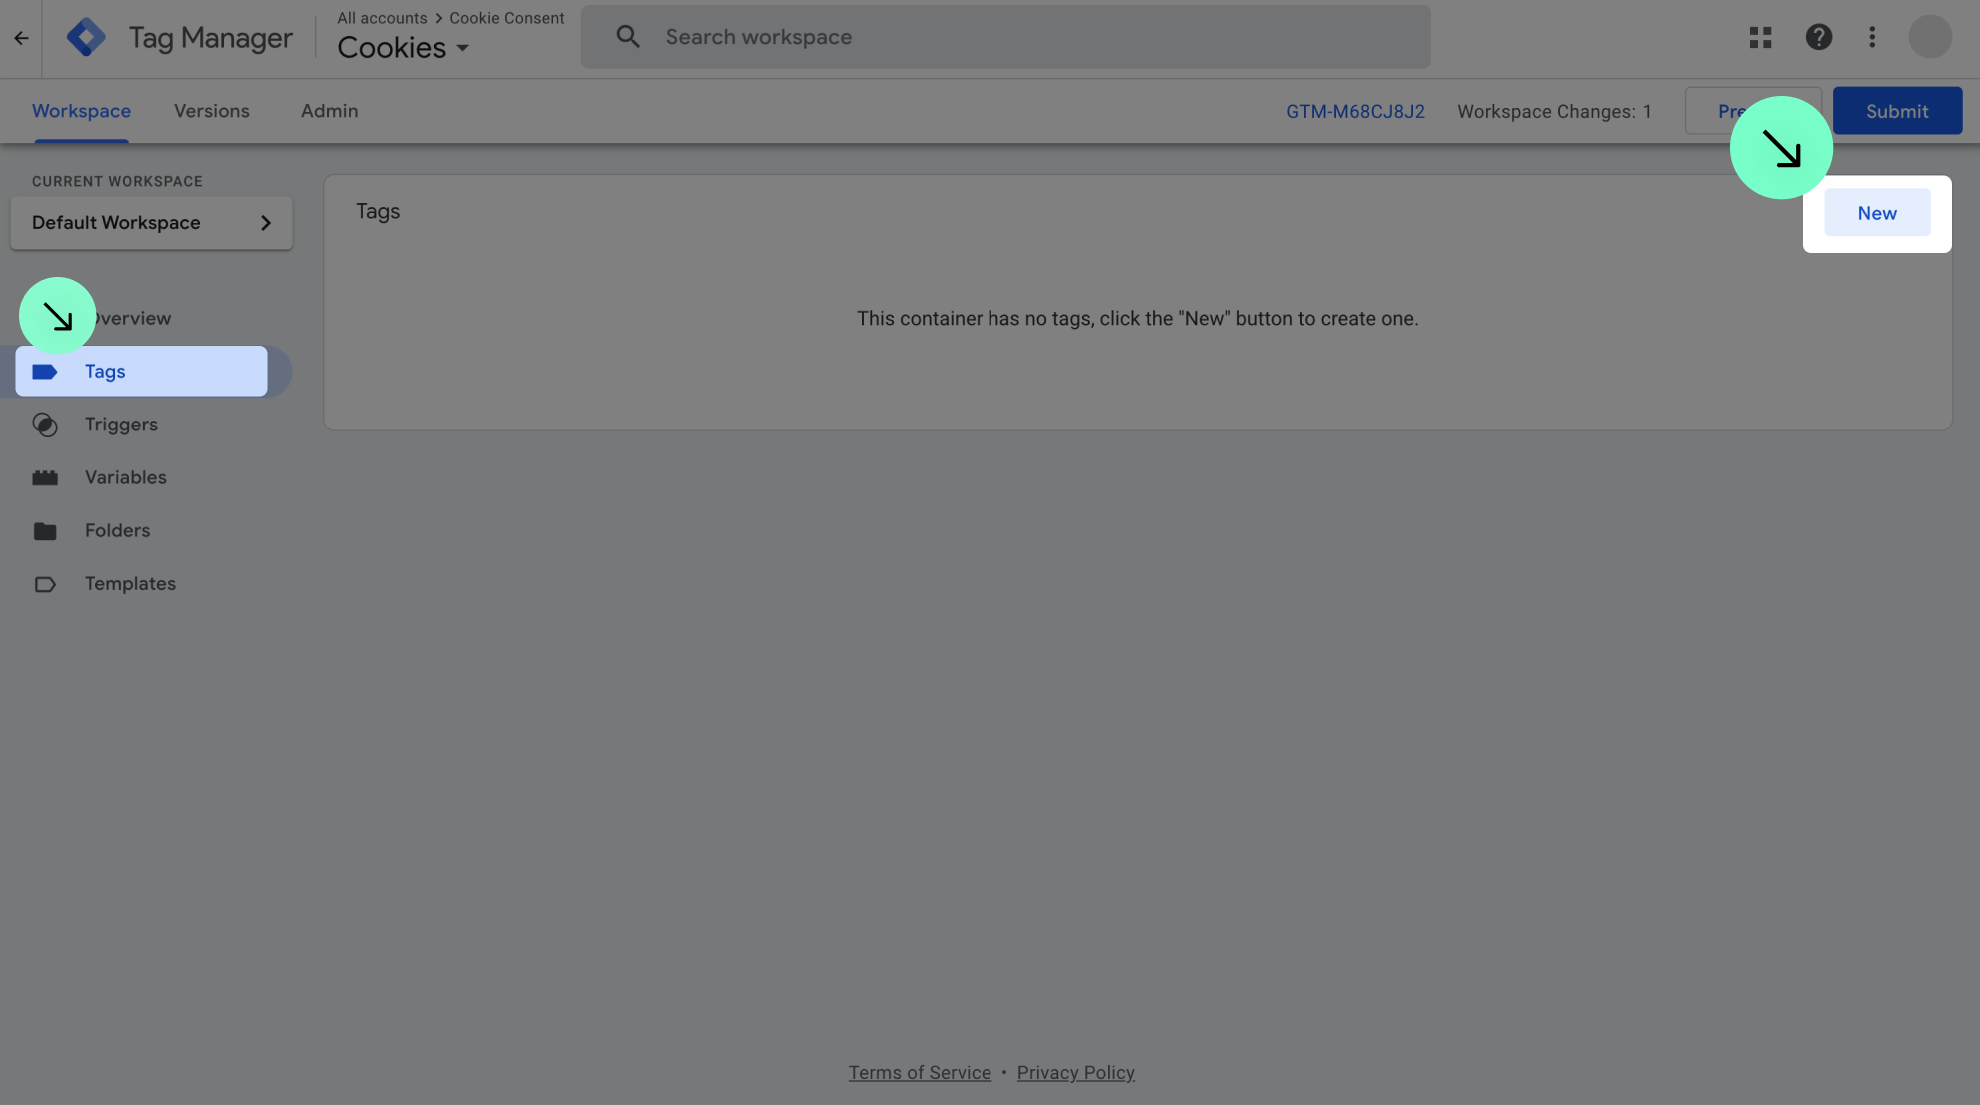
Create a tag for Consent Mode Initialization
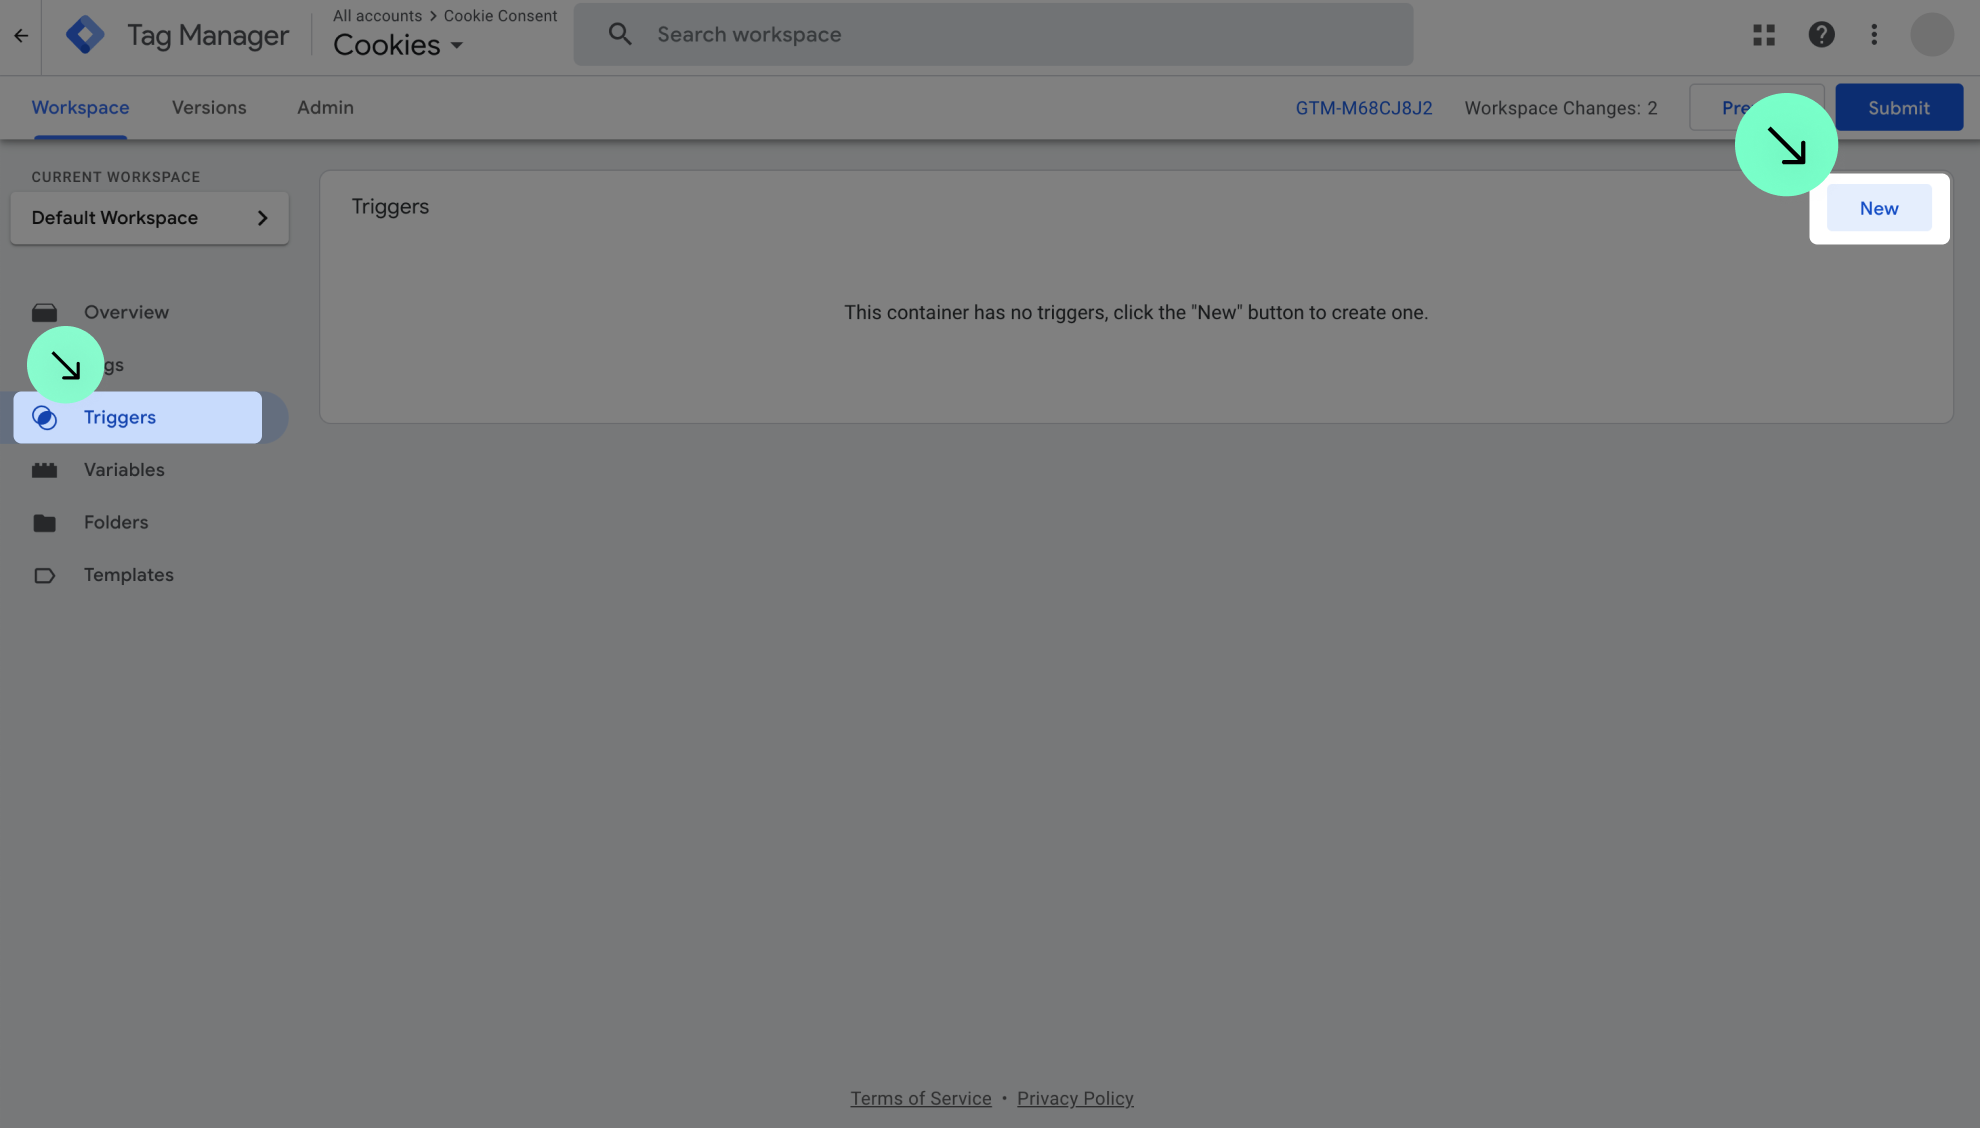
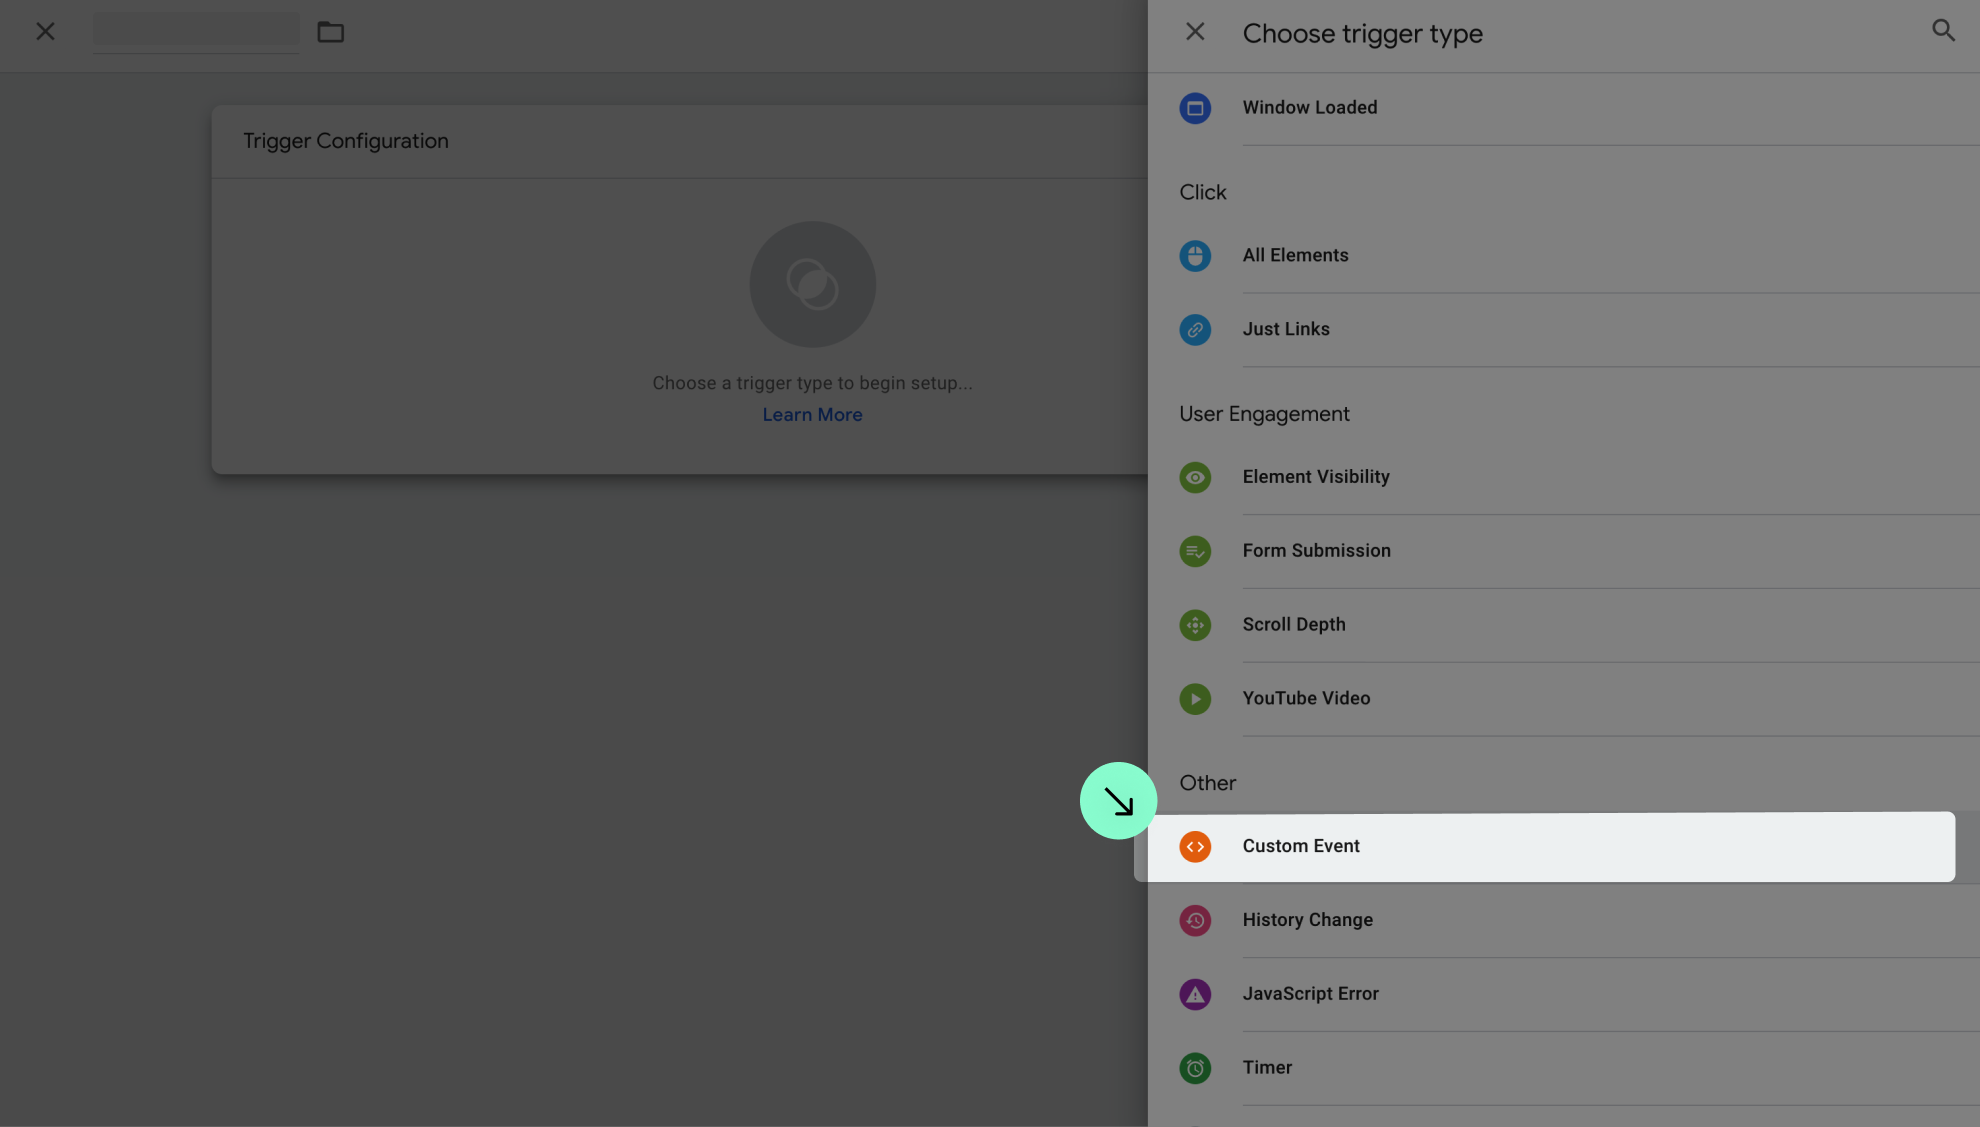
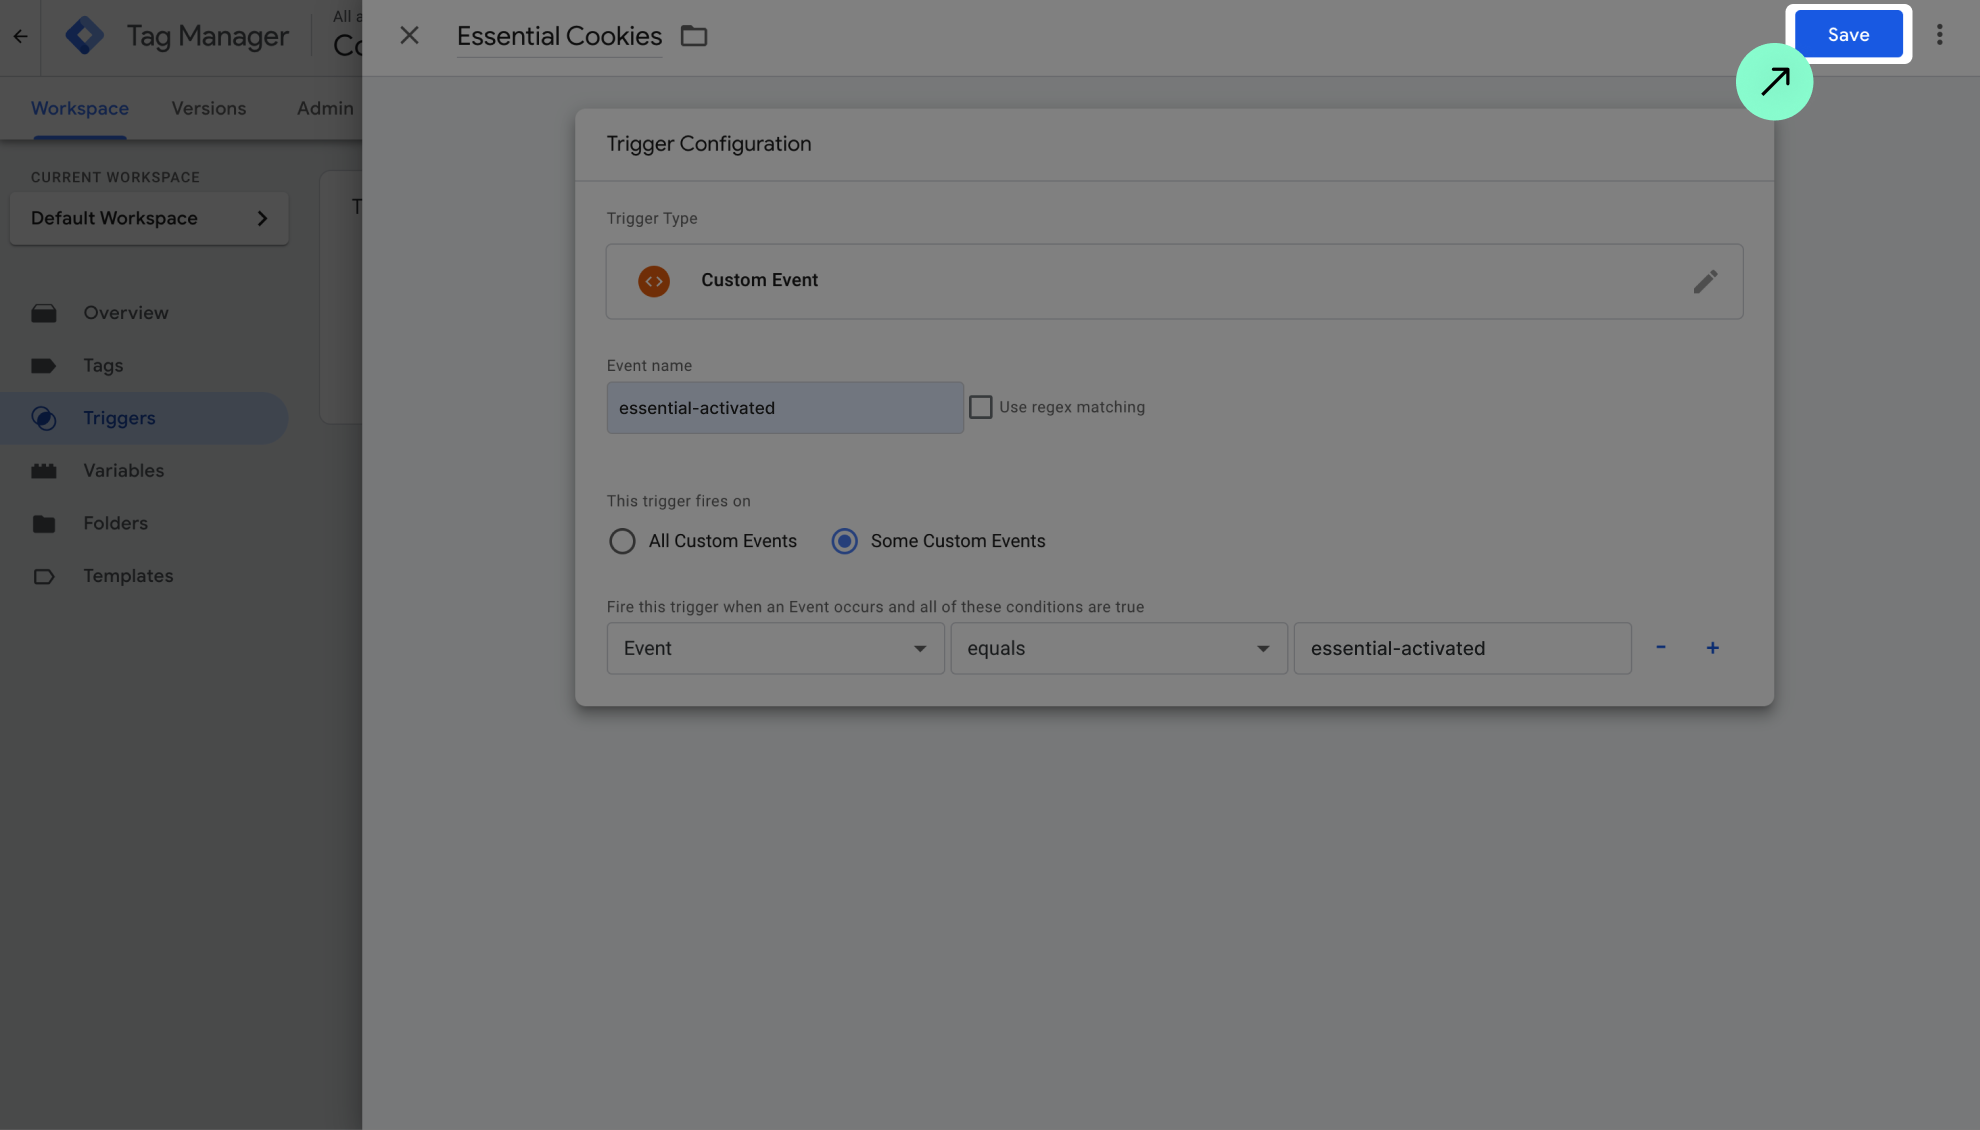
Go to 'Tags' and click 'New'.

Name it 'Consent Mode Init' and click on 'Tag Configuration'.

Choose 'Finsweet Cookie Consent GTM Template'.

Click on 'Triggering'.

Select 'Consent Initialization - All Pages'.

And 'Save'.

5

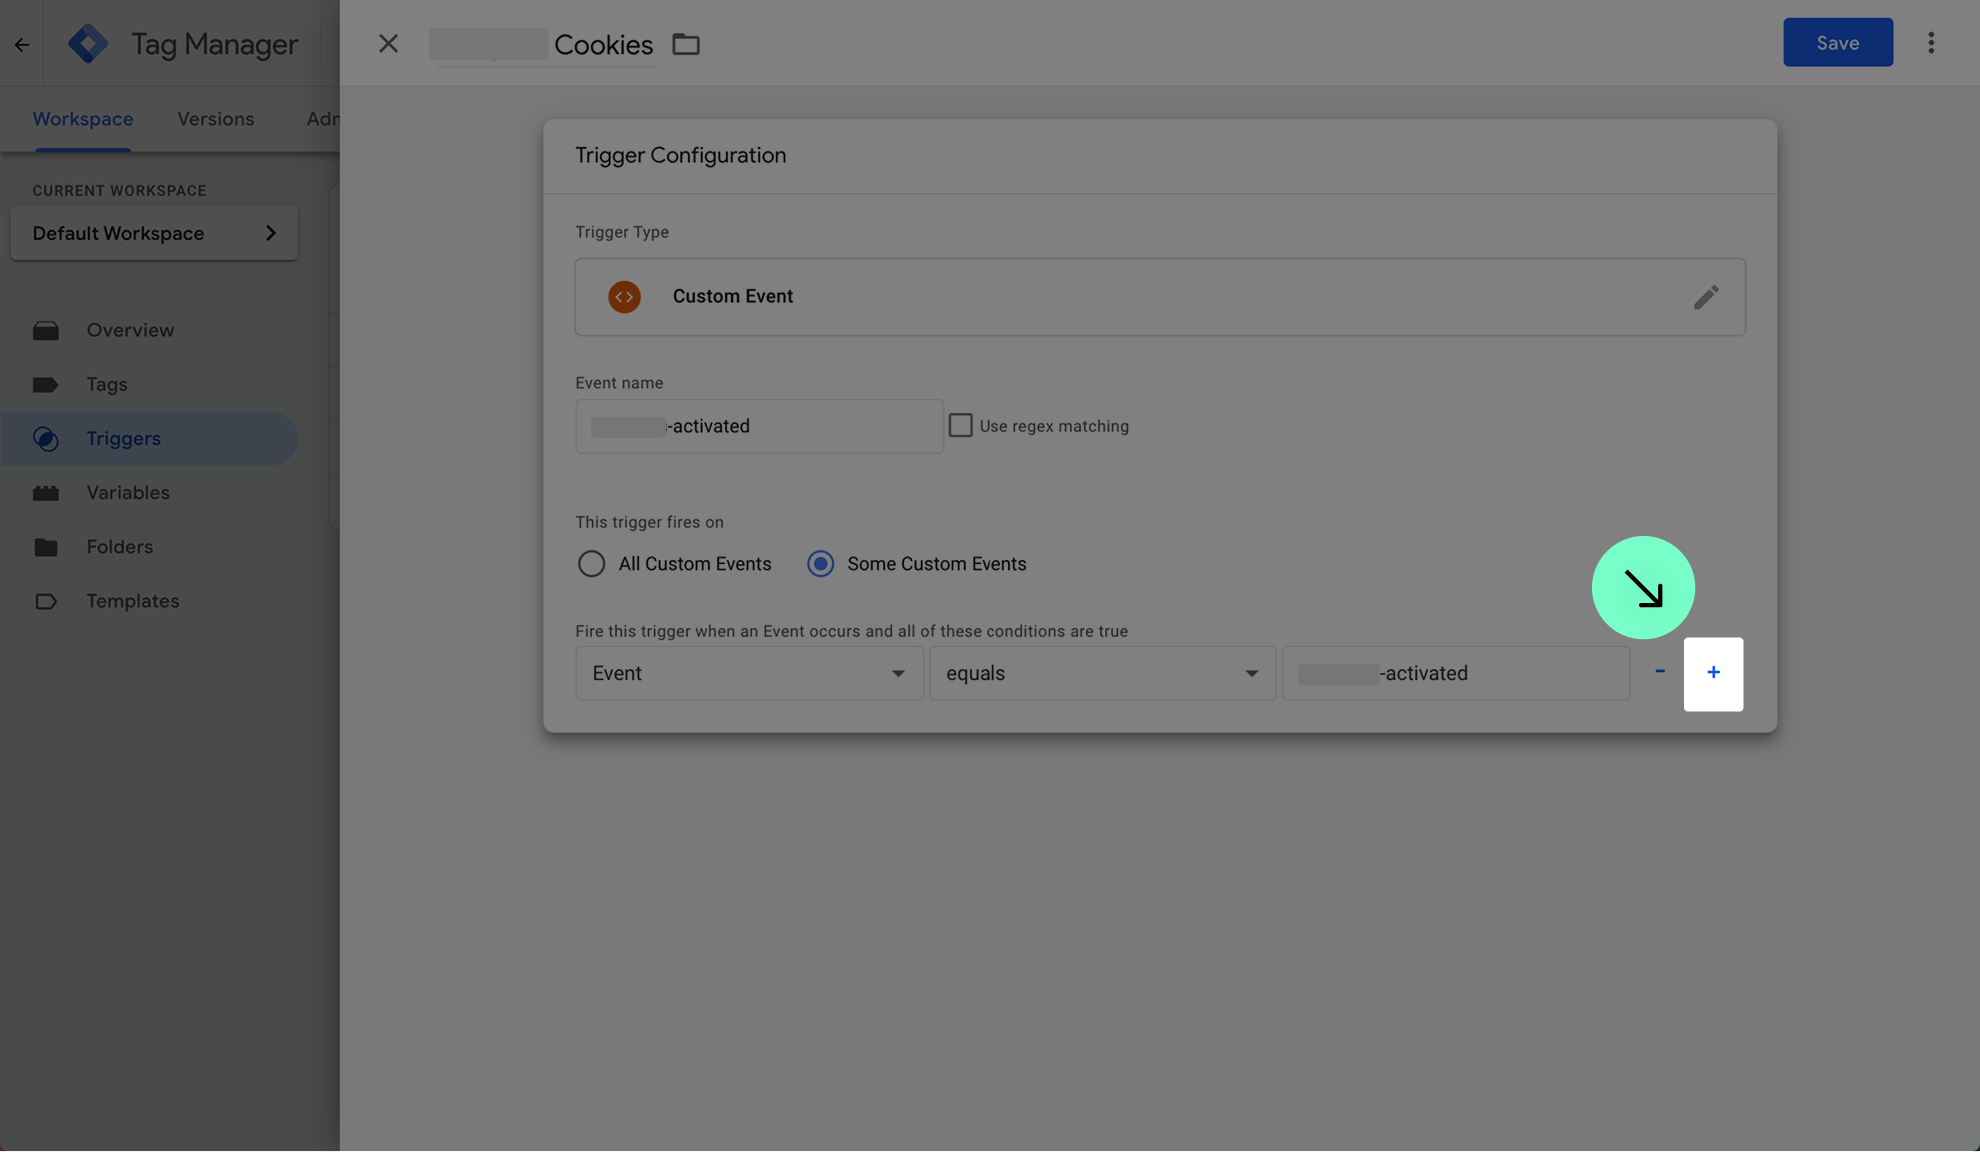
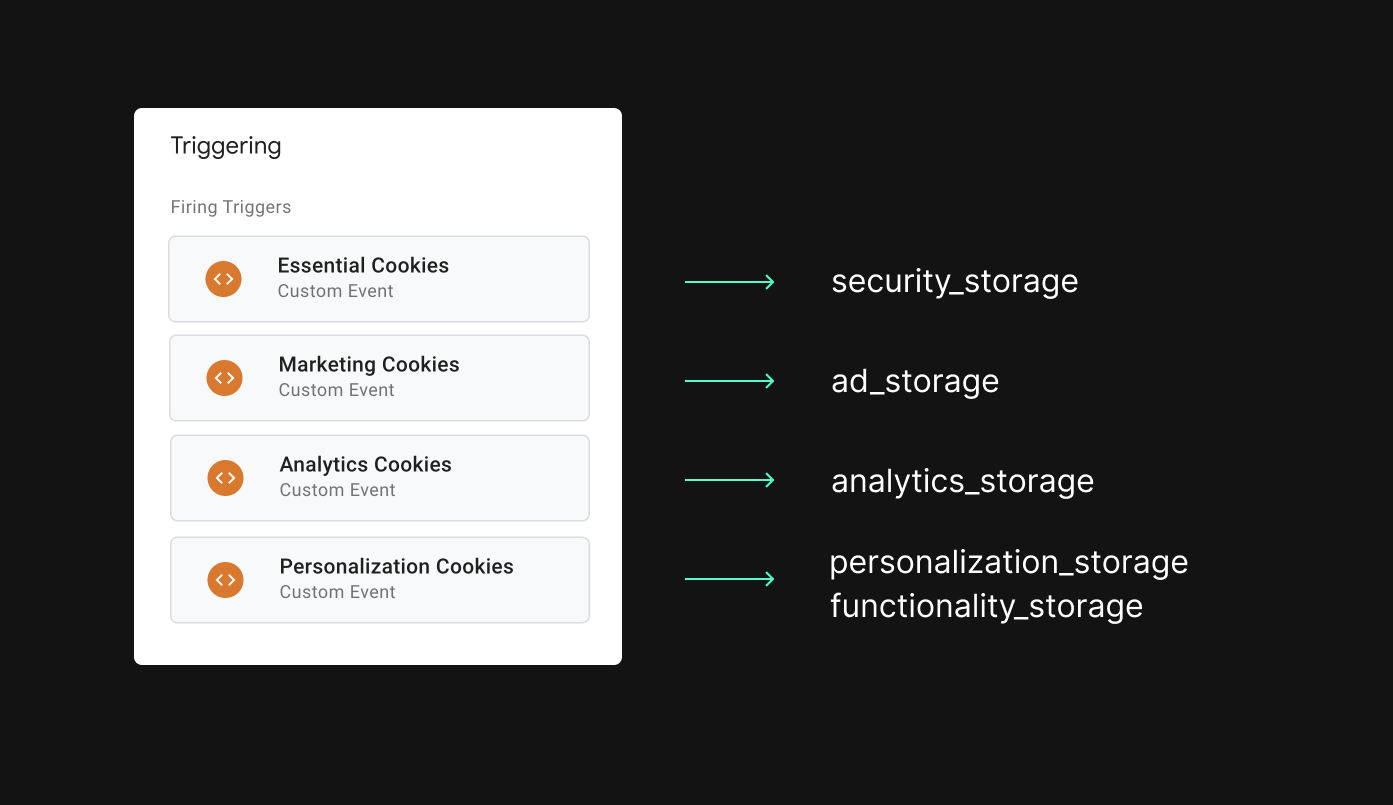
Create a trigger for Essential Cookies

Go to 'Triggers' and click 'New'.

Name it 'Essential Cookies' and click on 'Trigger Configuration'.

Choose 'Custom Event'.

Fill 'Event Name' with 'essential-activated', select 'Event', choose 'equals', and enter 'essential-activated'.

and 'Save'.

6

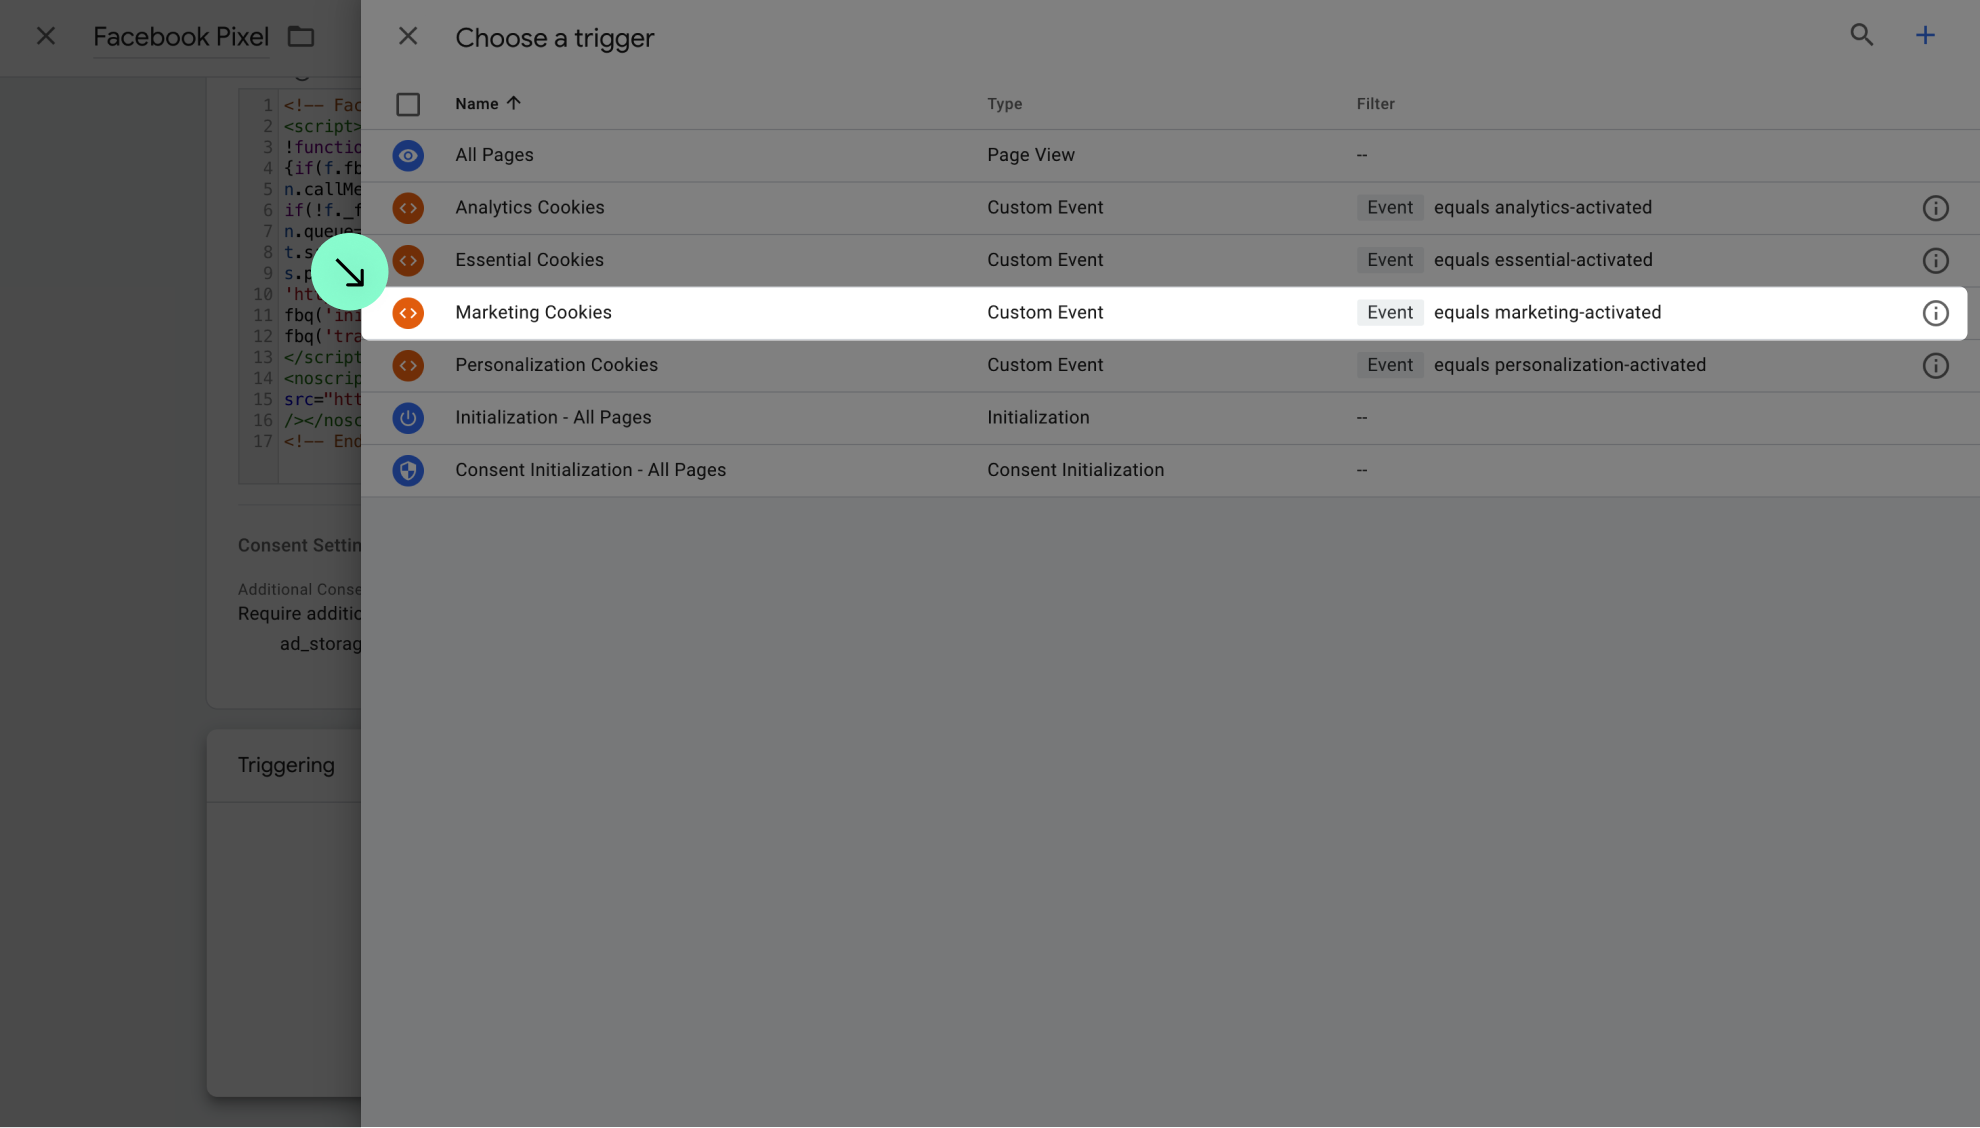
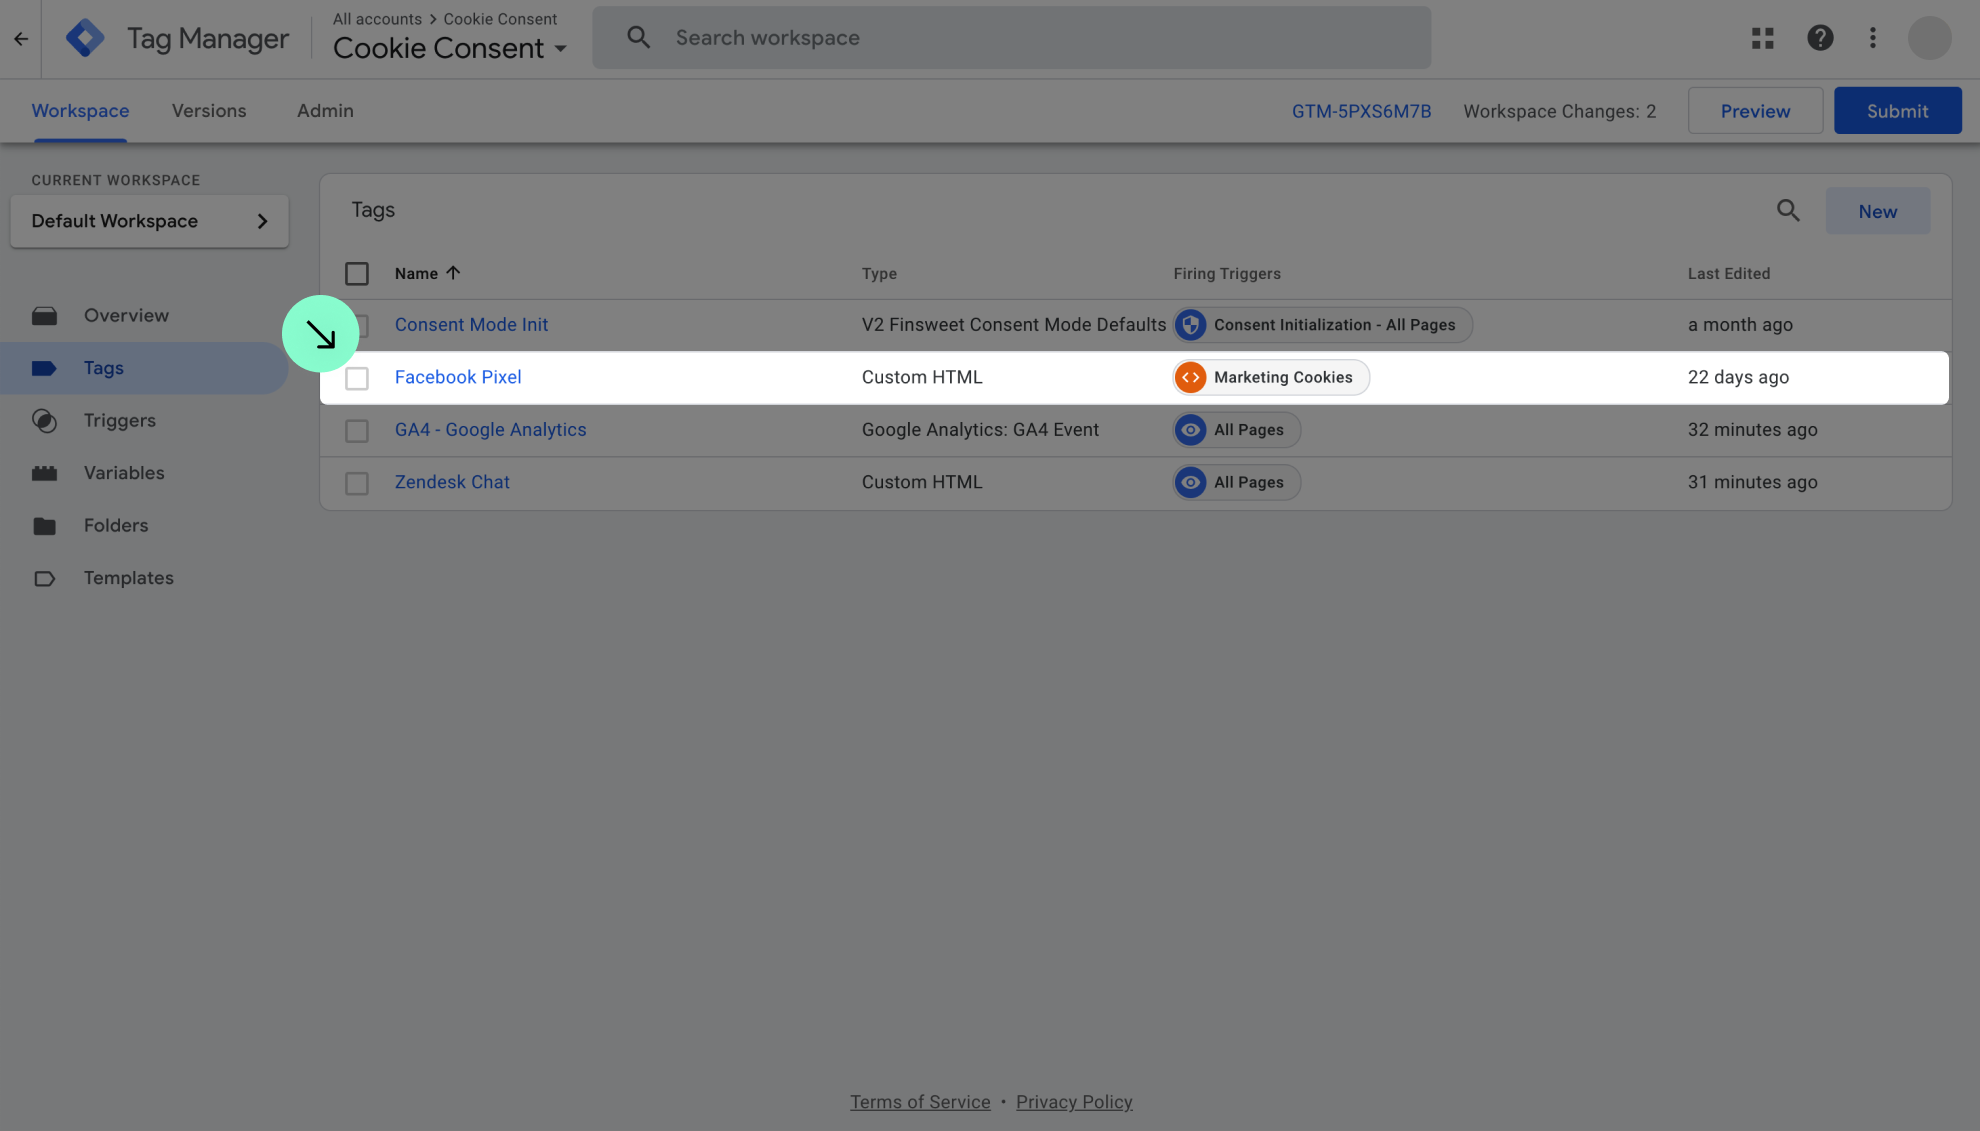
Create a trigger for Marketing Cookies
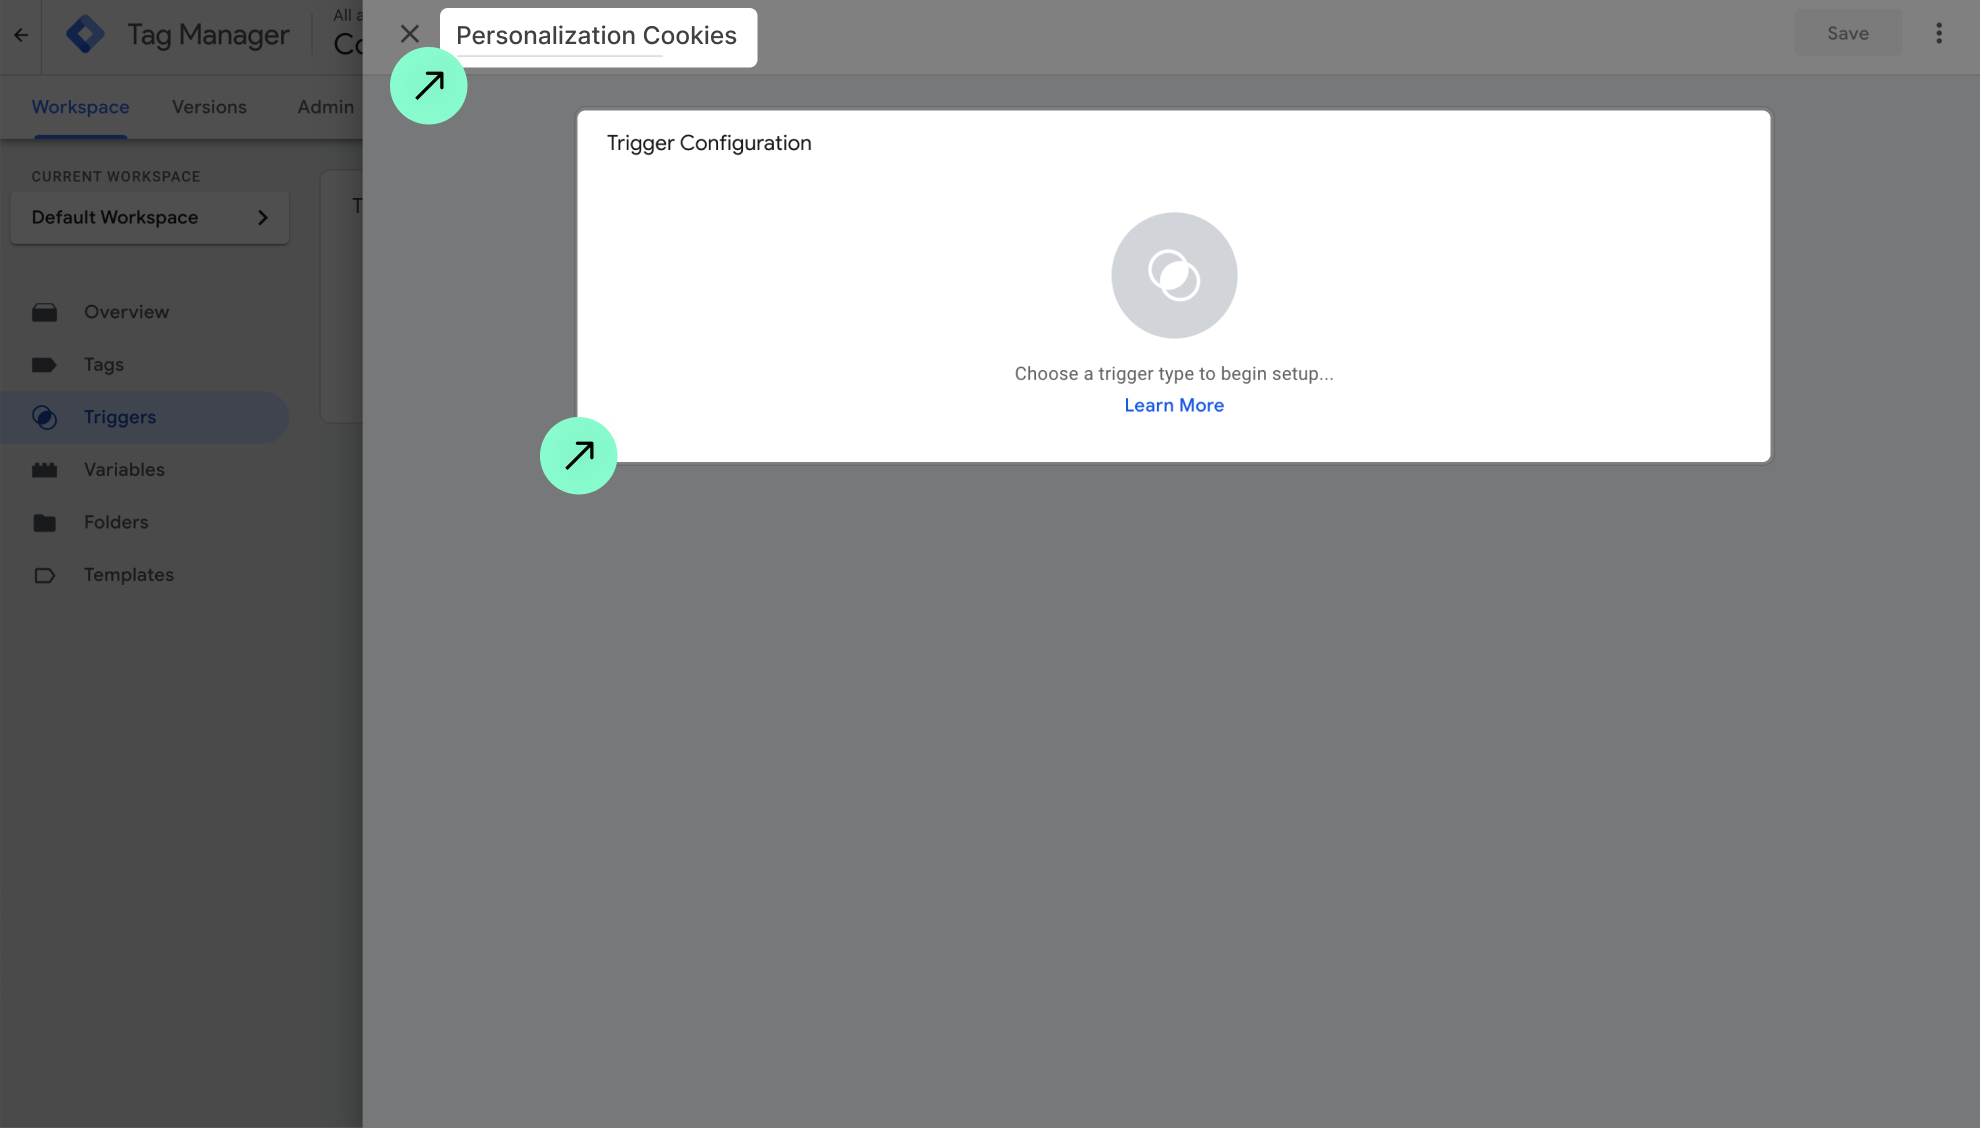
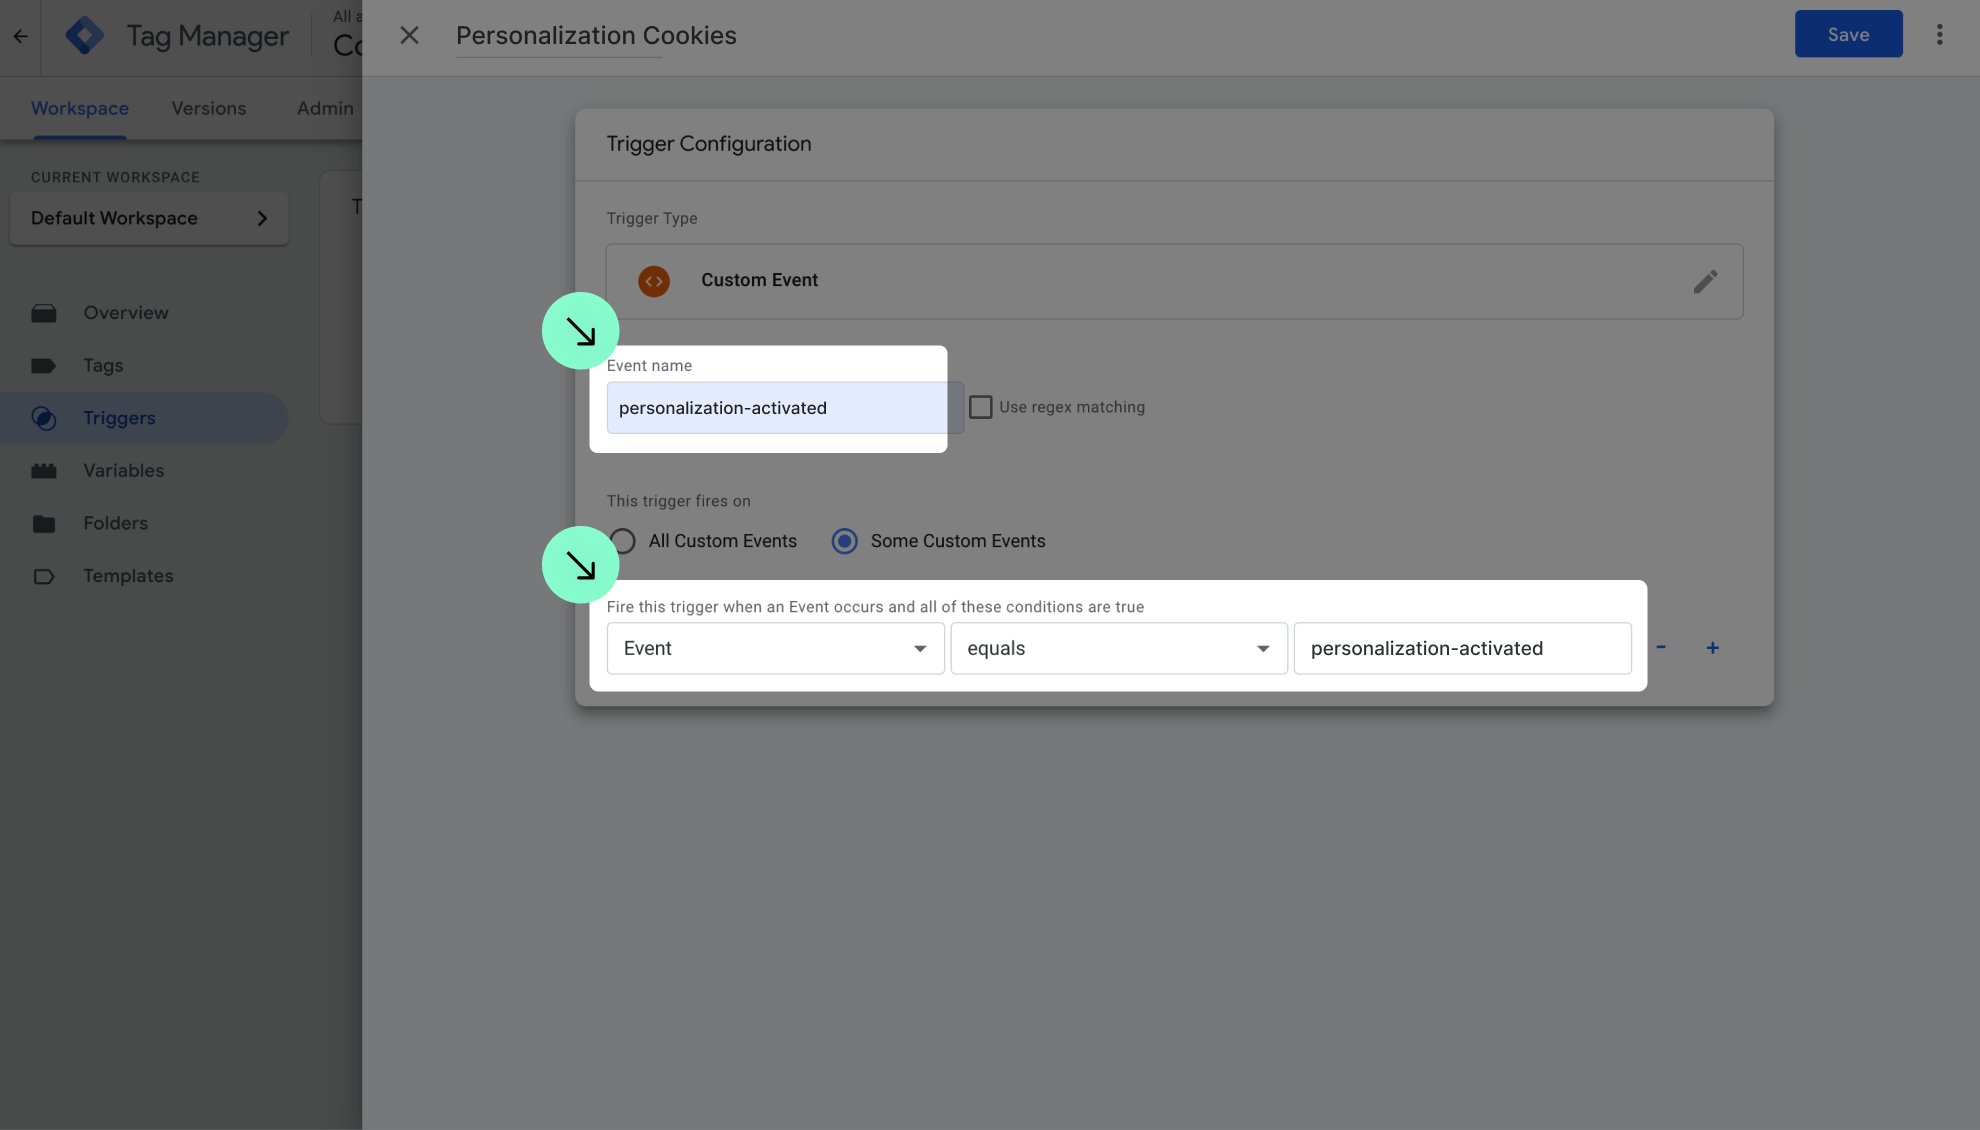
Go to 'Triggers' and click 'New'.

Name it 'Marketing Cookies' and click on 'Trigger Configuration'.

Choose 'Custom Event'.

Fill 'Event Name' with 'marketing-activated', select 'Event', choose 'equals', and enter 'marketing-activated'.

and 'Save'.

7

Create a trigger for Personalization Cookies
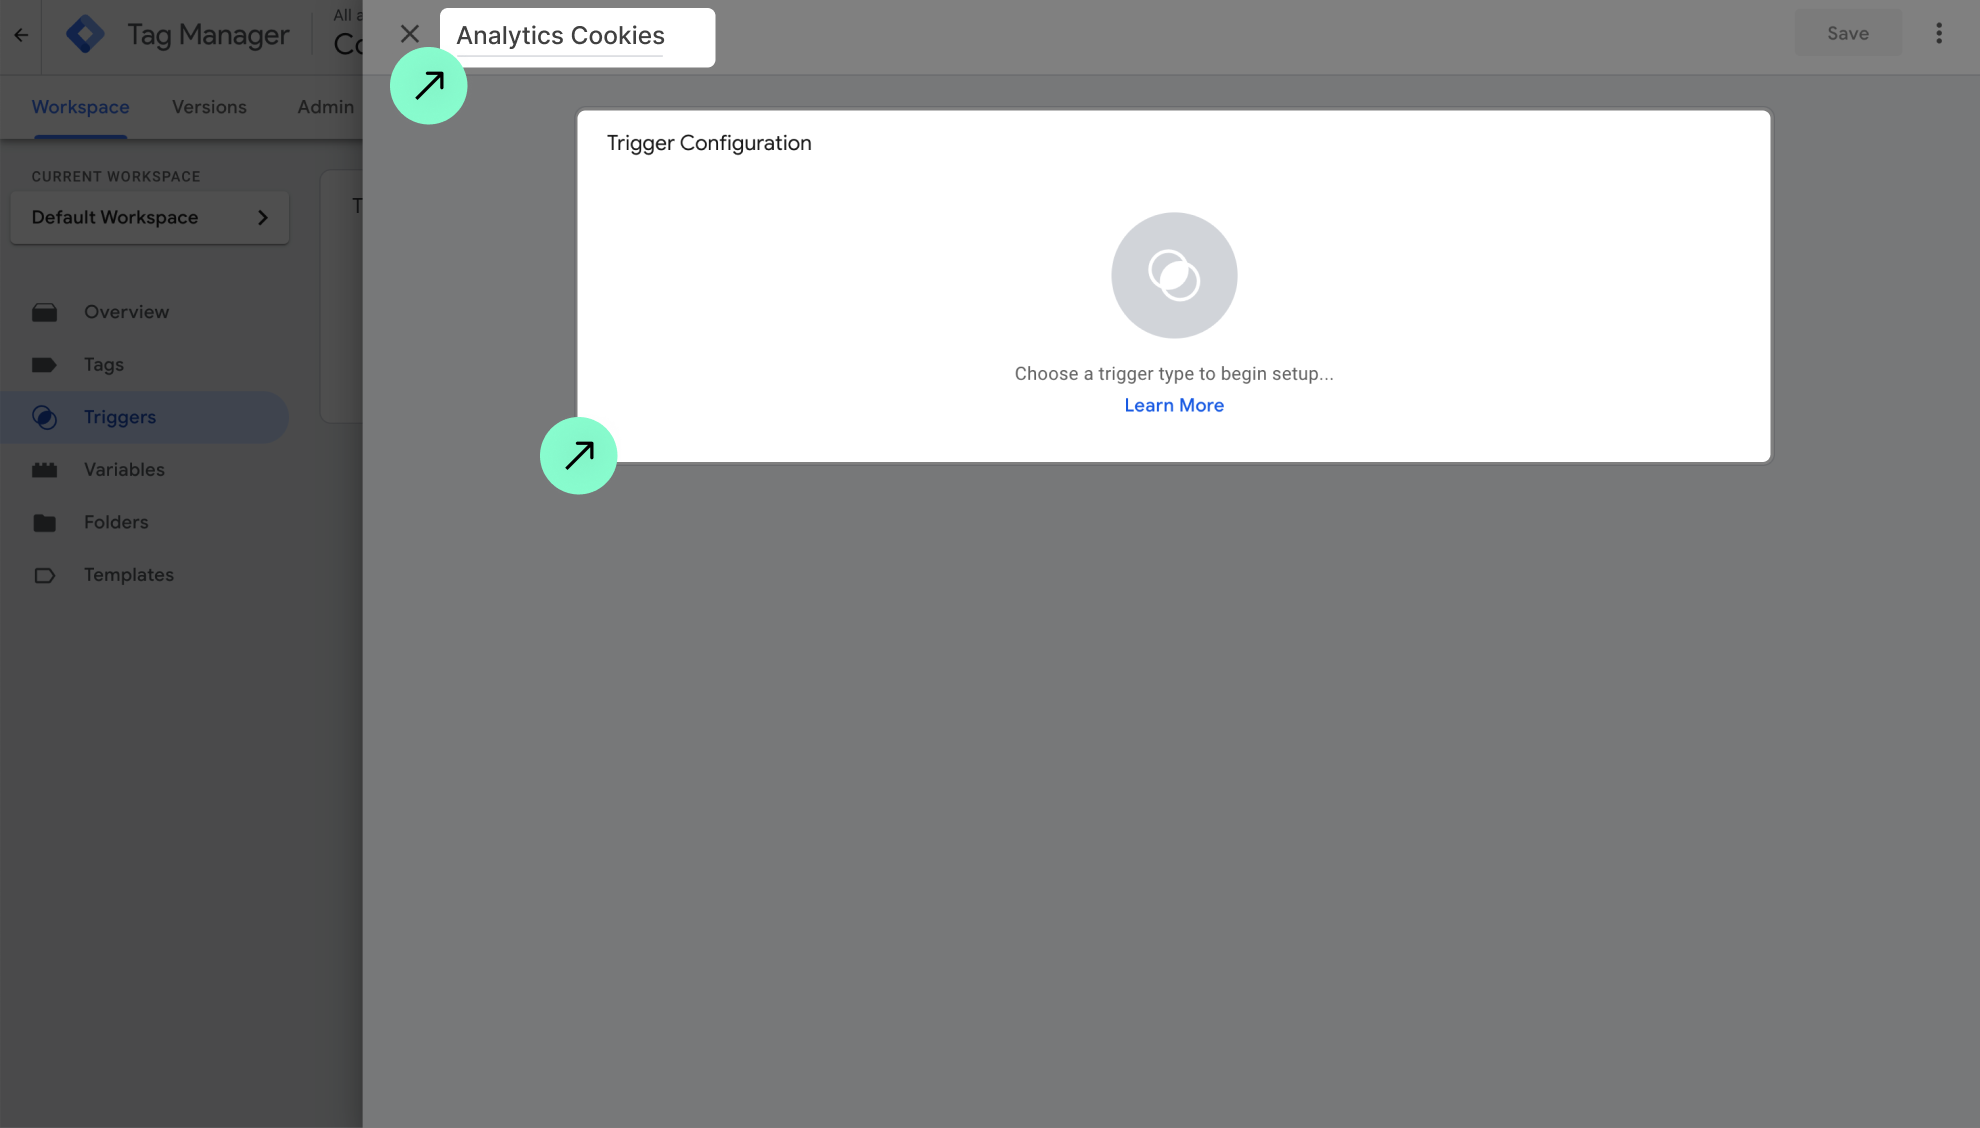
Go to 'Triggers' and click 'New'.

Name it 'Personalization Cookies' and click on 'Trigger Configuration'.

Choose 'Custom Event'.

Fill 'Event Name' with 'personalization-activated', select 'Event', choose 'equals', and enter 'personalization-activated'.

and 'Save'.

8

Create a trigger for Analytics Cookies
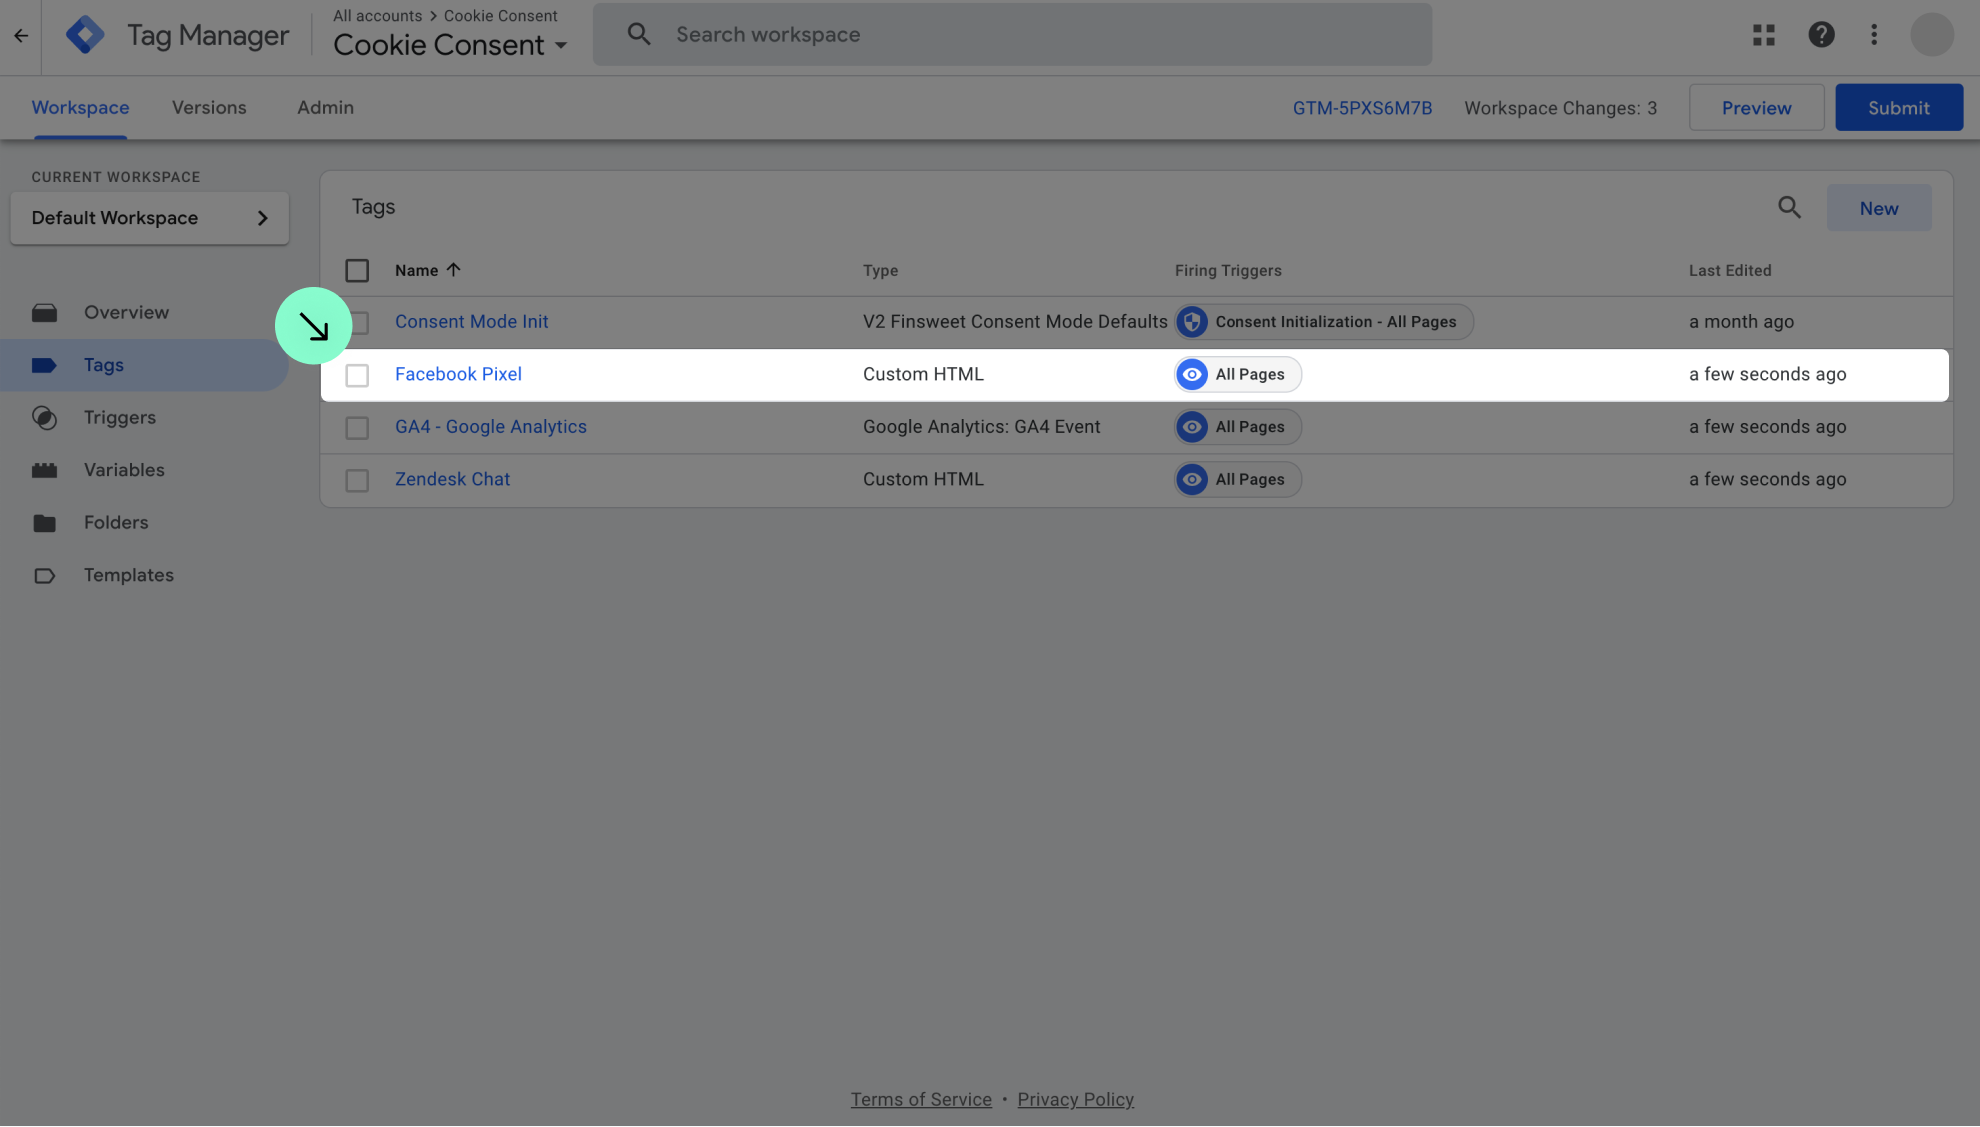
Go to 'Triggers' and click 'New'.

Name it 'Analytics Cookies' and click on 'Trigger Configuration'.

Choose 'Custom Event'.

Fill 'Event Name' with 'analytics-activated', select 'Event', choose 'equals', and enter 'analytics-activated'.

and 'Save'.

9

Update how the scripts are triggered for Cookie compliance
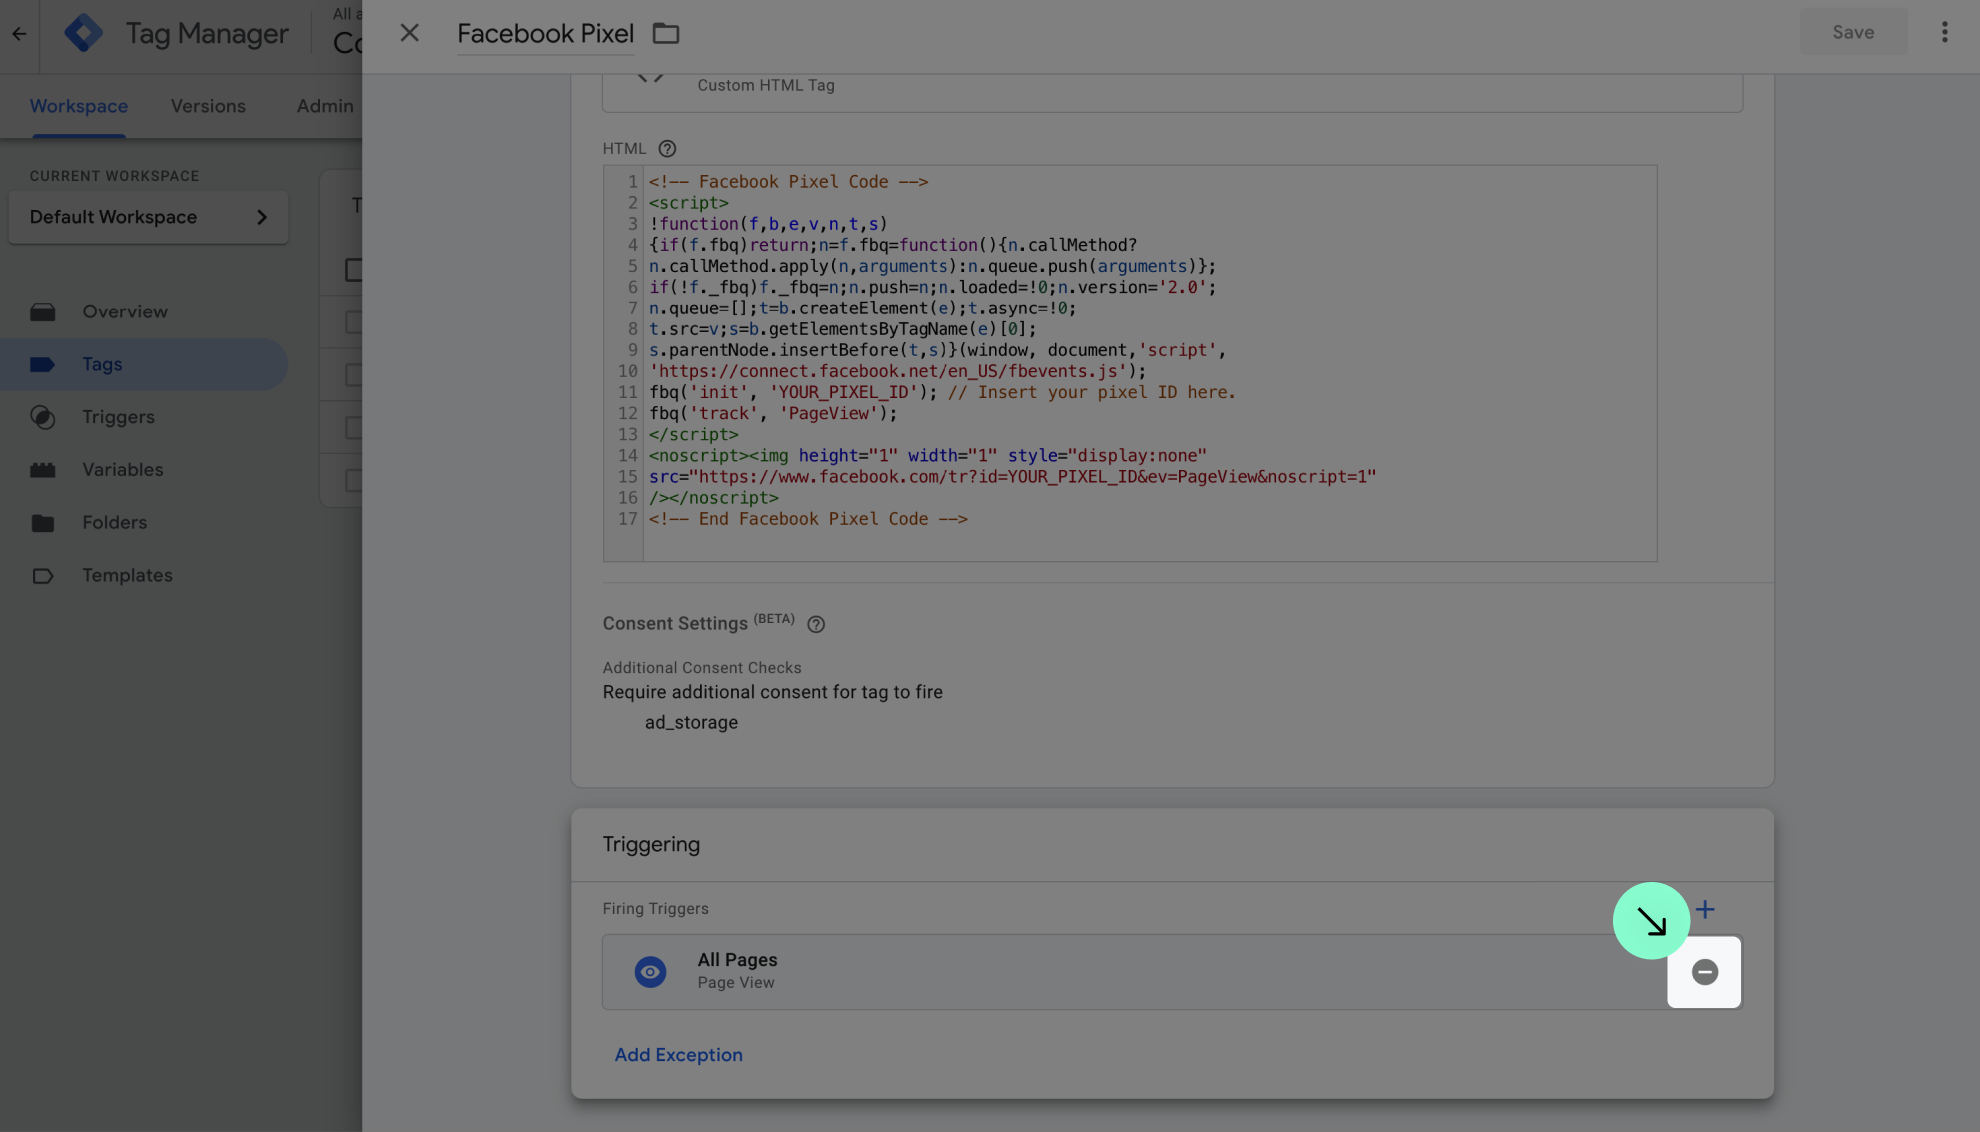
Select the script that should be prevented from loading. This script will only load when the user consents to a specific category.

For this example, we are going to use the 'Facebook Pixel' tag:

Click on 'Edit icon'.

Remove the current trigger.

Click on 'Triggering'.

Choose the new trigger.
For Facebook Pixel, for example, we can choose 'Marketing Cookies'.

That means the Facebook Pixel script will only load when the user consents to the 'Marketing' category or clicks on 'Accept All'.

You can select the trigger you think fits best for each script.

10

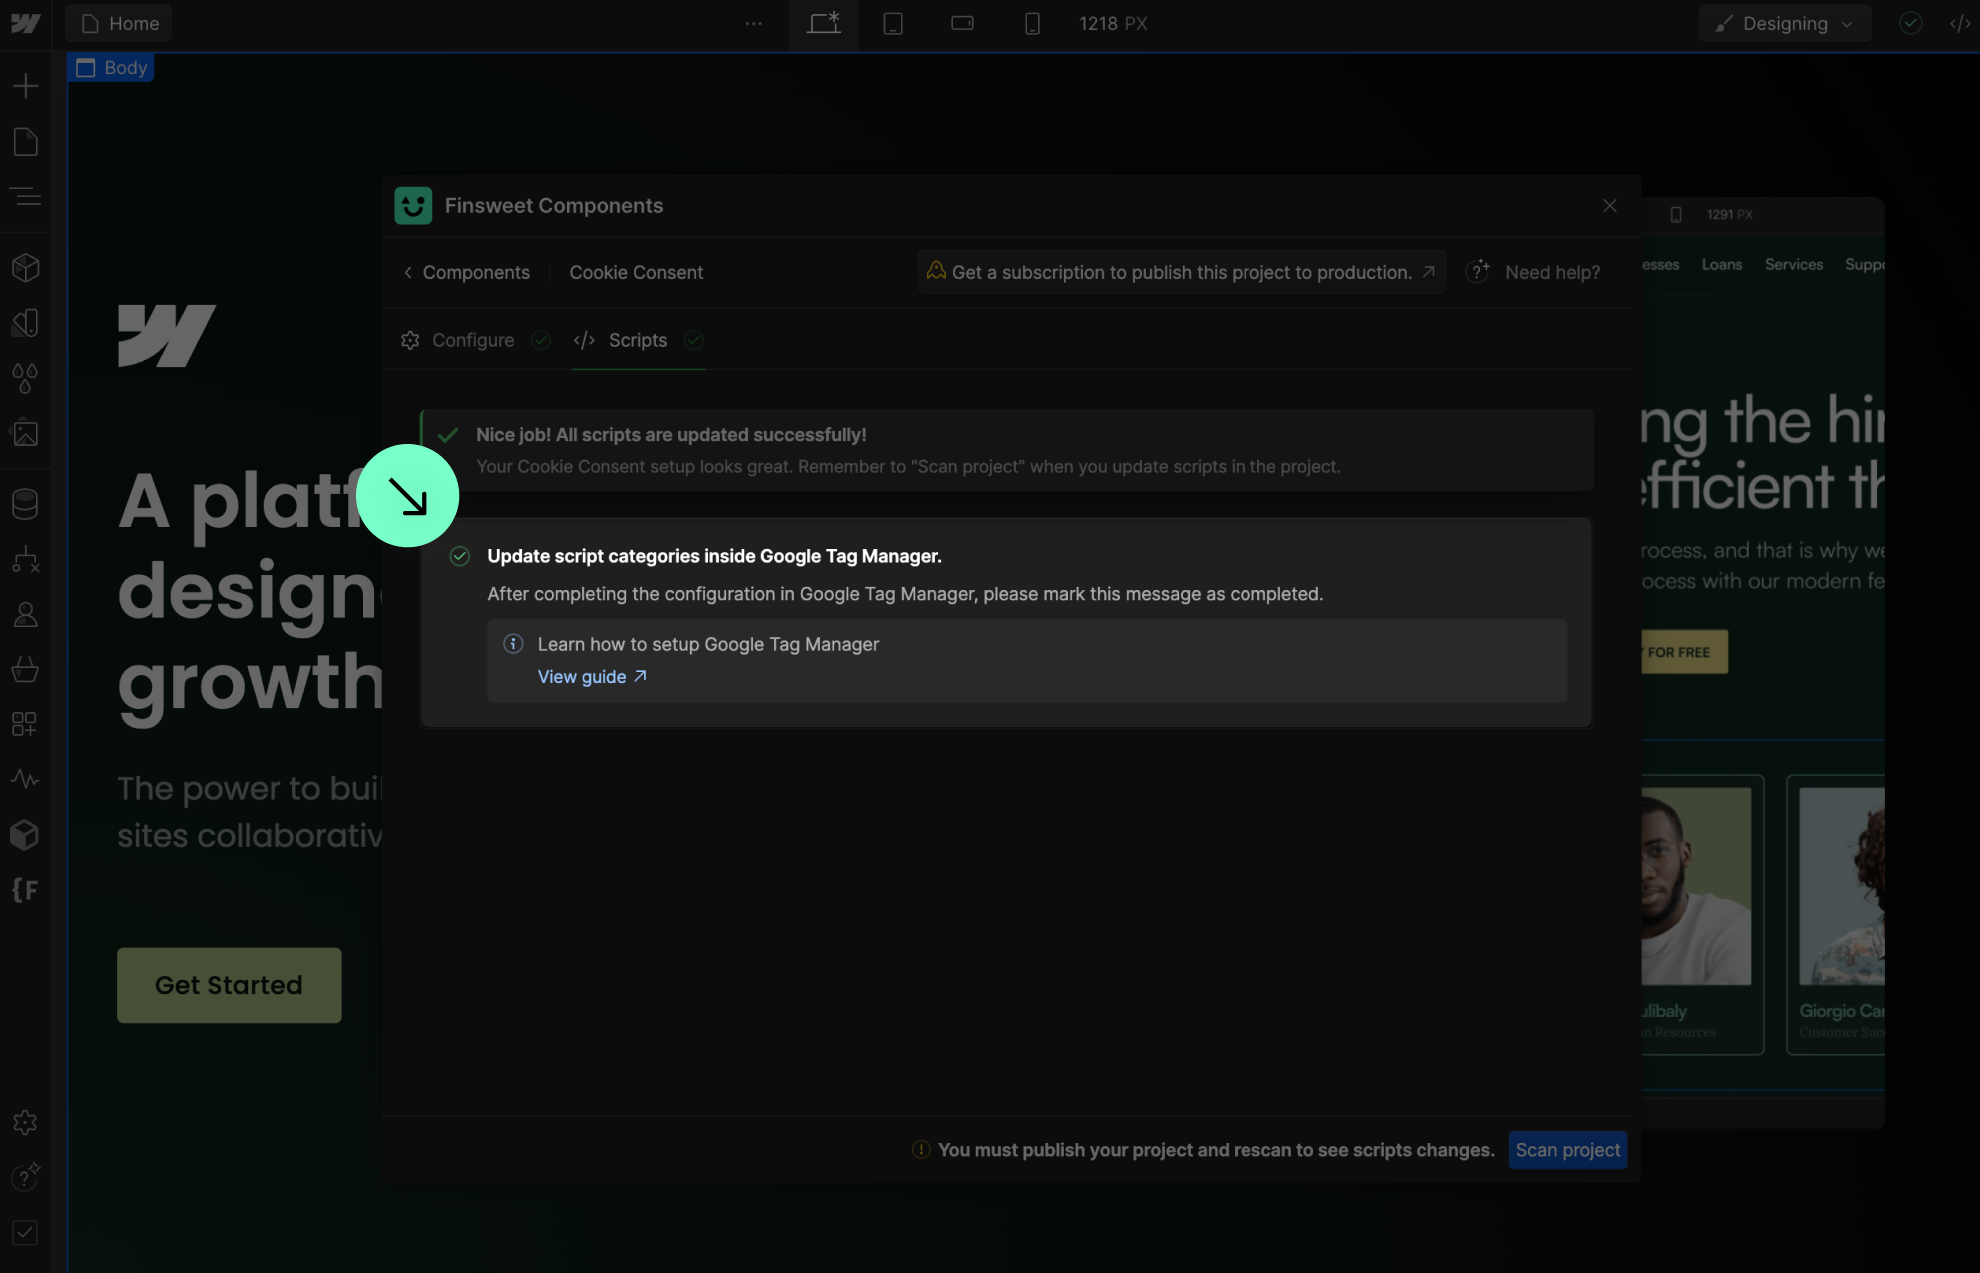
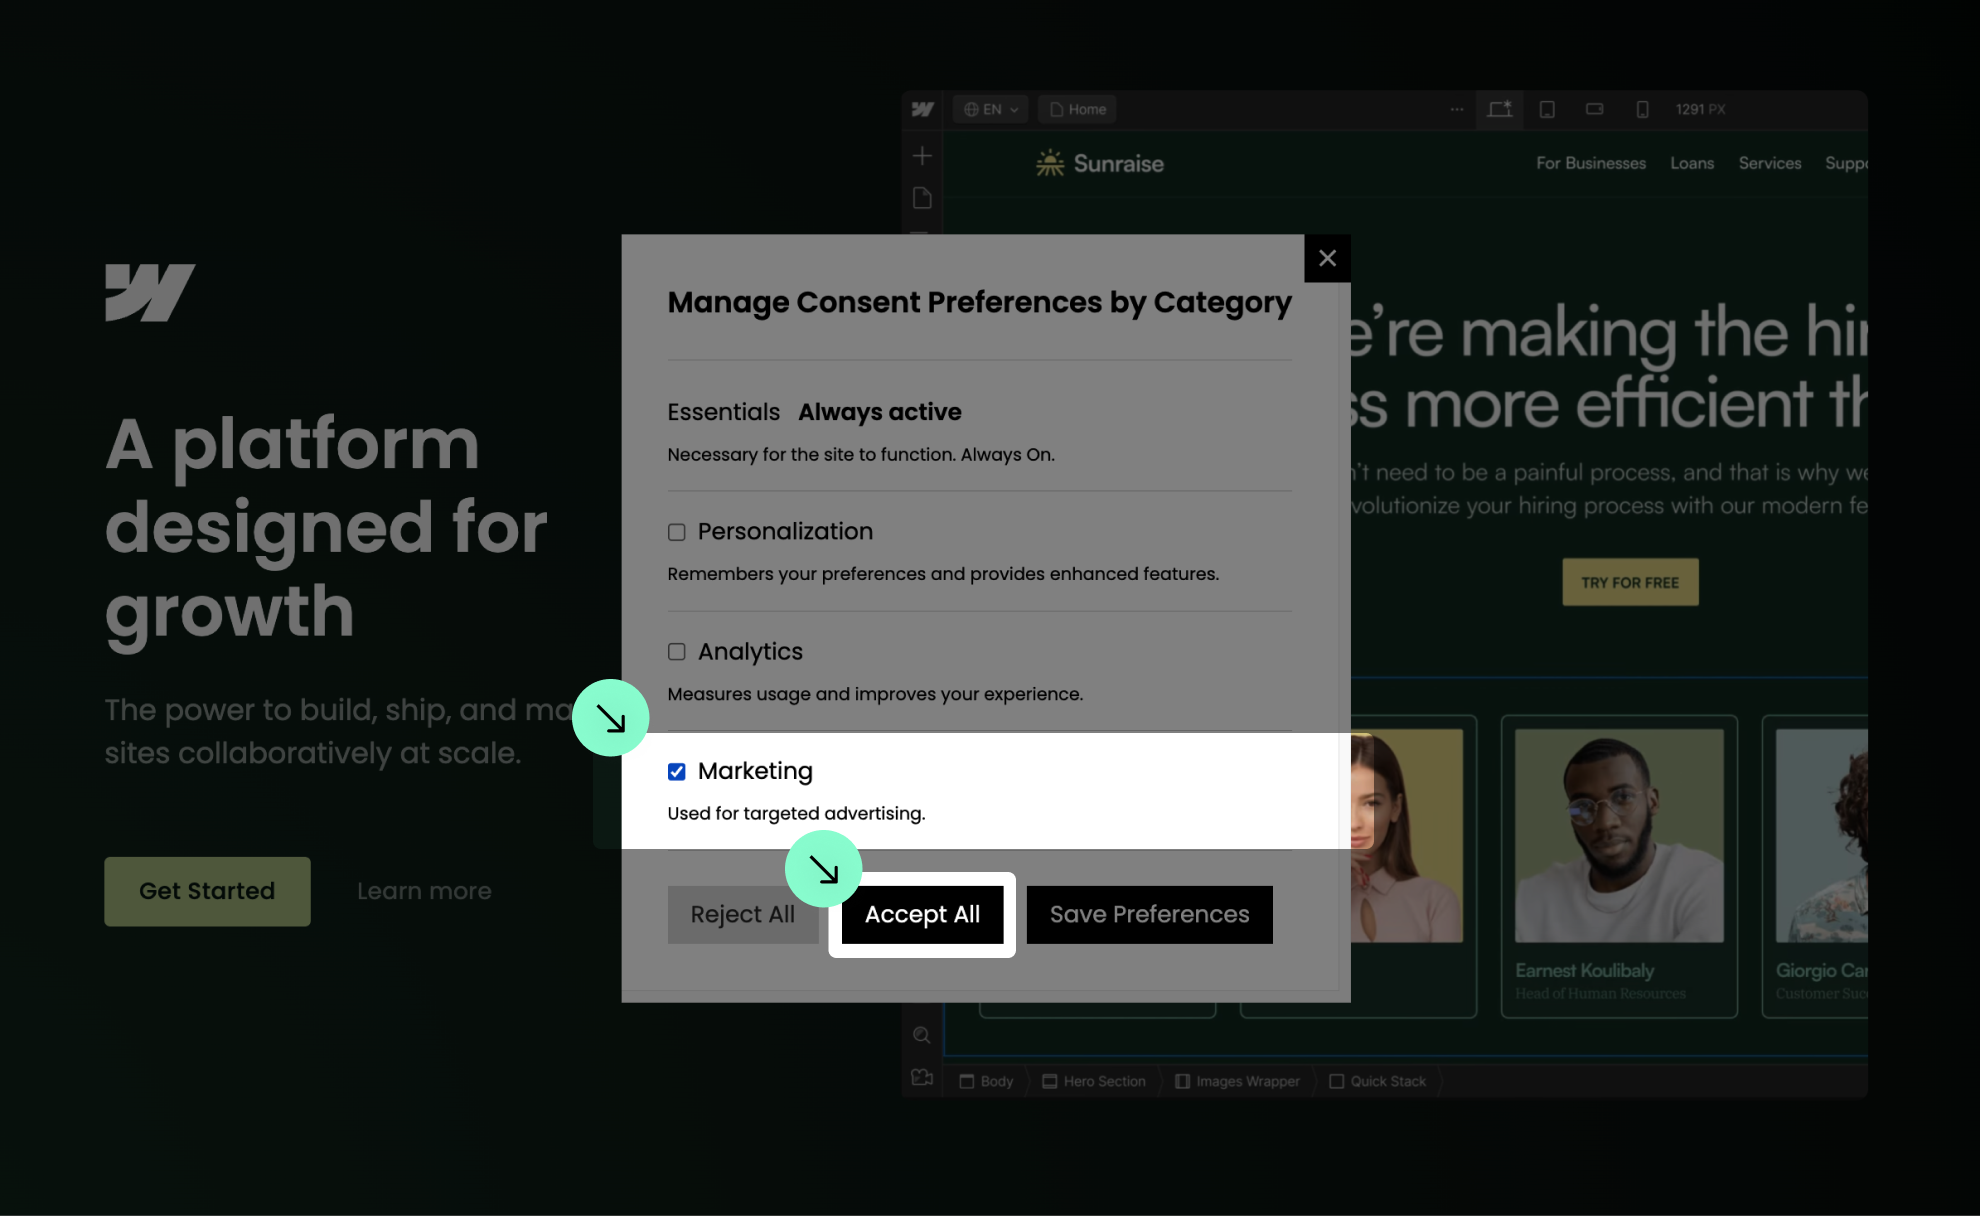
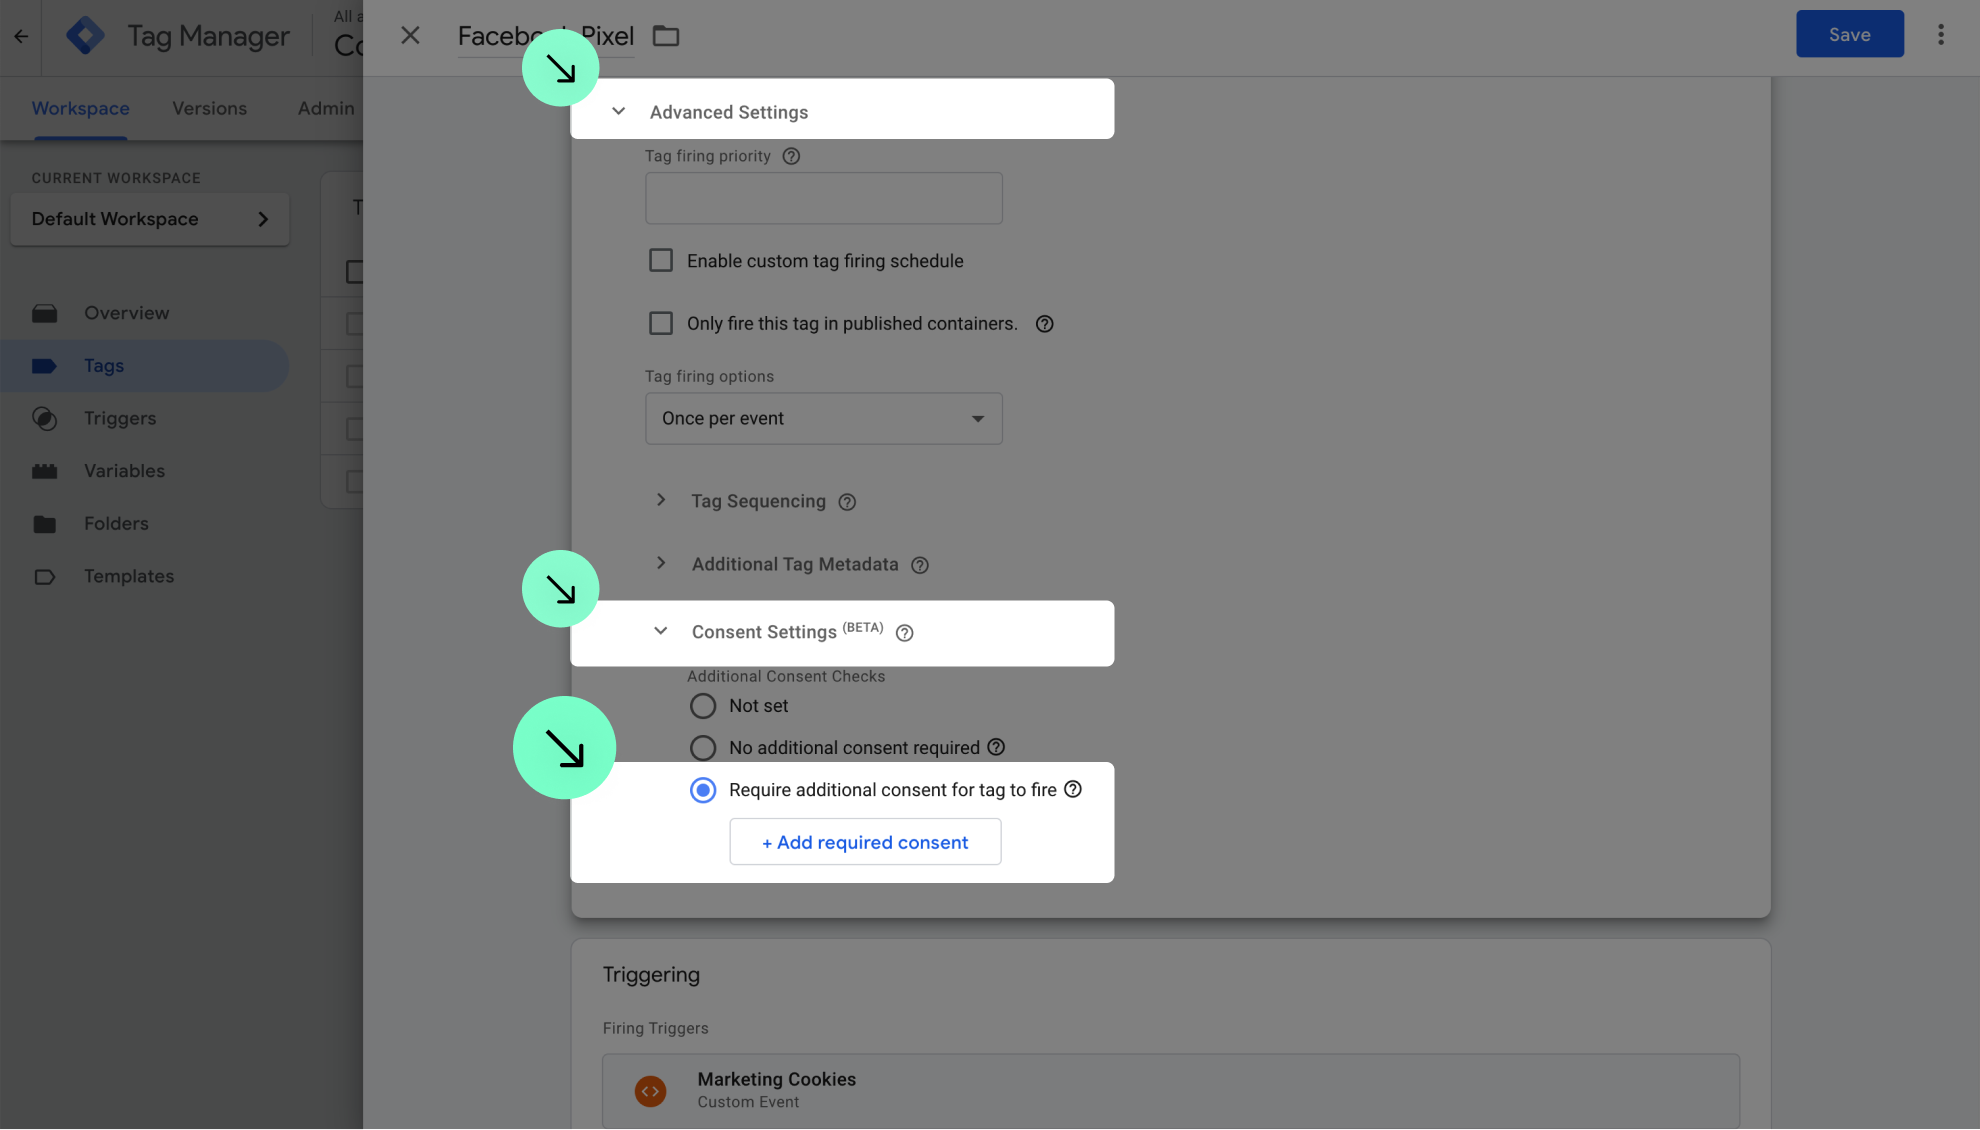
Add additional consent checks for each tag to comply with Google Consent Mode V2
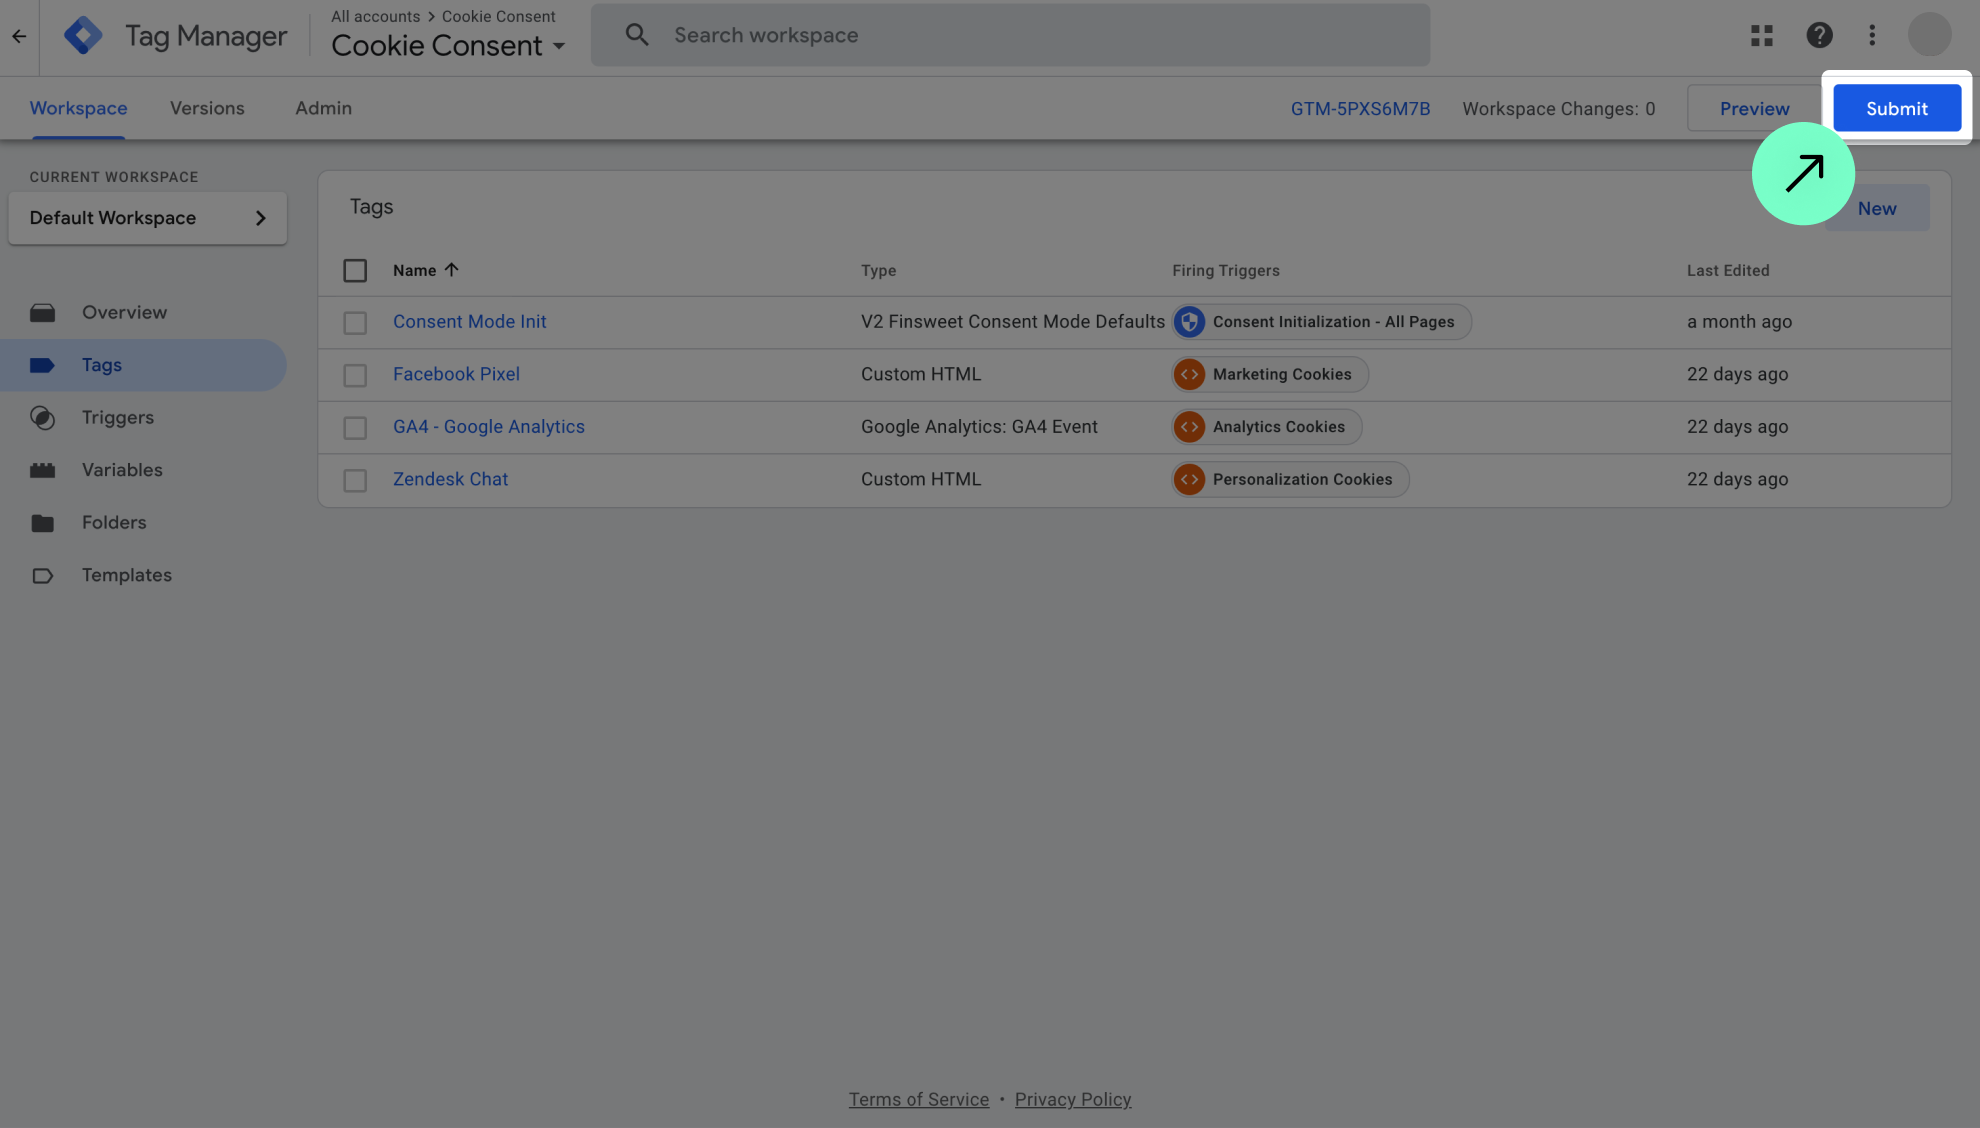
Select the tag you want to add the addicional consent check.

For this example, we are going to use the 'Facebook Pixel' tag again:

Go to 'Advanced Settings''Consent Settings' and select 'Require additional consent for tag to fire'.

Choose the additional consents based on the previously selected trigger (check the visual reference below):

Visual reference for mapping the Cookie Consent categories with additional consents:

Add the additional checks to every tag inside Google Tag Manager that requires user consent.

11

Submit and publish the changes in Google Tag Manager

Click on 'Submit'.

and 'Publish'.

12

Confirm that the Google Tag Manager setup is completed in the Finsweet Components app

Check the checkbox in the Google Tag Manager message within the Finsweet Components app.

Done! That's it!